# 基于宝塔面板安装部署
感谢 MoChat 开发者群群友 @小天 提供的原始安装笔记。
# 安装前必看重要提示
由于项目是前后端分离方式开发和部署的,所以安装演示过程中会用到三个域名:
- 商户后台:dashboard.test
- 聊天侧边栏:sidebar.test
- 后端API接口:backend.test
- 运营工具:operation.test
假设你自己的主域名是 mochat.com,那你可以分别配置为,以下域名可以自定义,下面只是举例:
- 商户后台:scrm.mochat.com
- 聊天侧边栏:h5.mochat.com
- 后端API接口:api.mochat.com
- 运营工具:op.mochat.com
# 安装宝塔面板
- 阿里云ECS服务器,重新初始化操作系统 , 申请OSS ALiyunOS,安全组开放宝塔8888端口
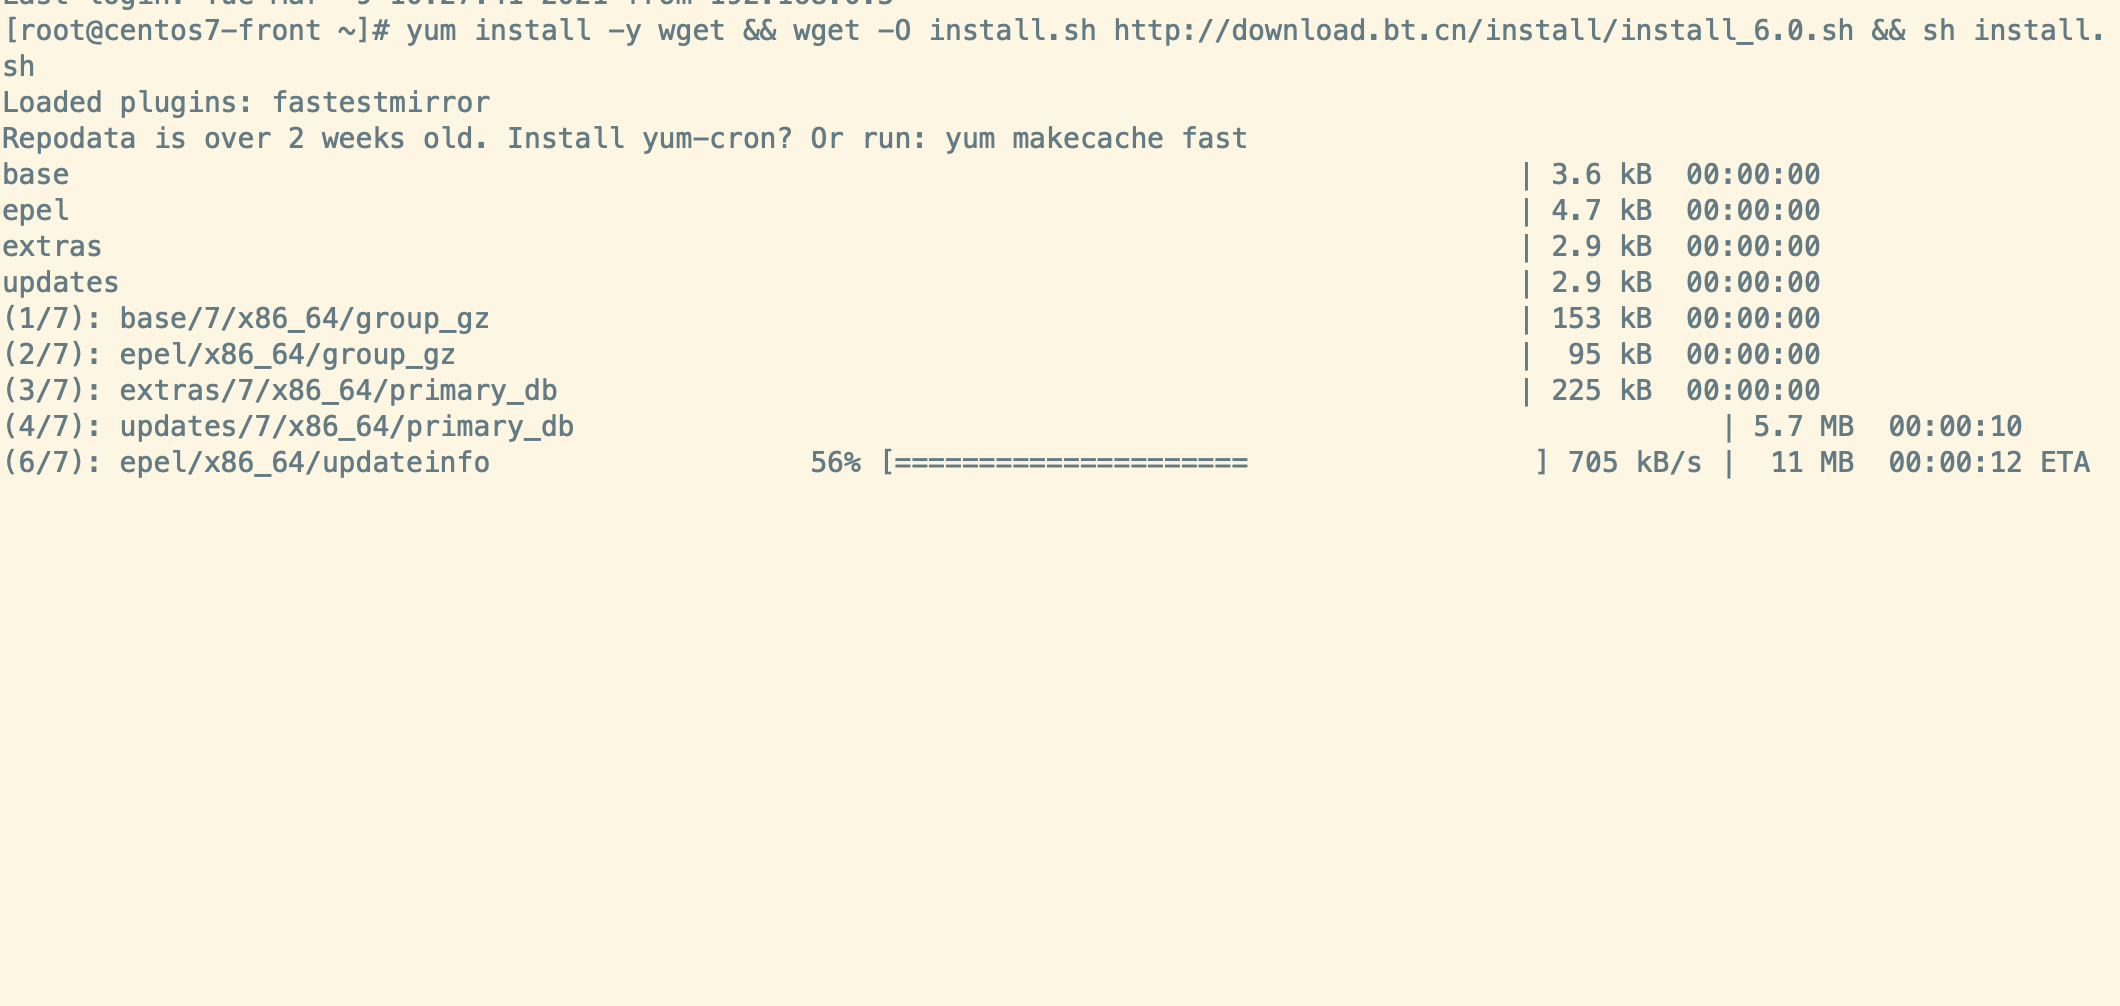
- 安装面板,执行以下命令
~# yum install -y wget && wget -O install.sh http://download.bt.cn/install/install_6.0.sh && sh install.sh
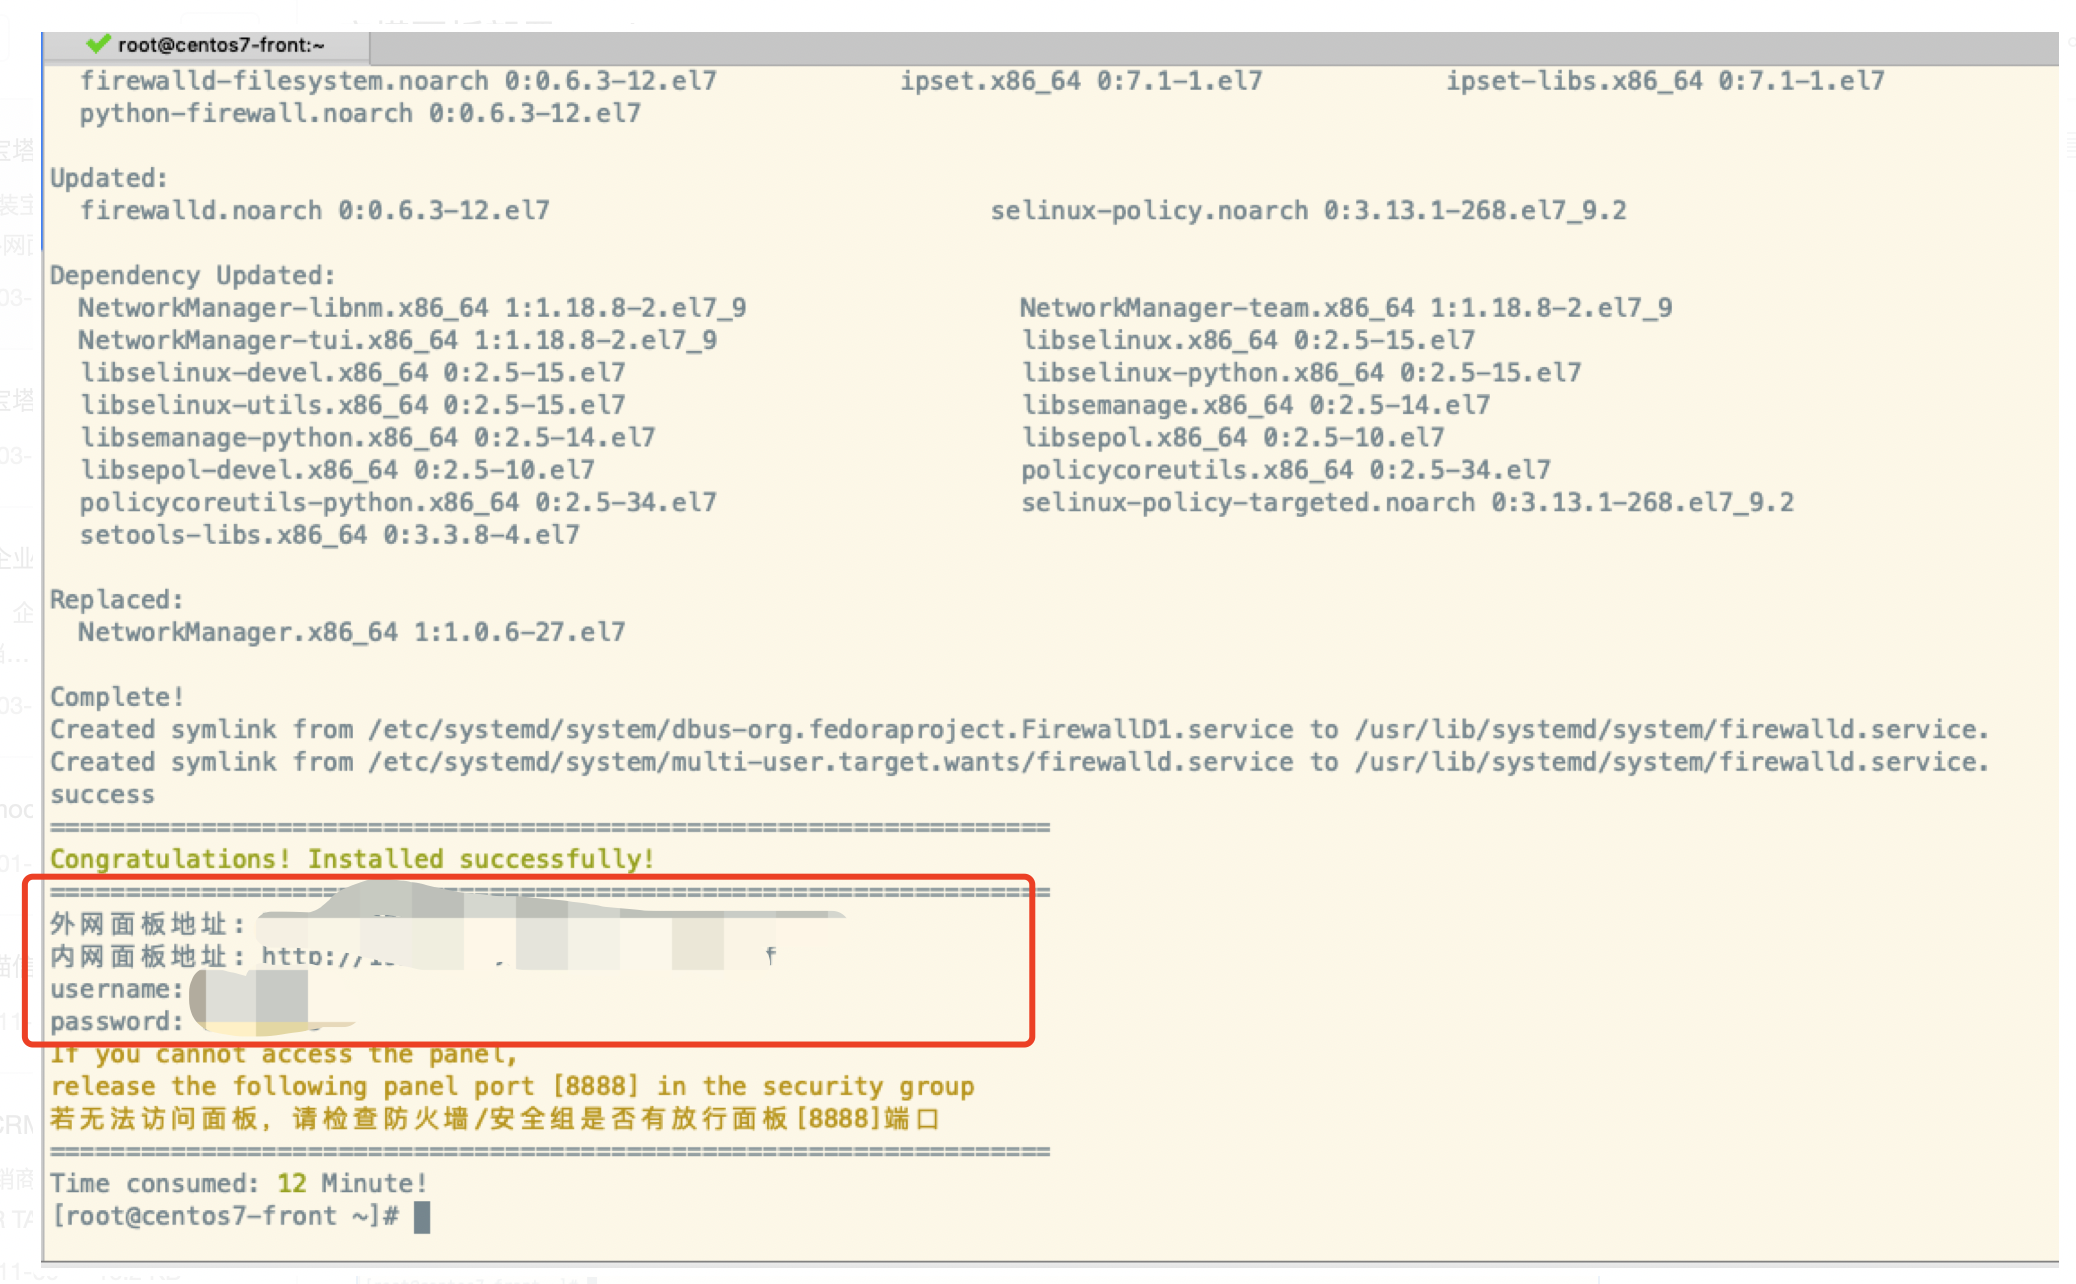
 3. 宝塔面板安装完成
# 安装环境
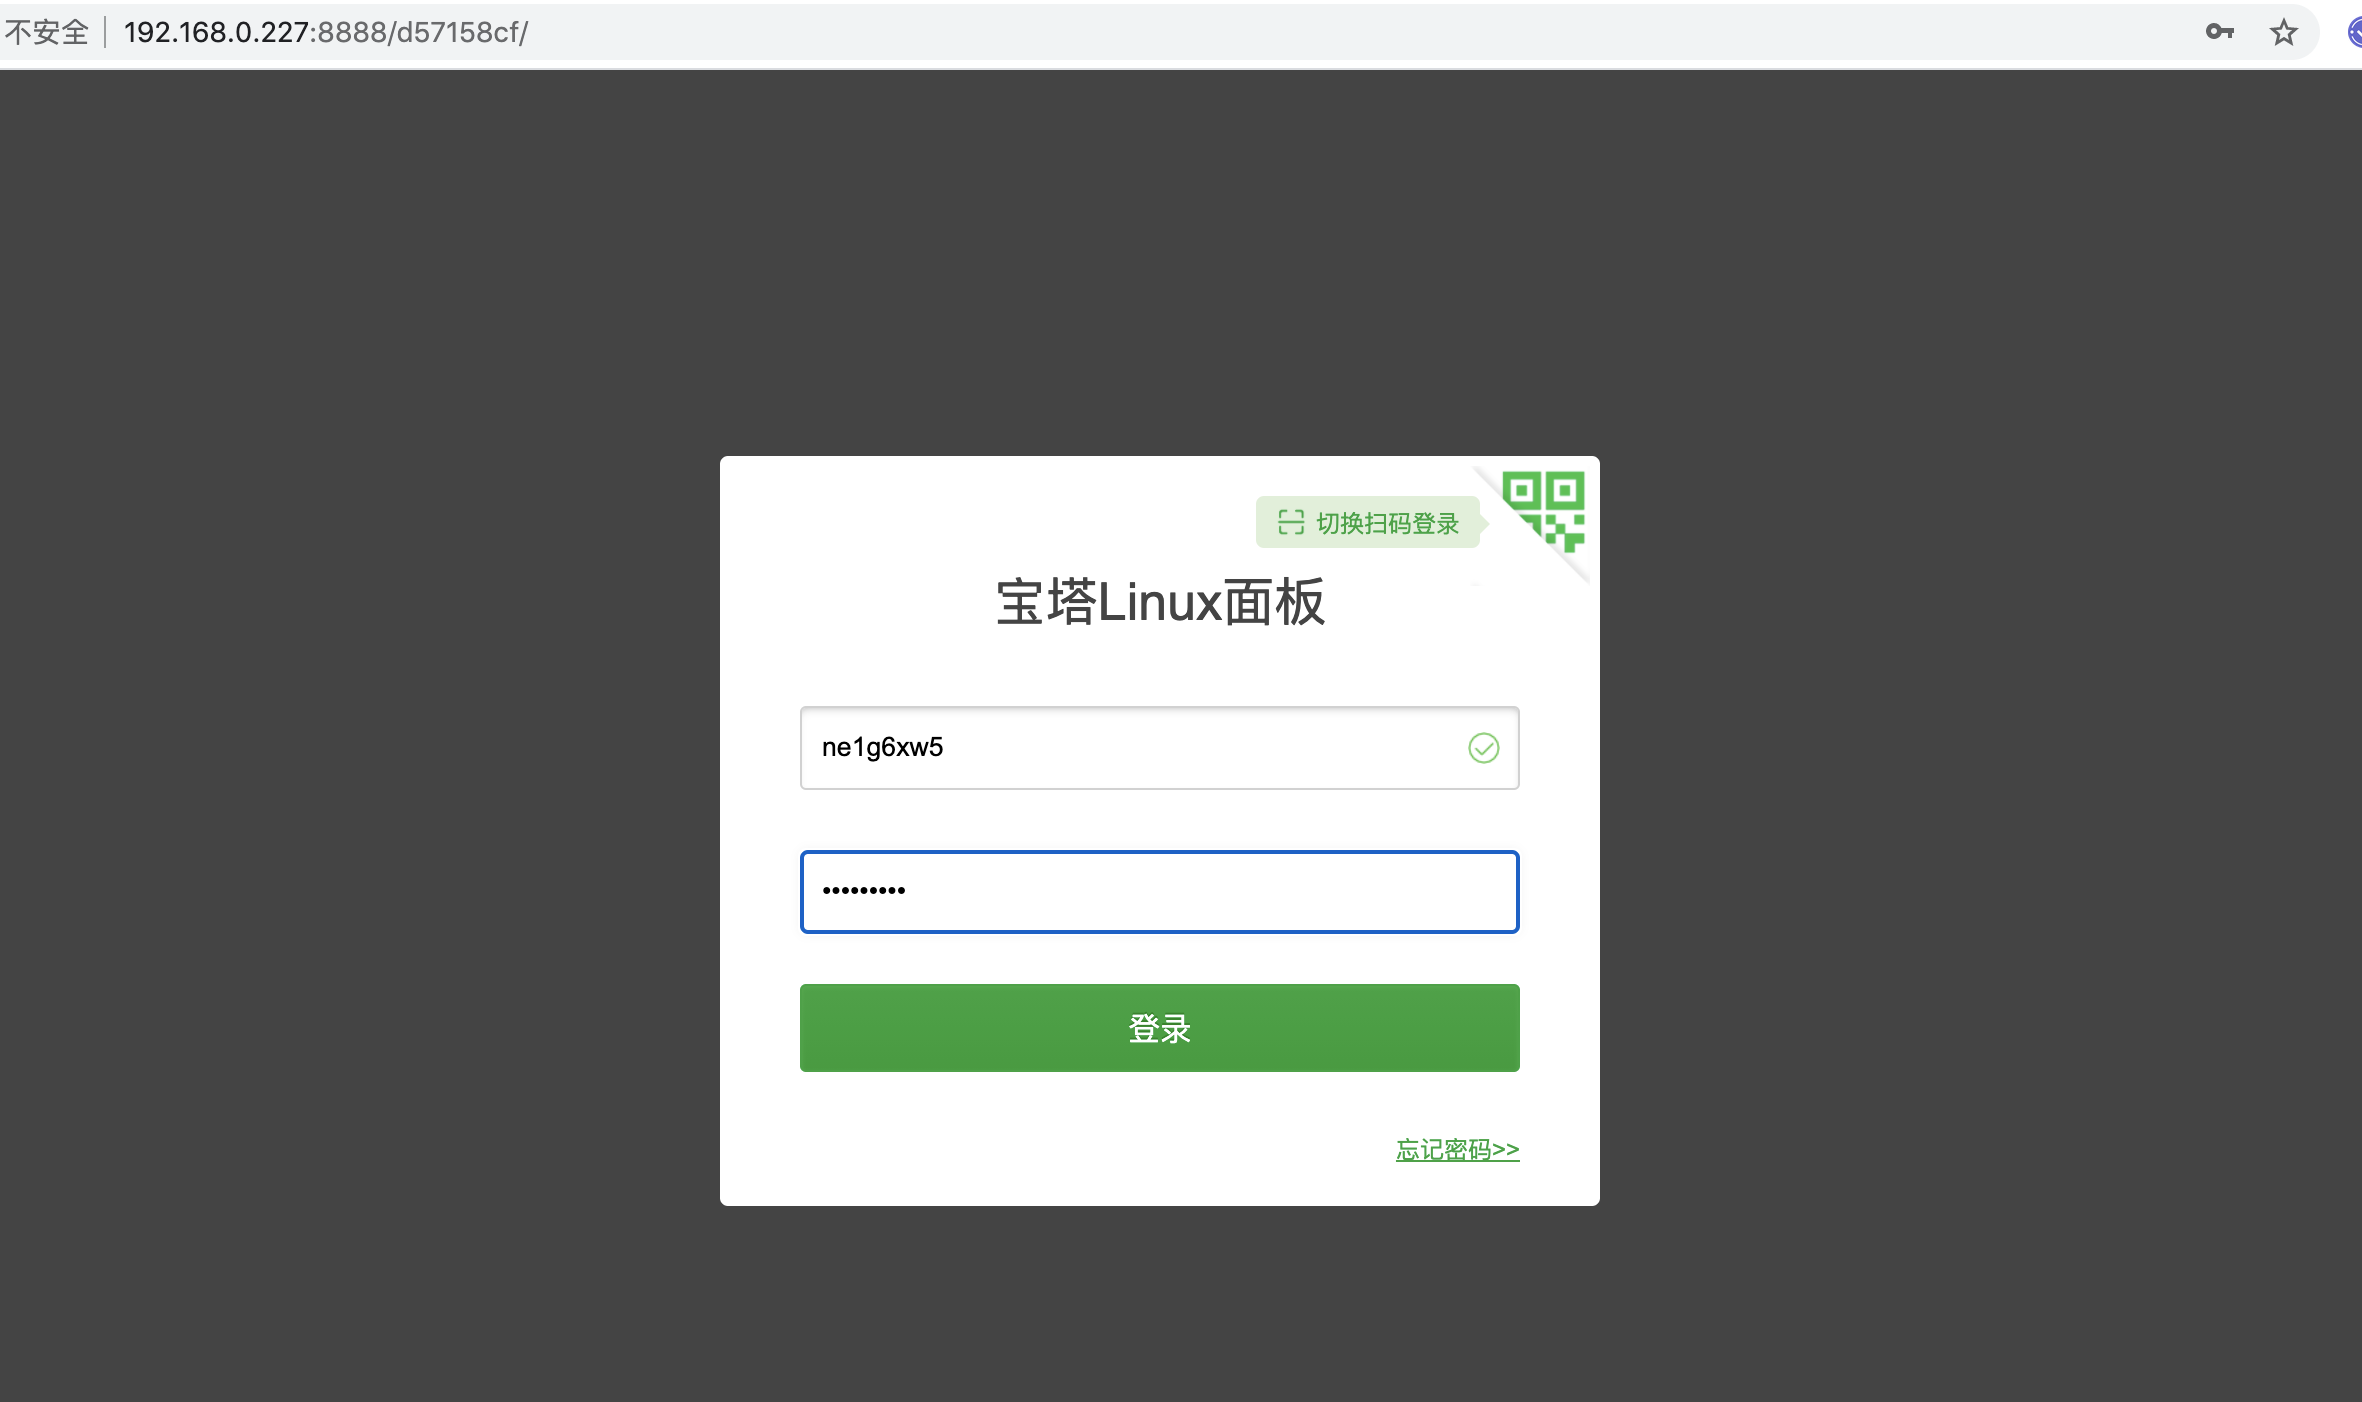
打开宝塔面板-登录
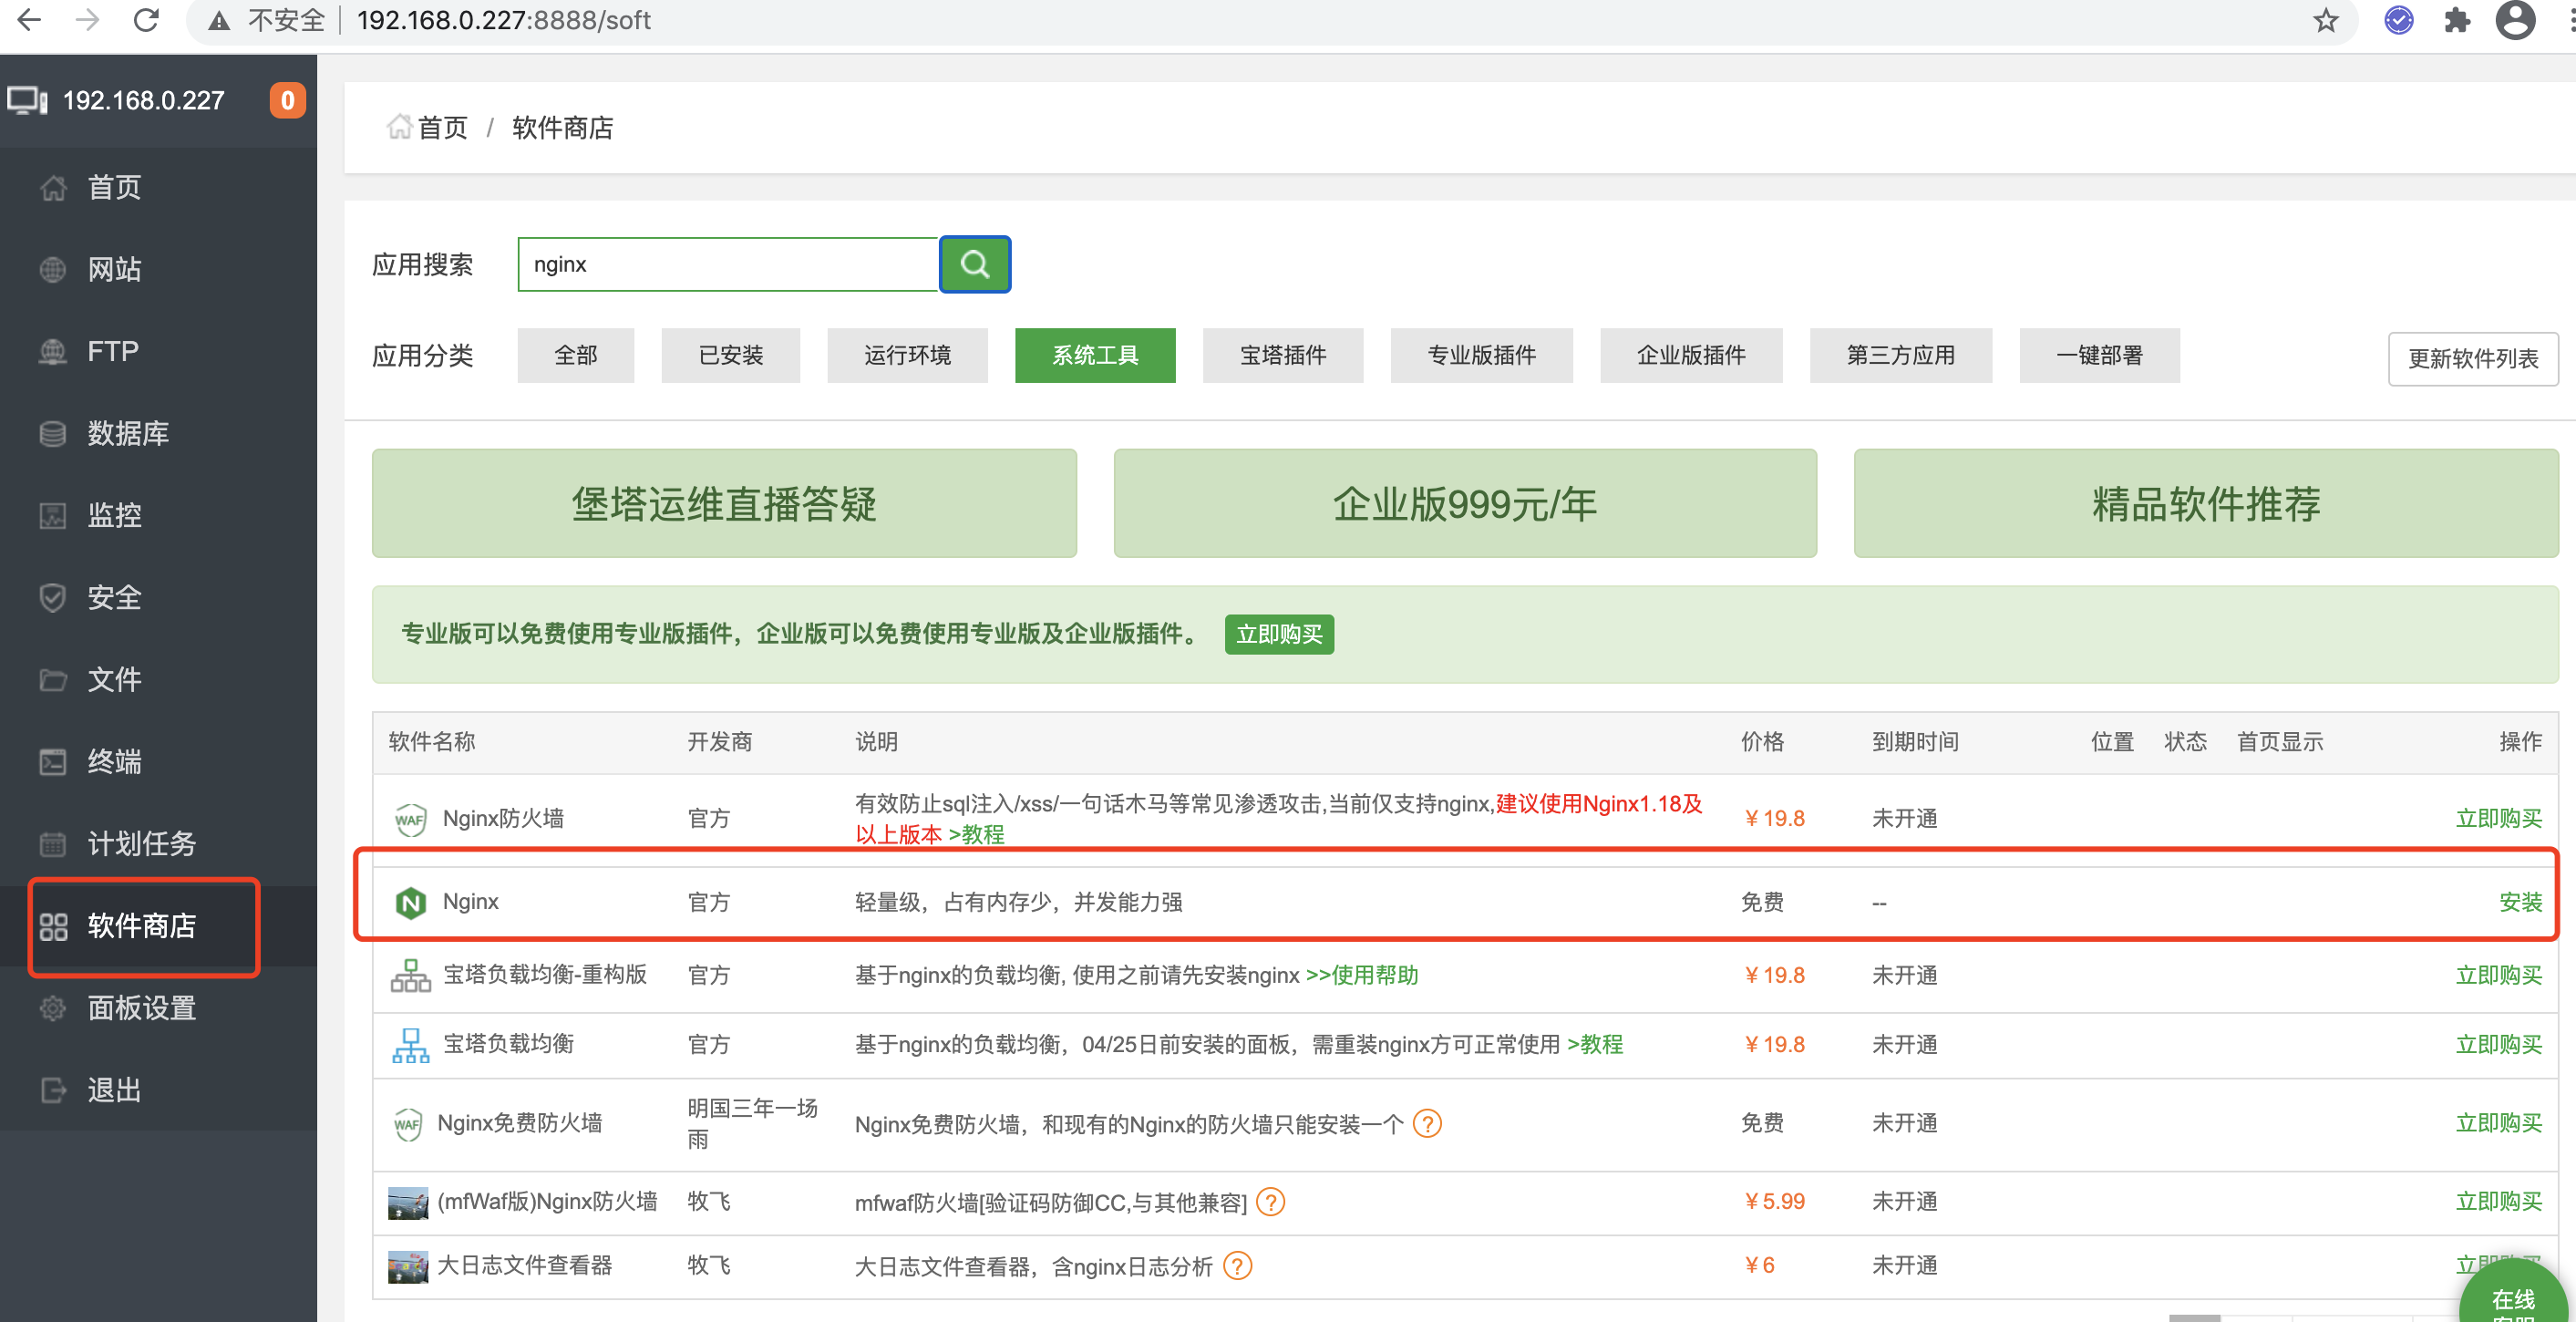
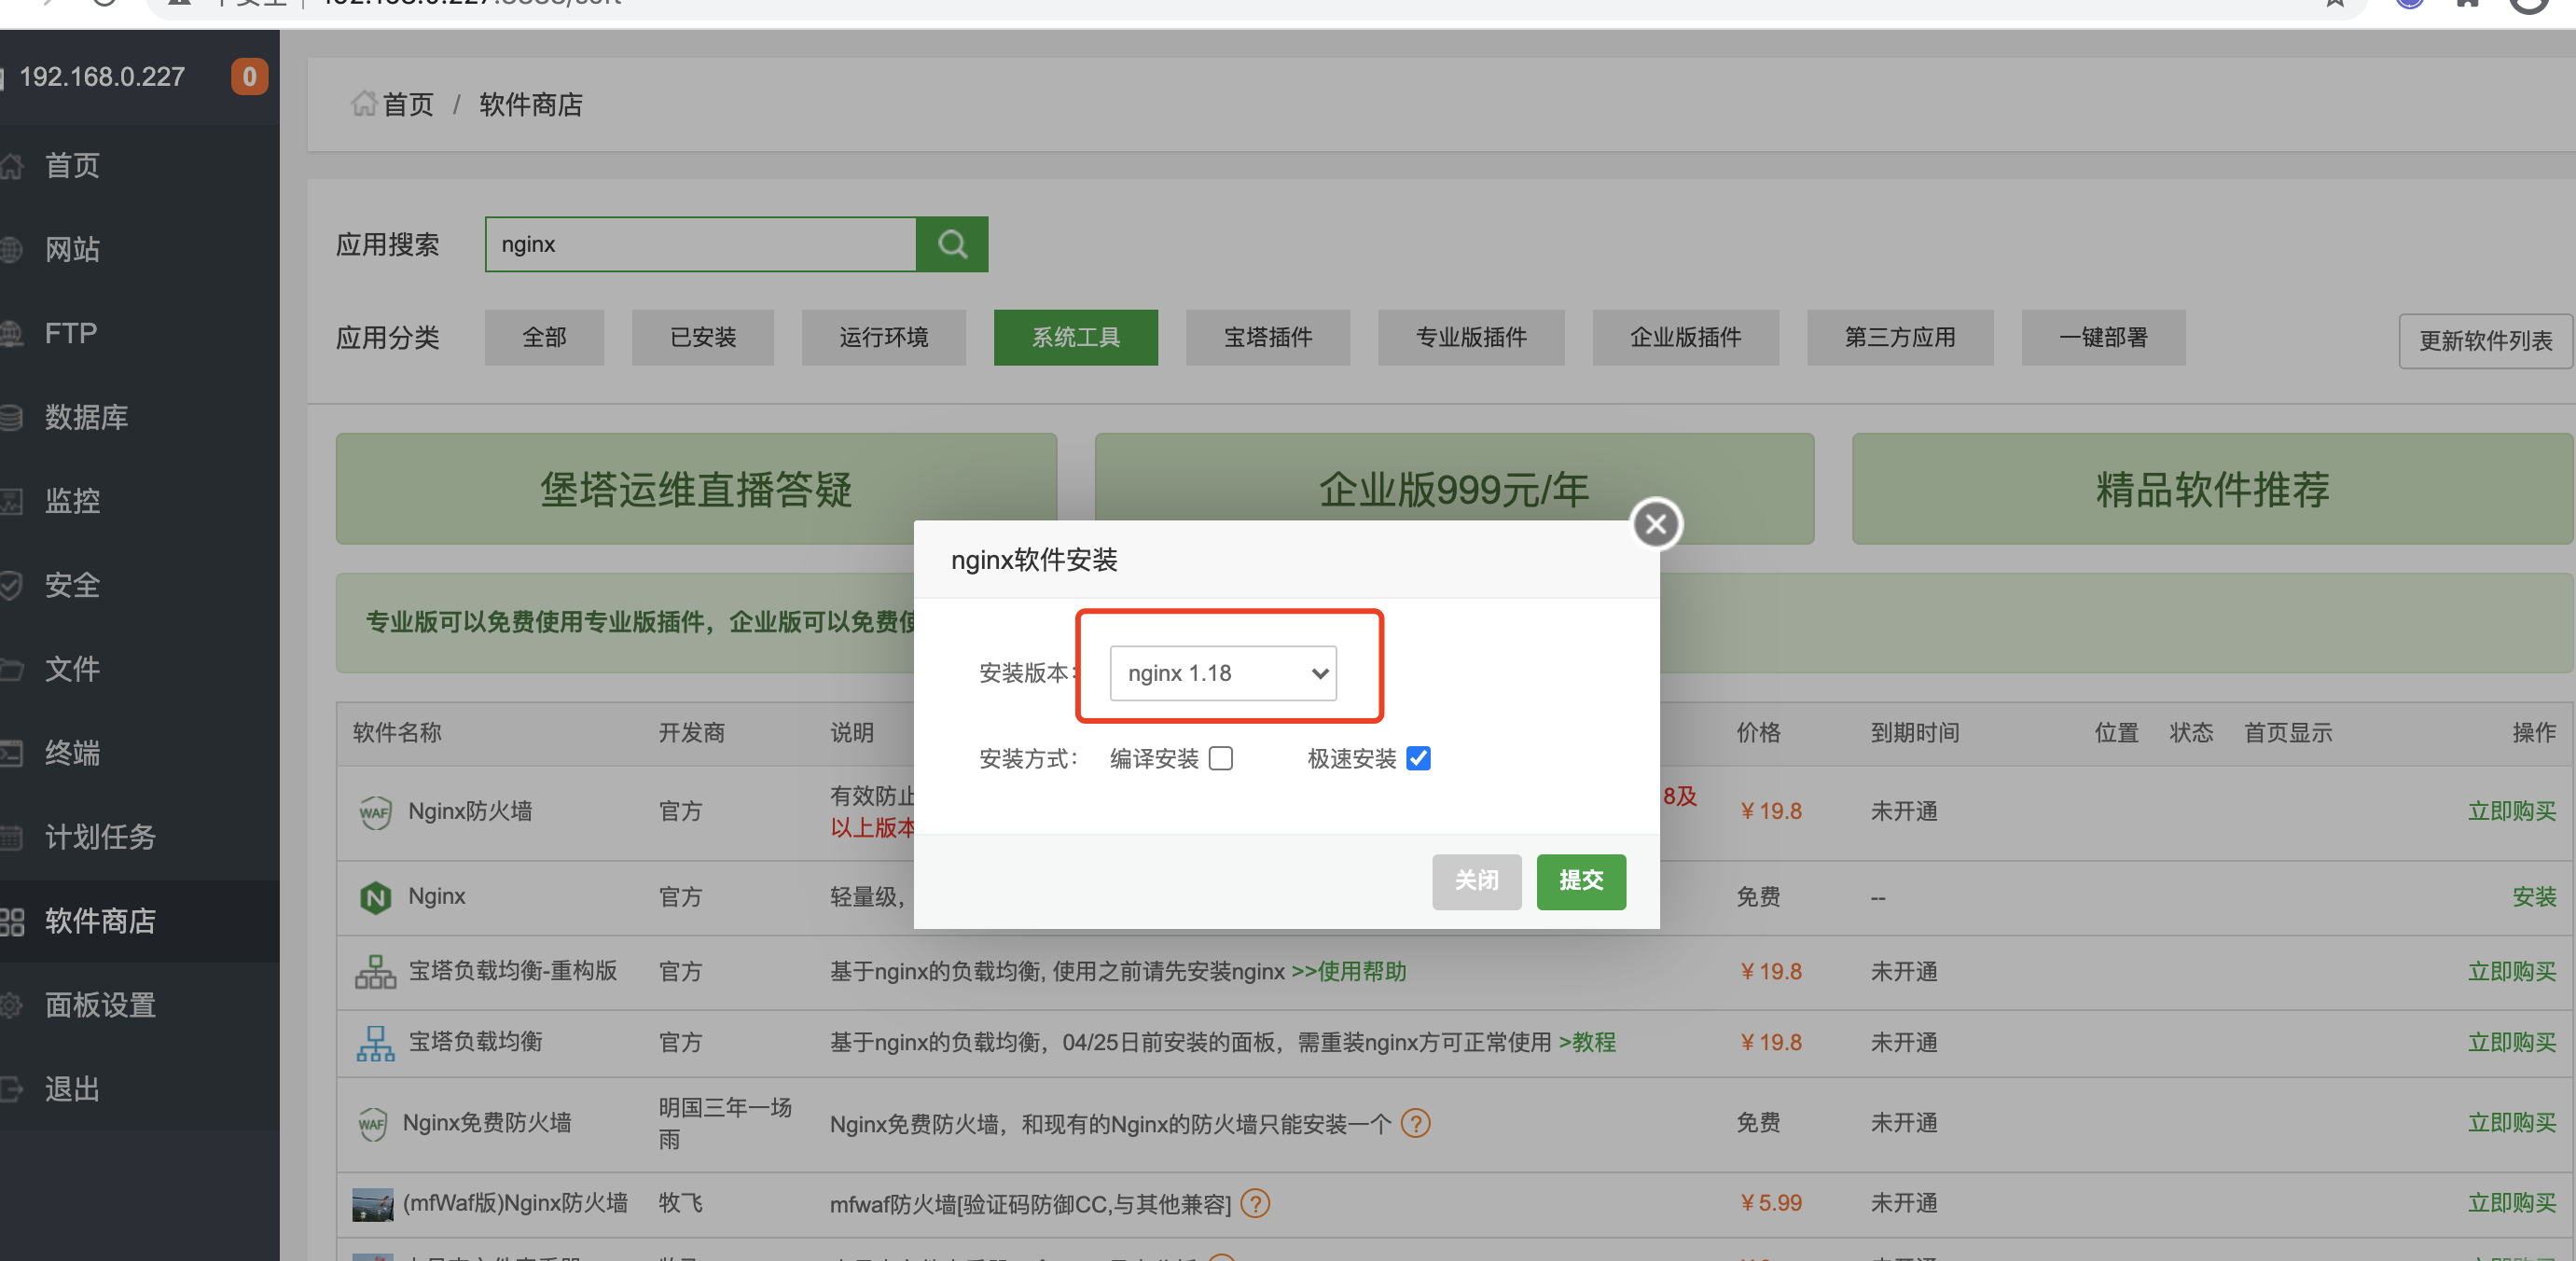
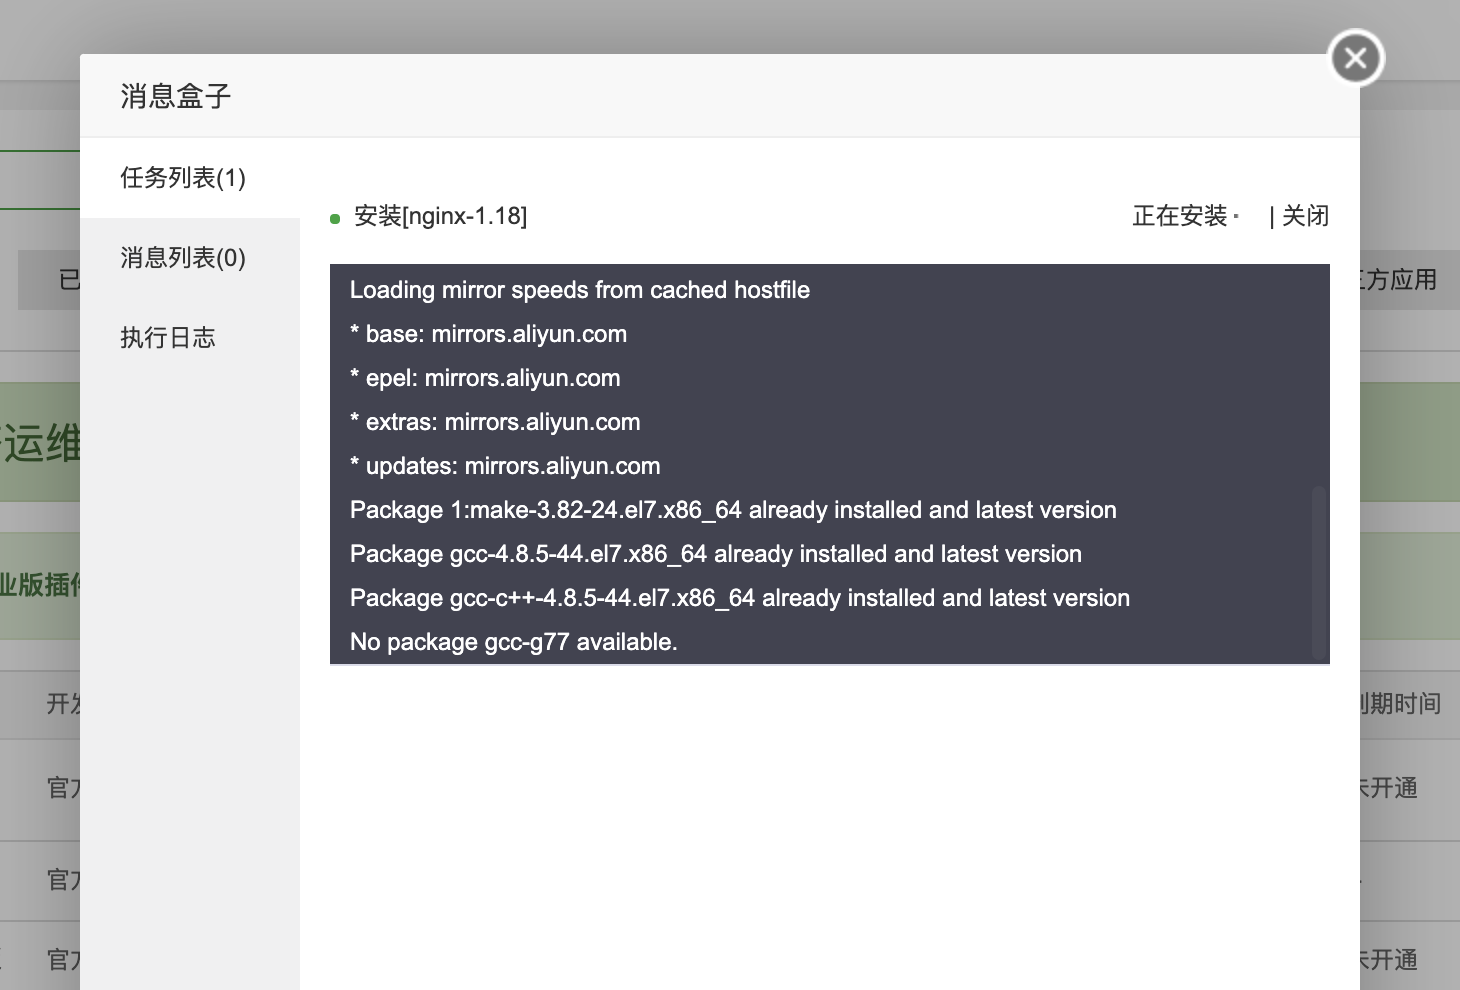
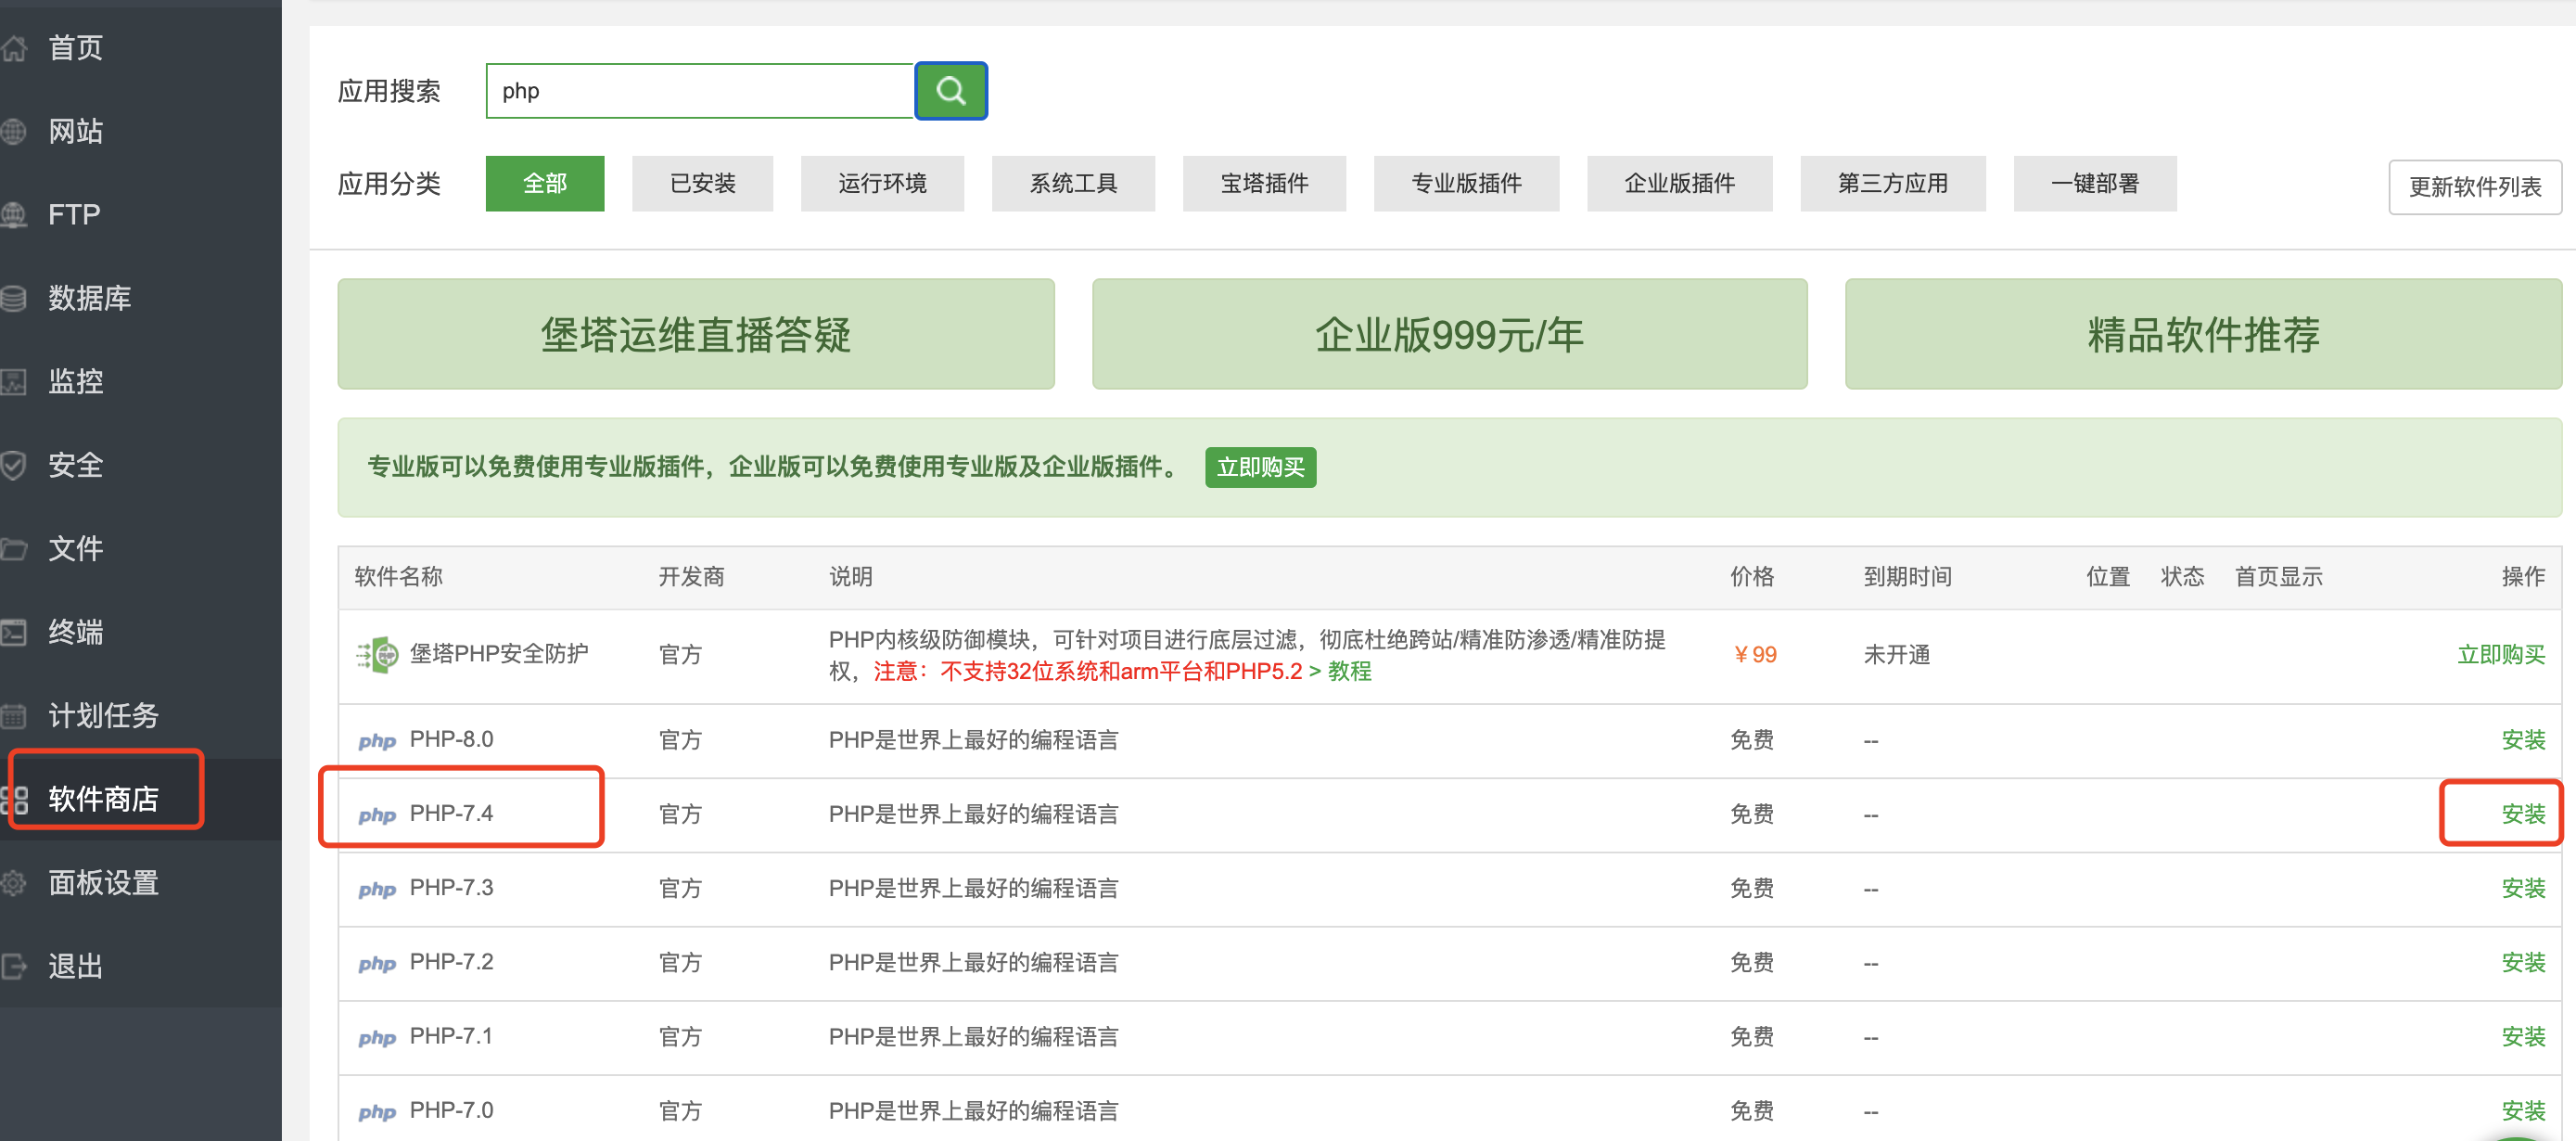
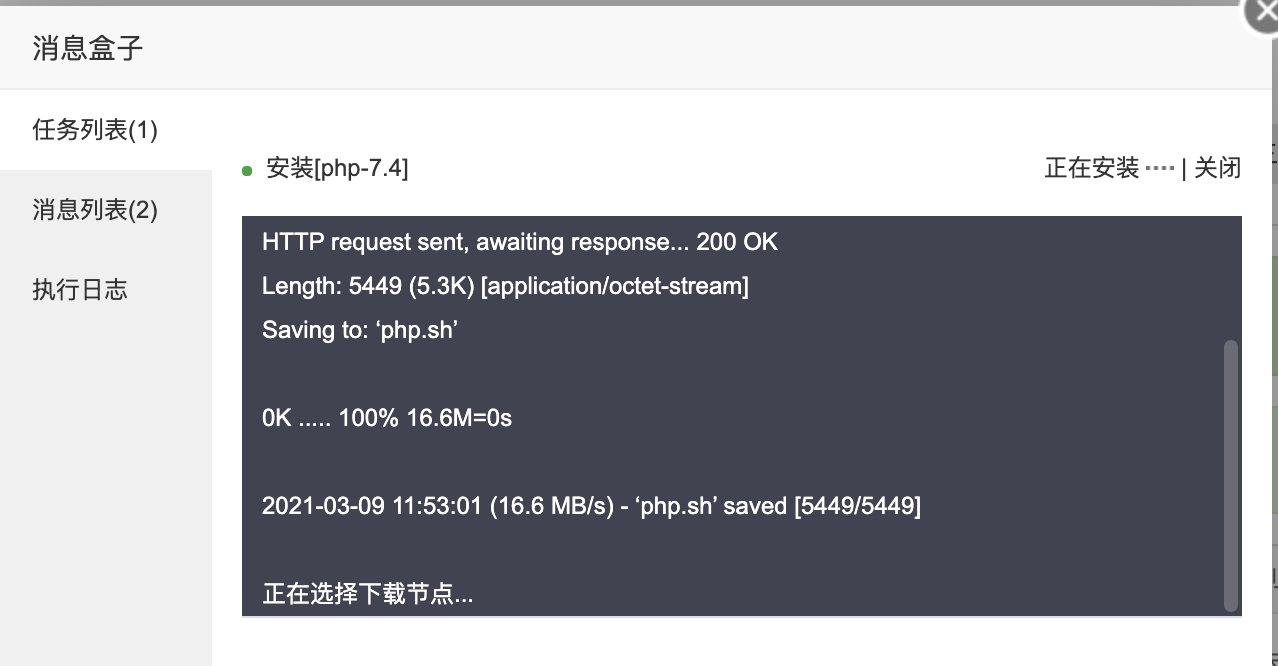
宝塔面板软件商店里面安装软件:
- nginx 1.18
- php74
- mysql5.7
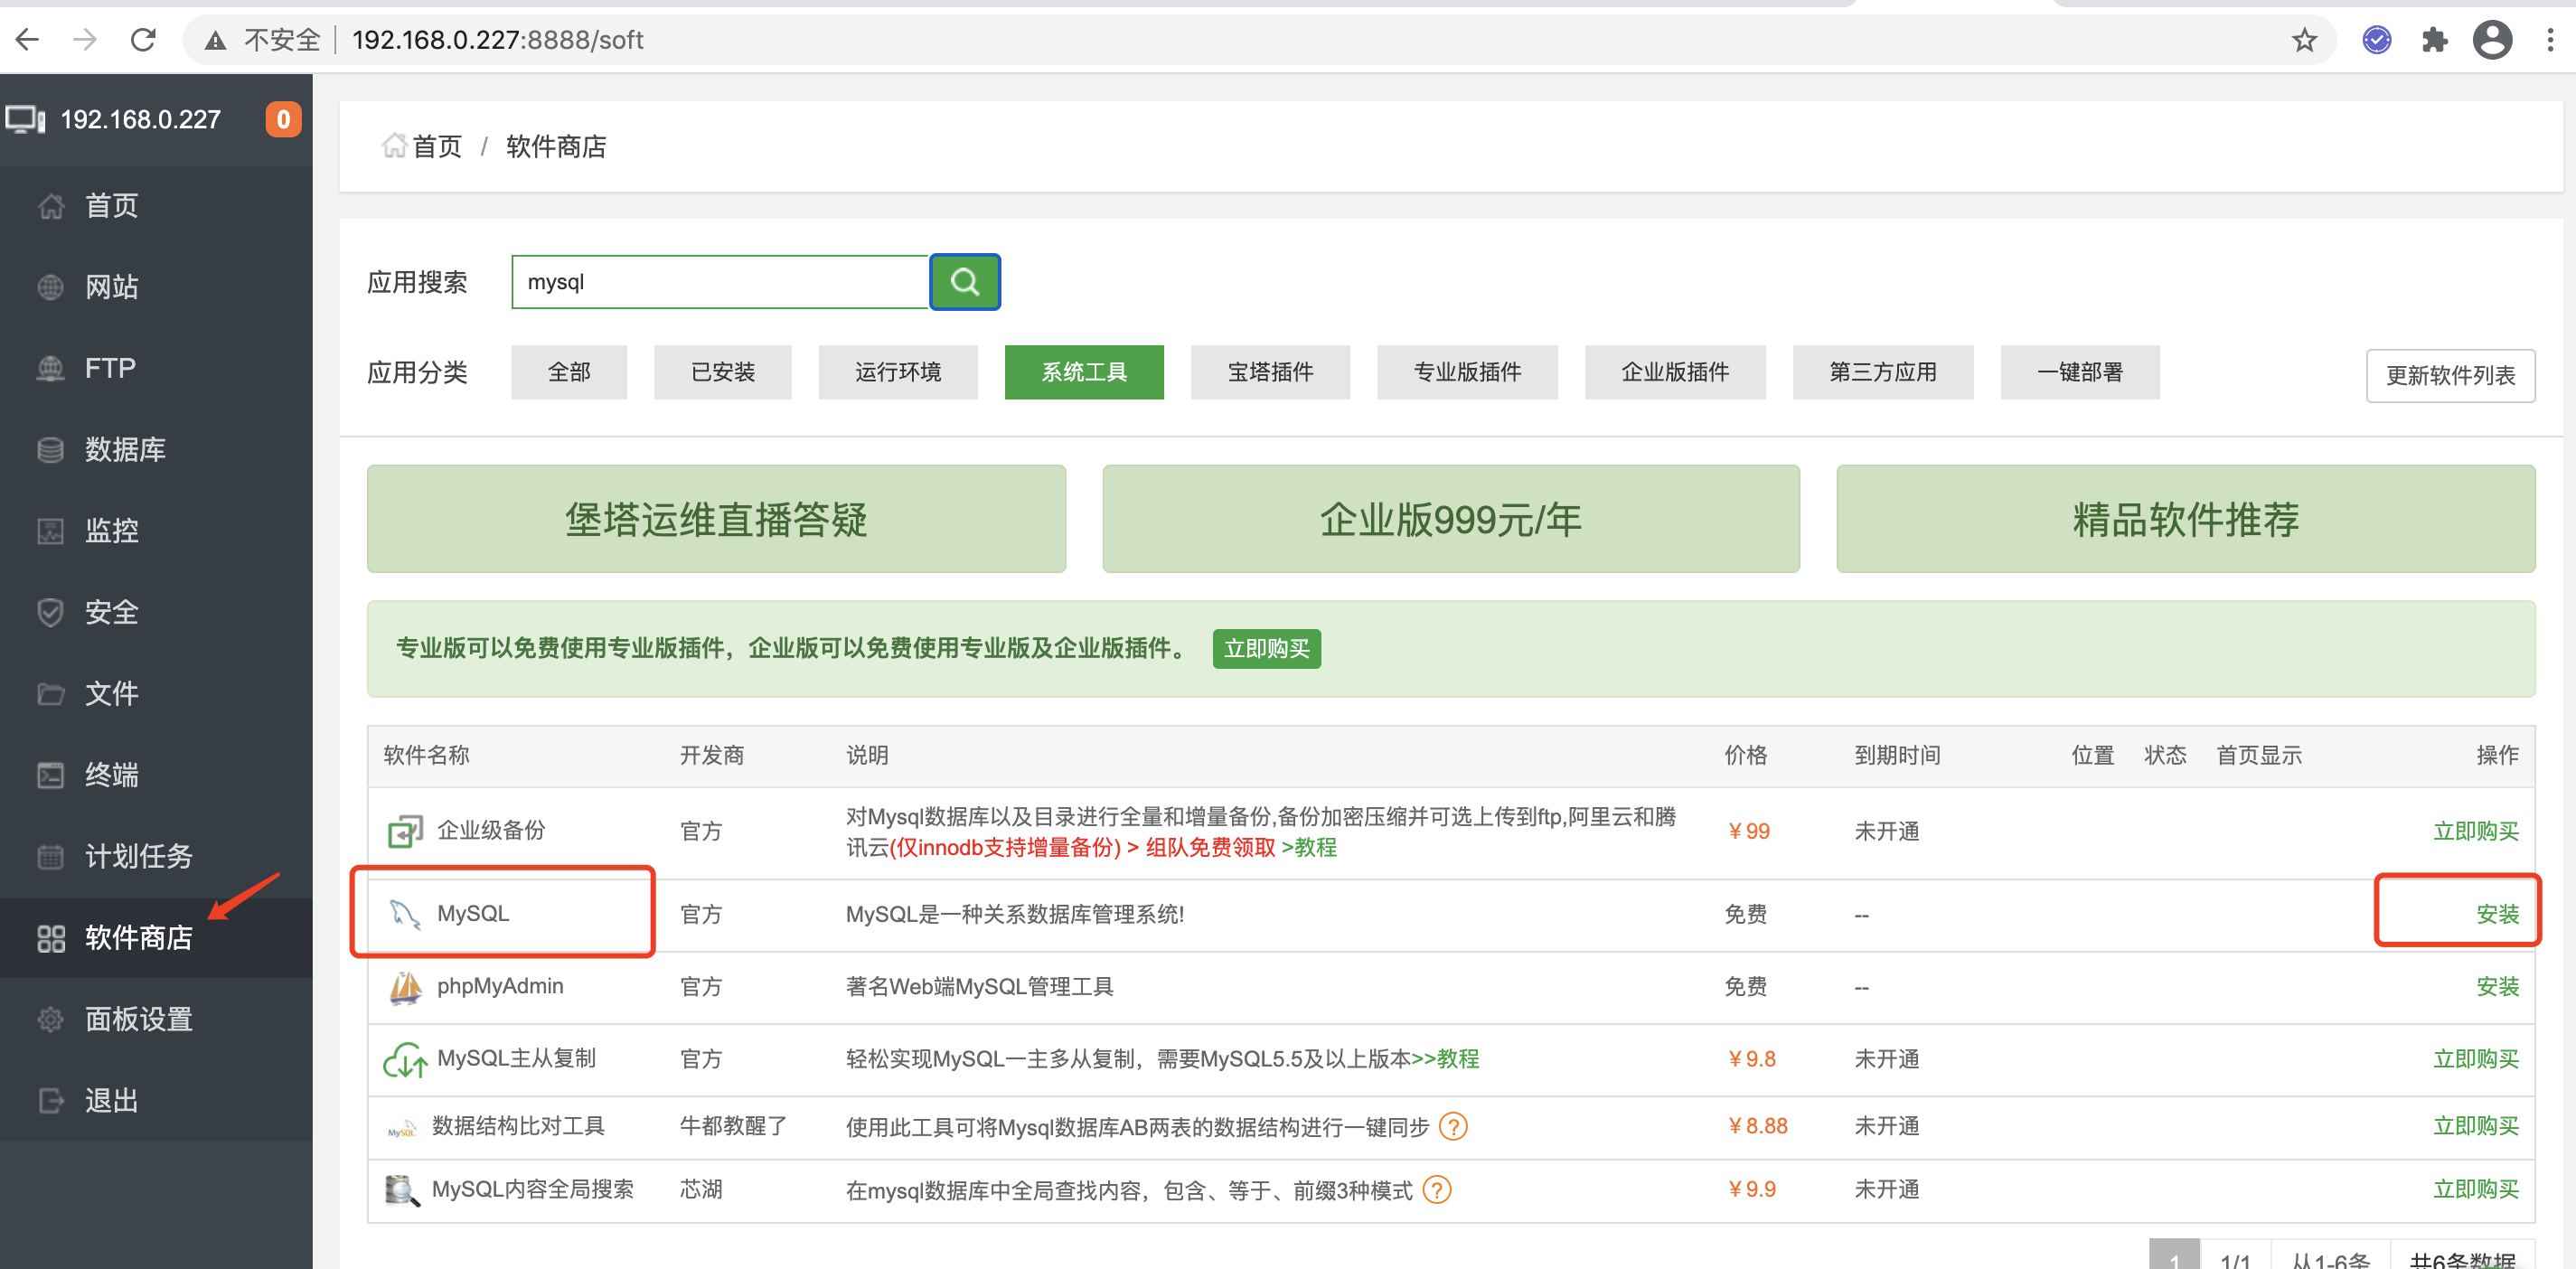
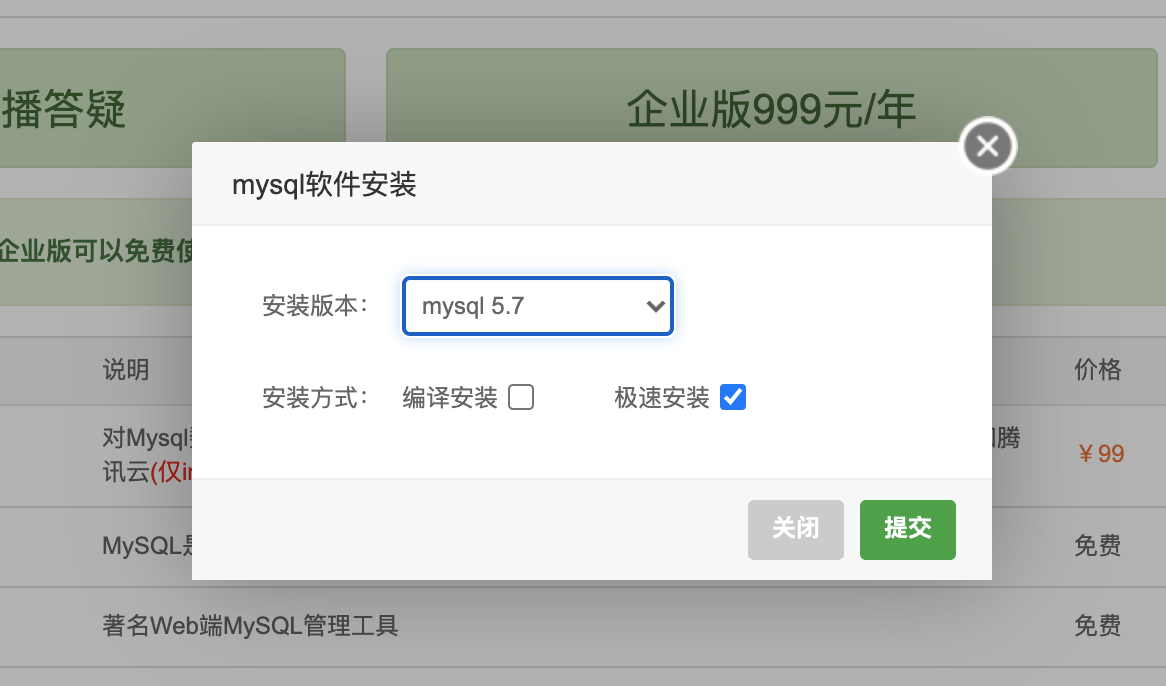
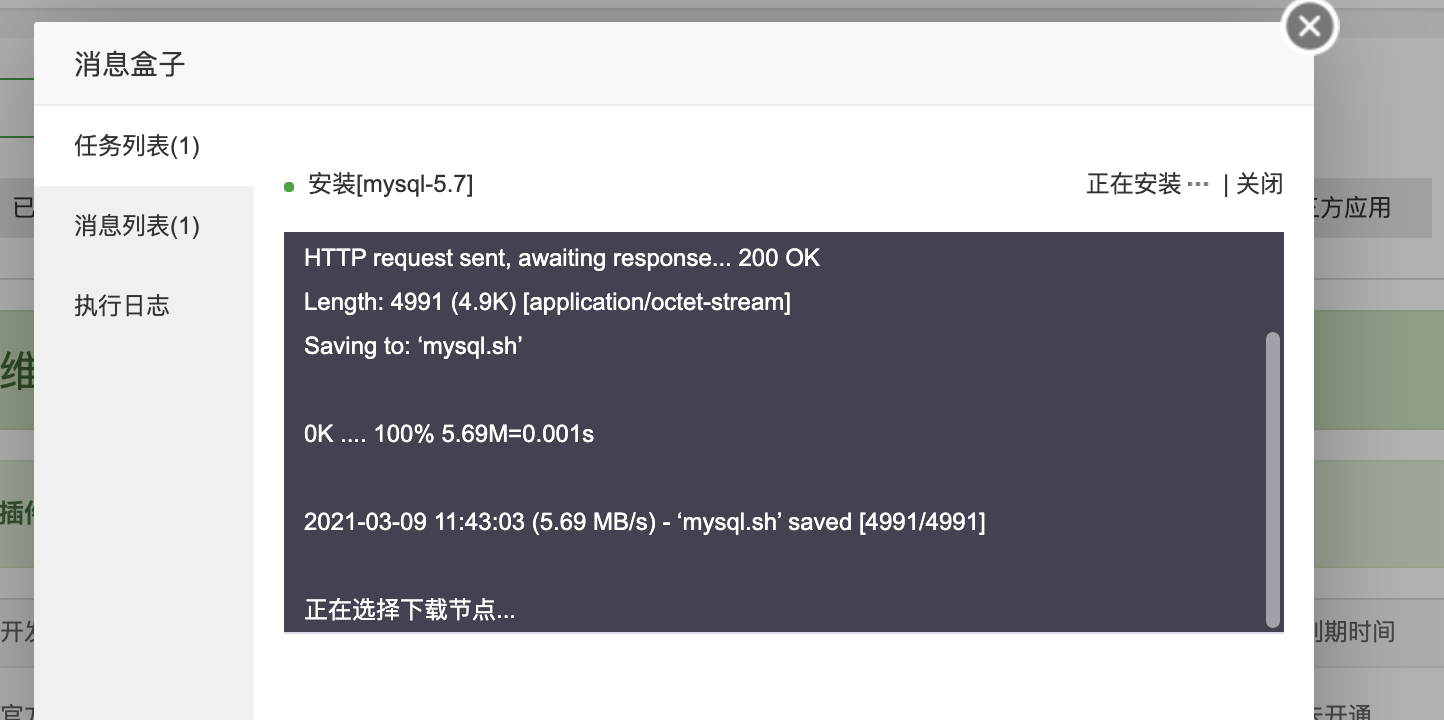
- PM2管理器 -4.2
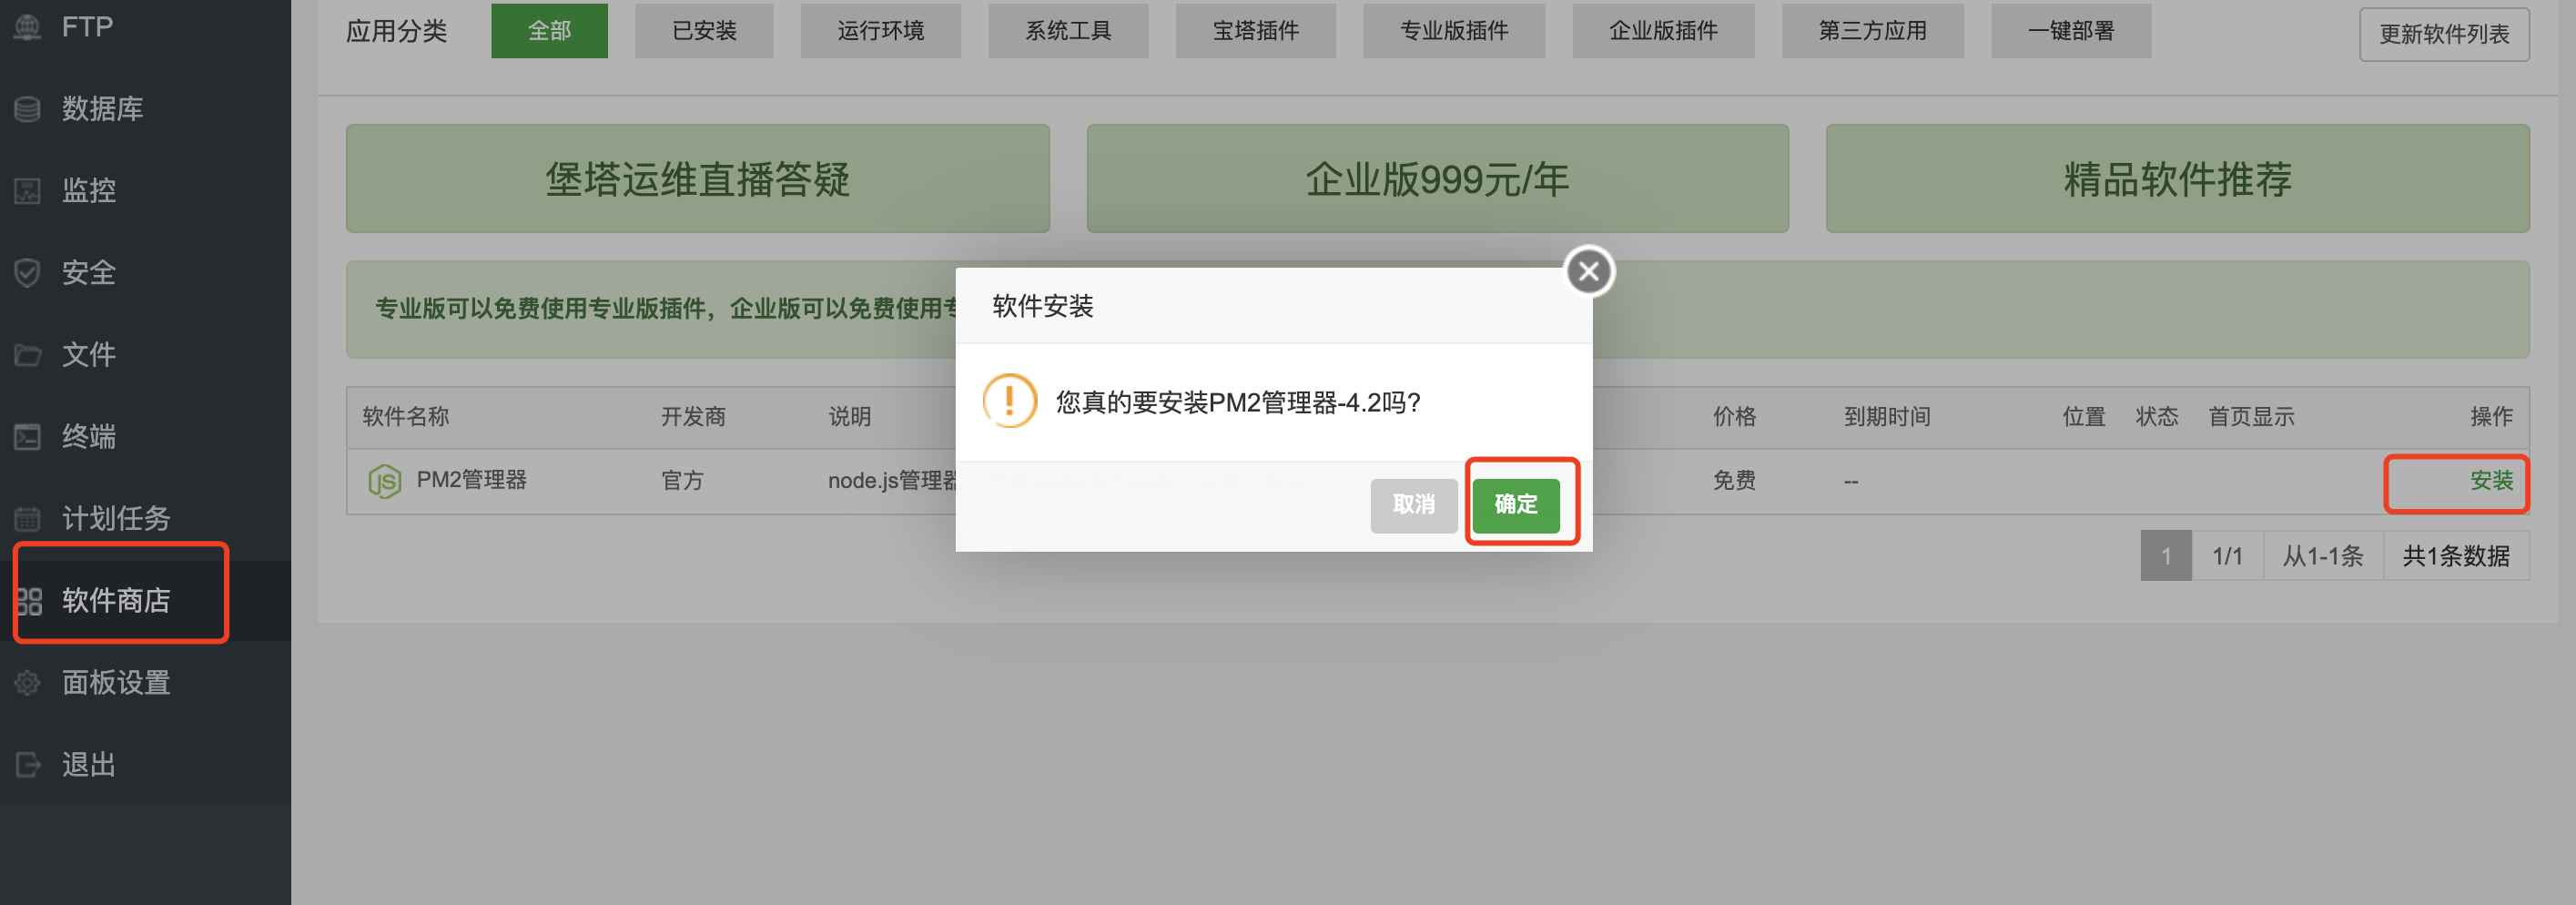
- PM2管理器->模块管理->yarn 安装(绑定环境变量export PATH=$PATH:/www/server/nvm/versions/node/v14.16.0/bin)
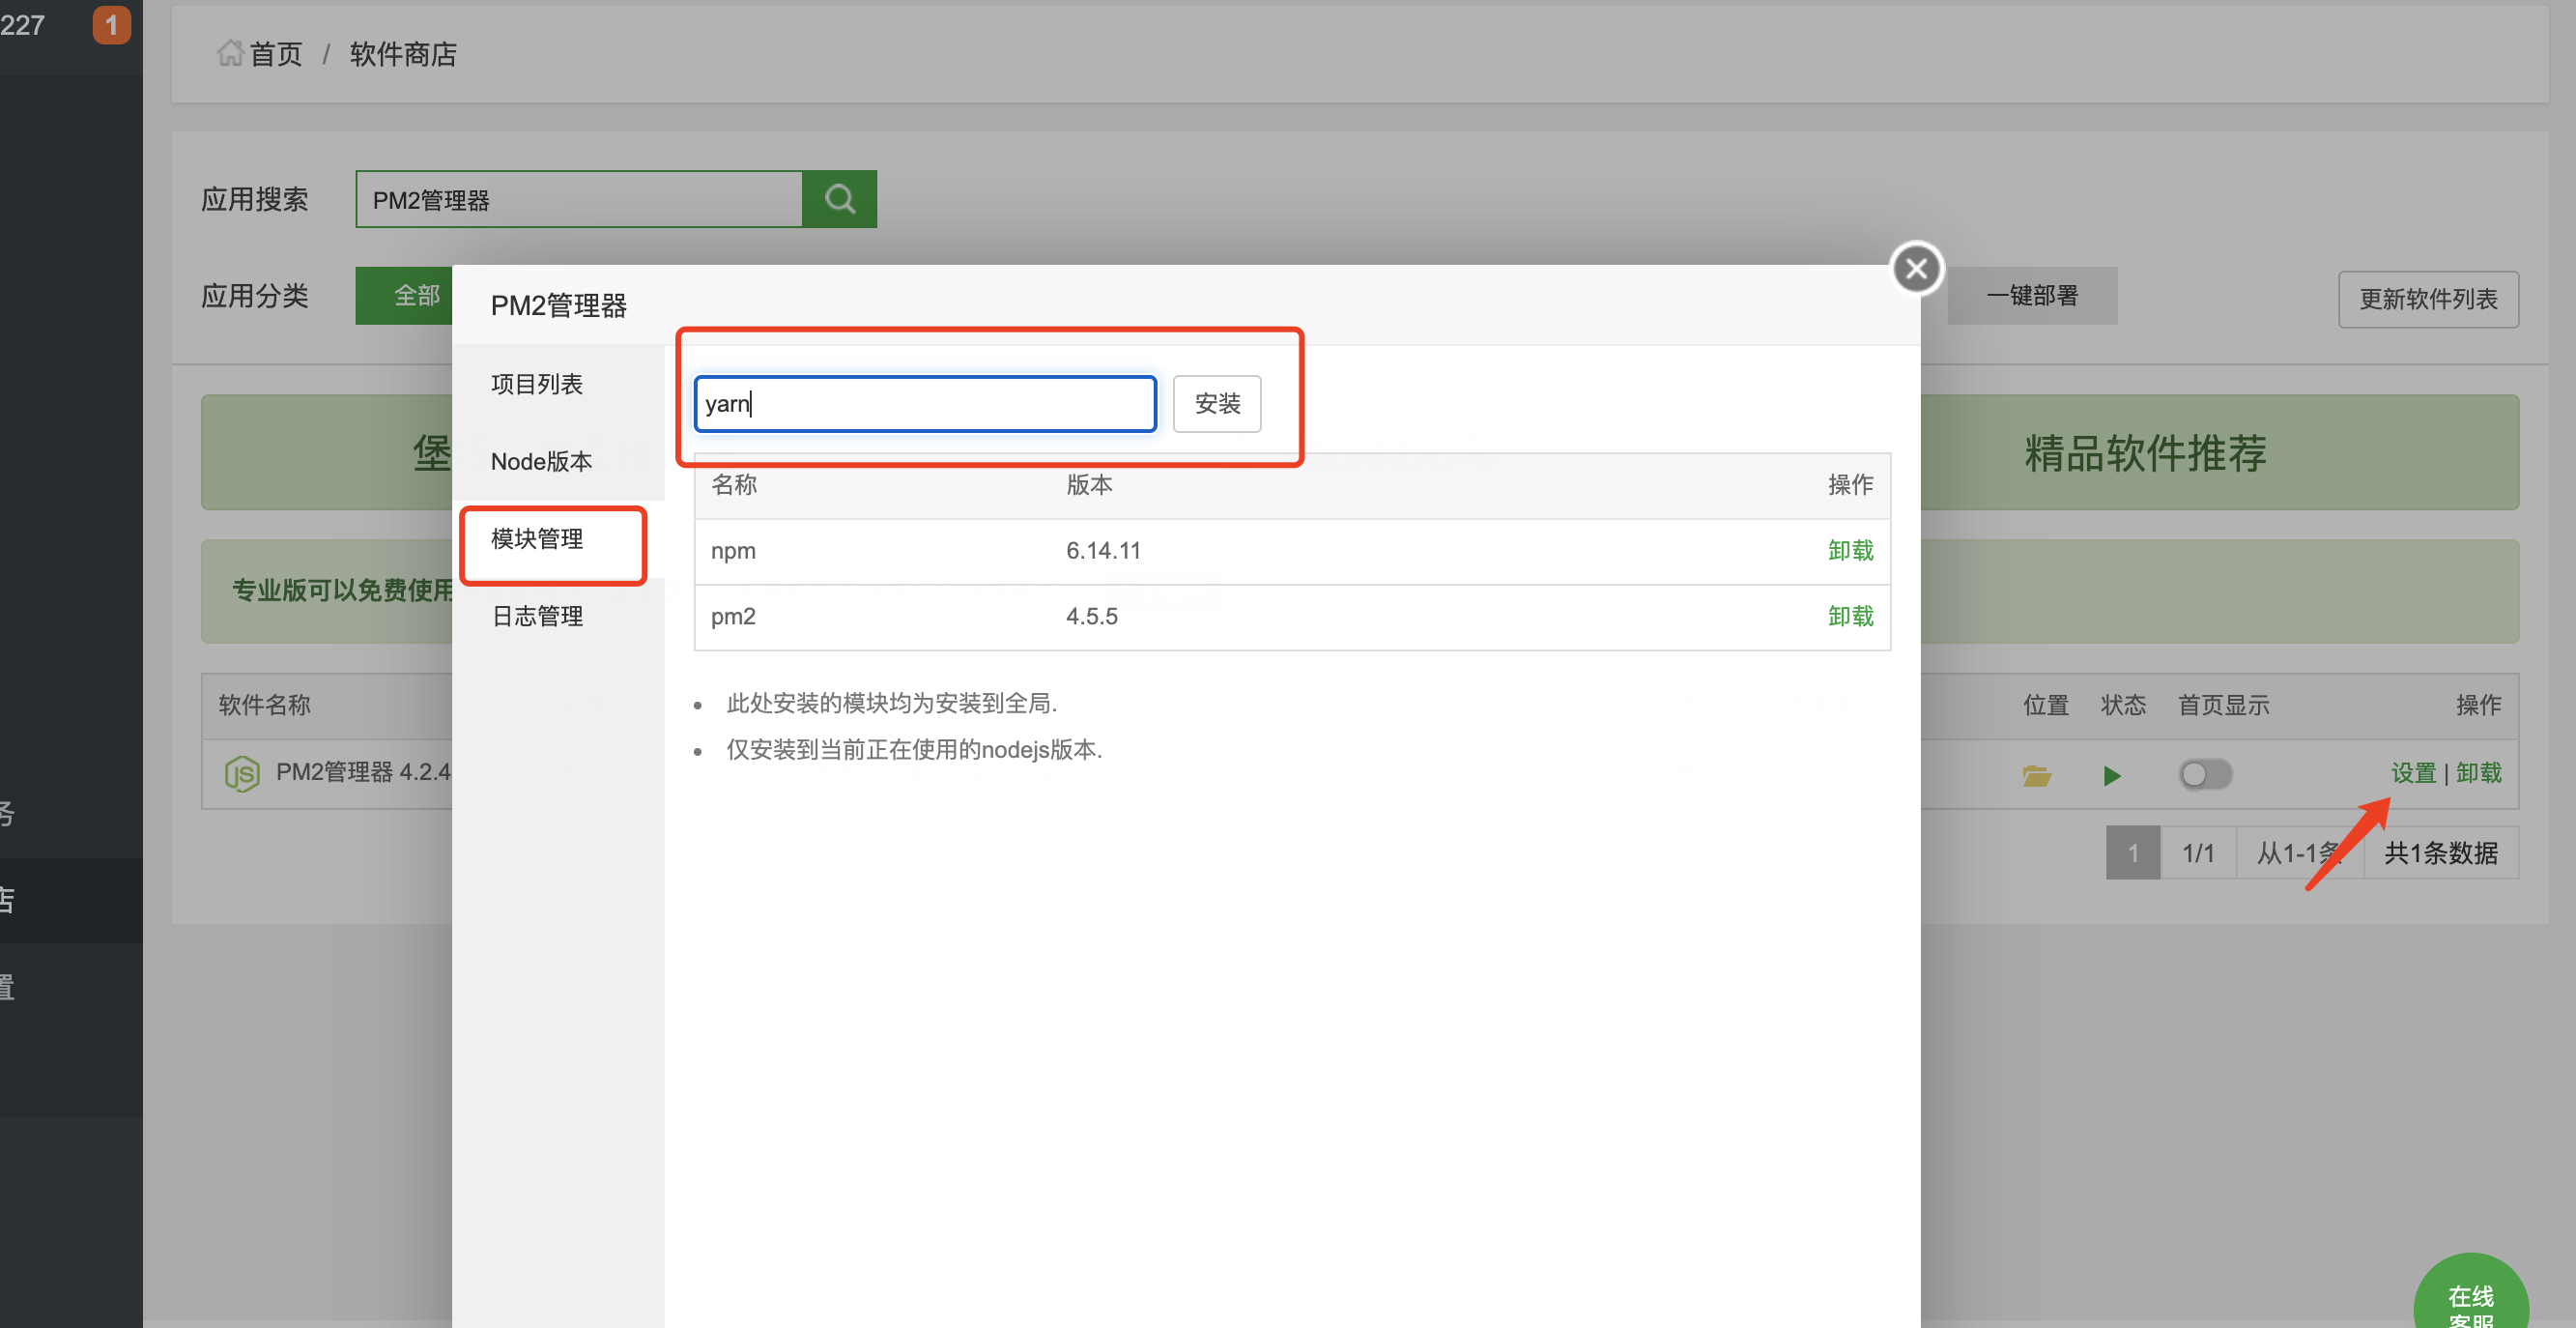

- nginx 1.18
安装Swoole
- 宝塔面板->软件商店->PHP-7.4->安装扩展->Swoole4
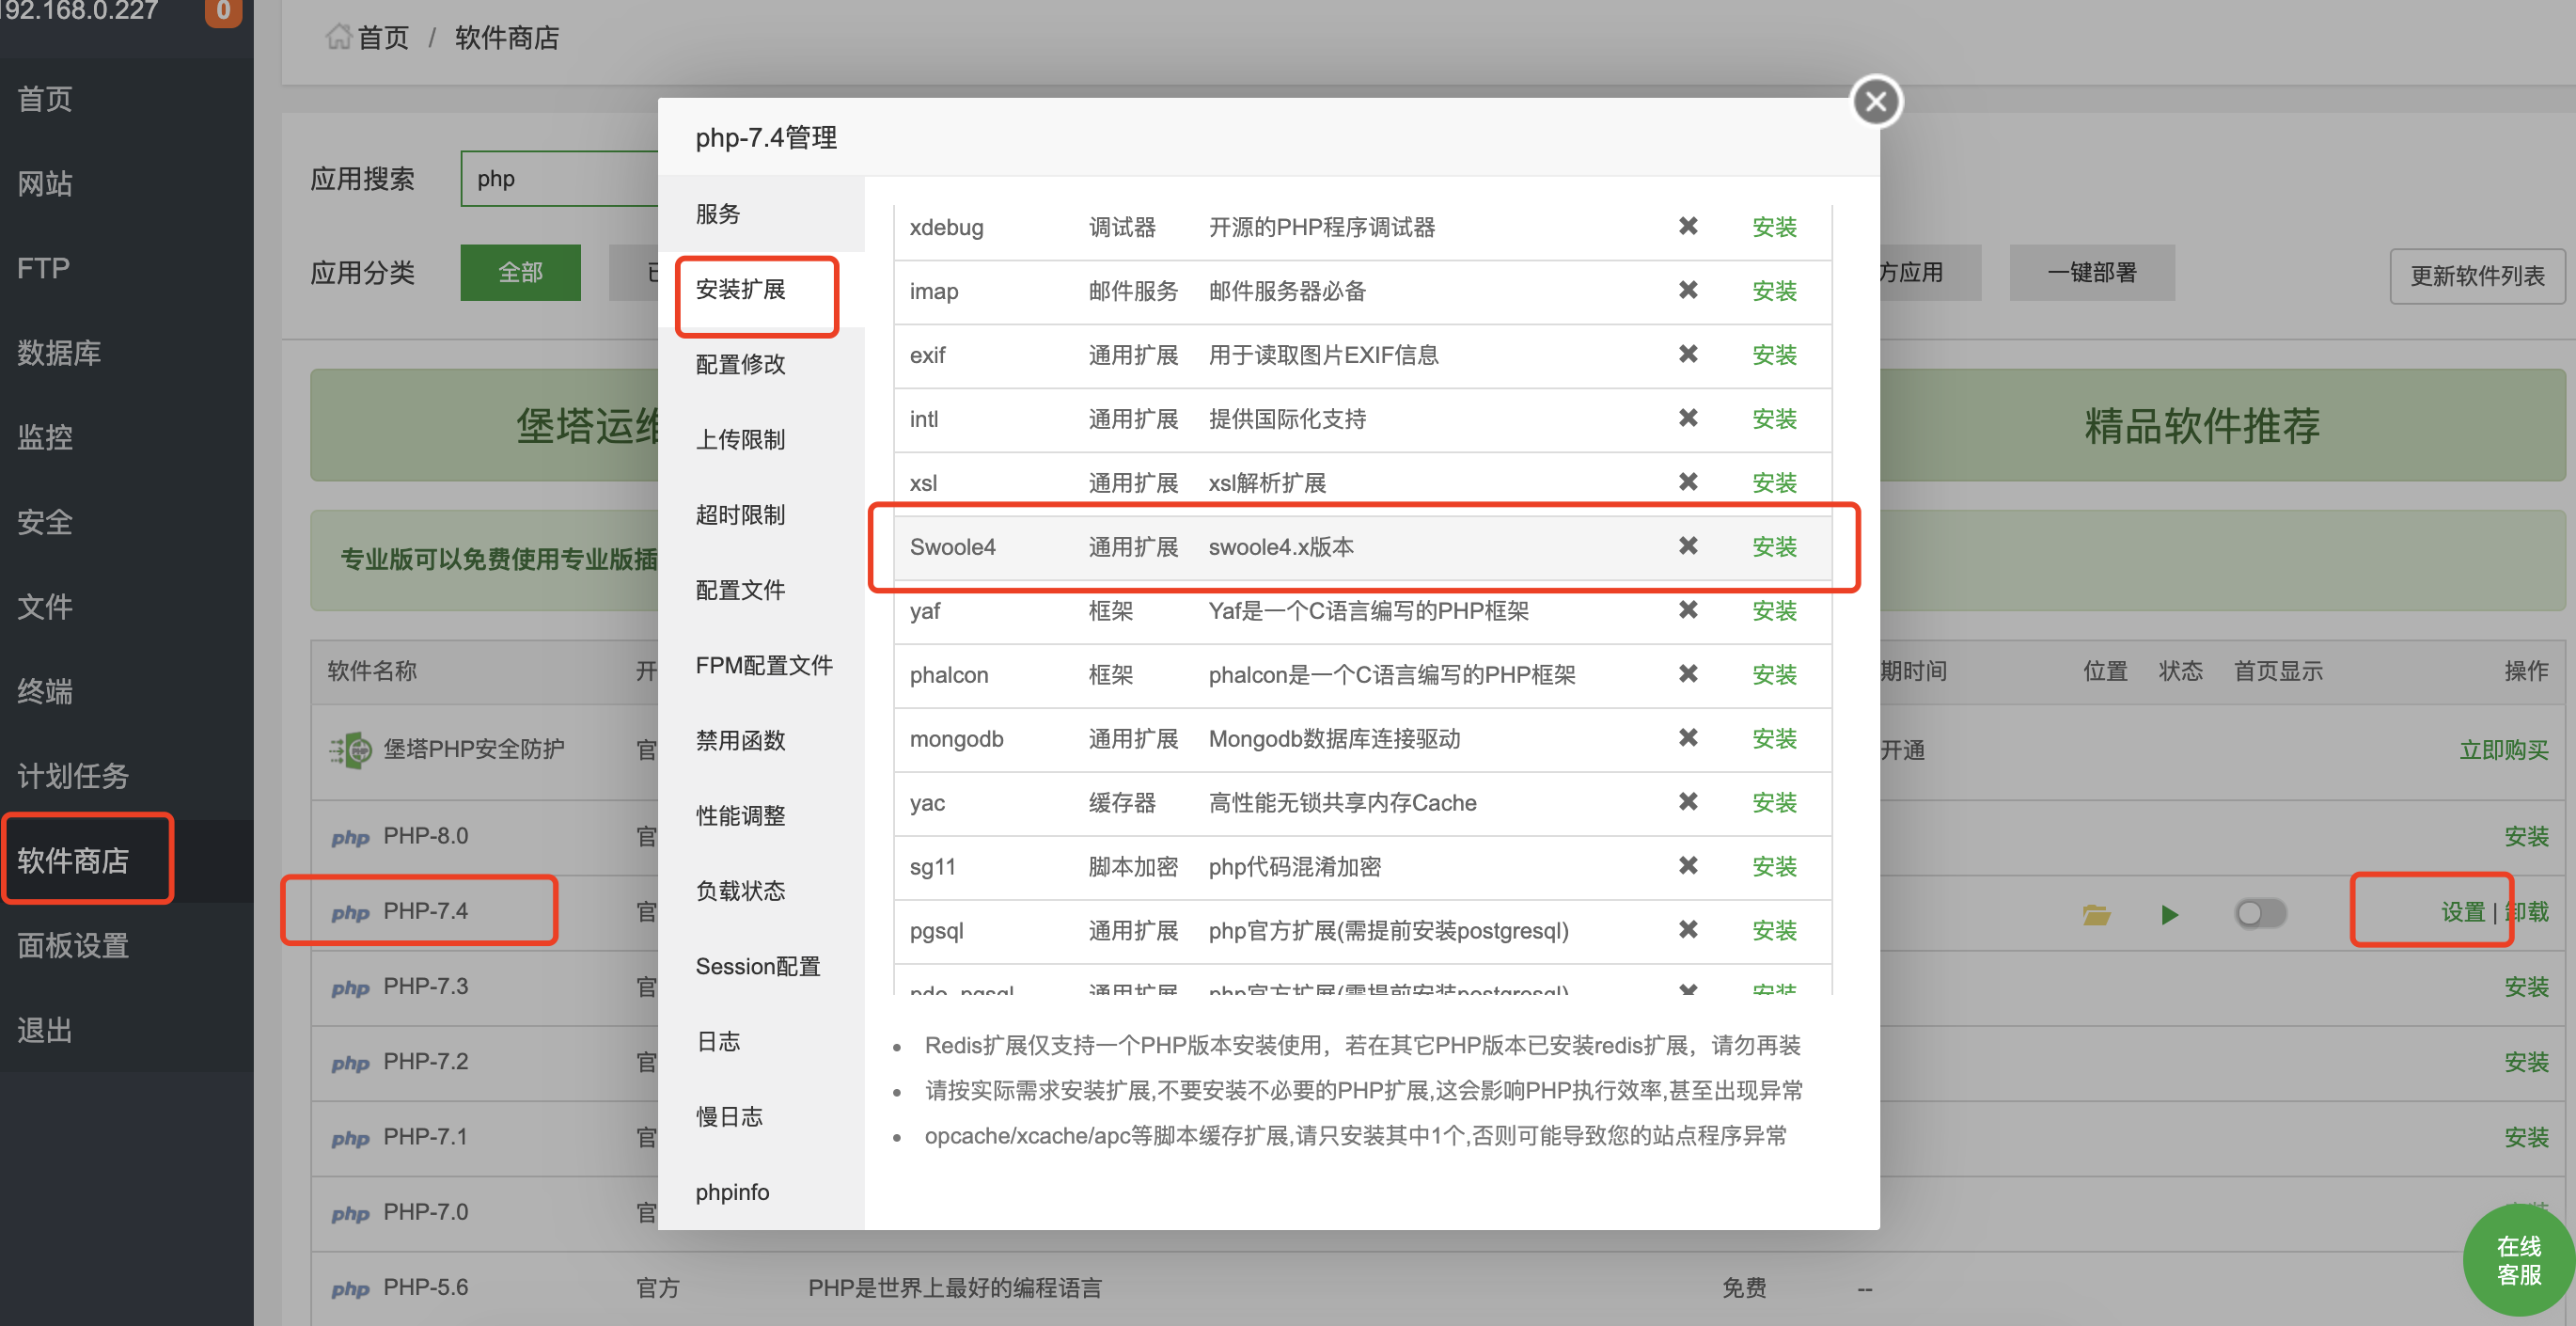
- 宝塔面板->软件商店->PHP-7.4->配置文件-> 最后添加以下配置并保存
[swoole]
		extension = swoole.so
		swoole.use_shortname = off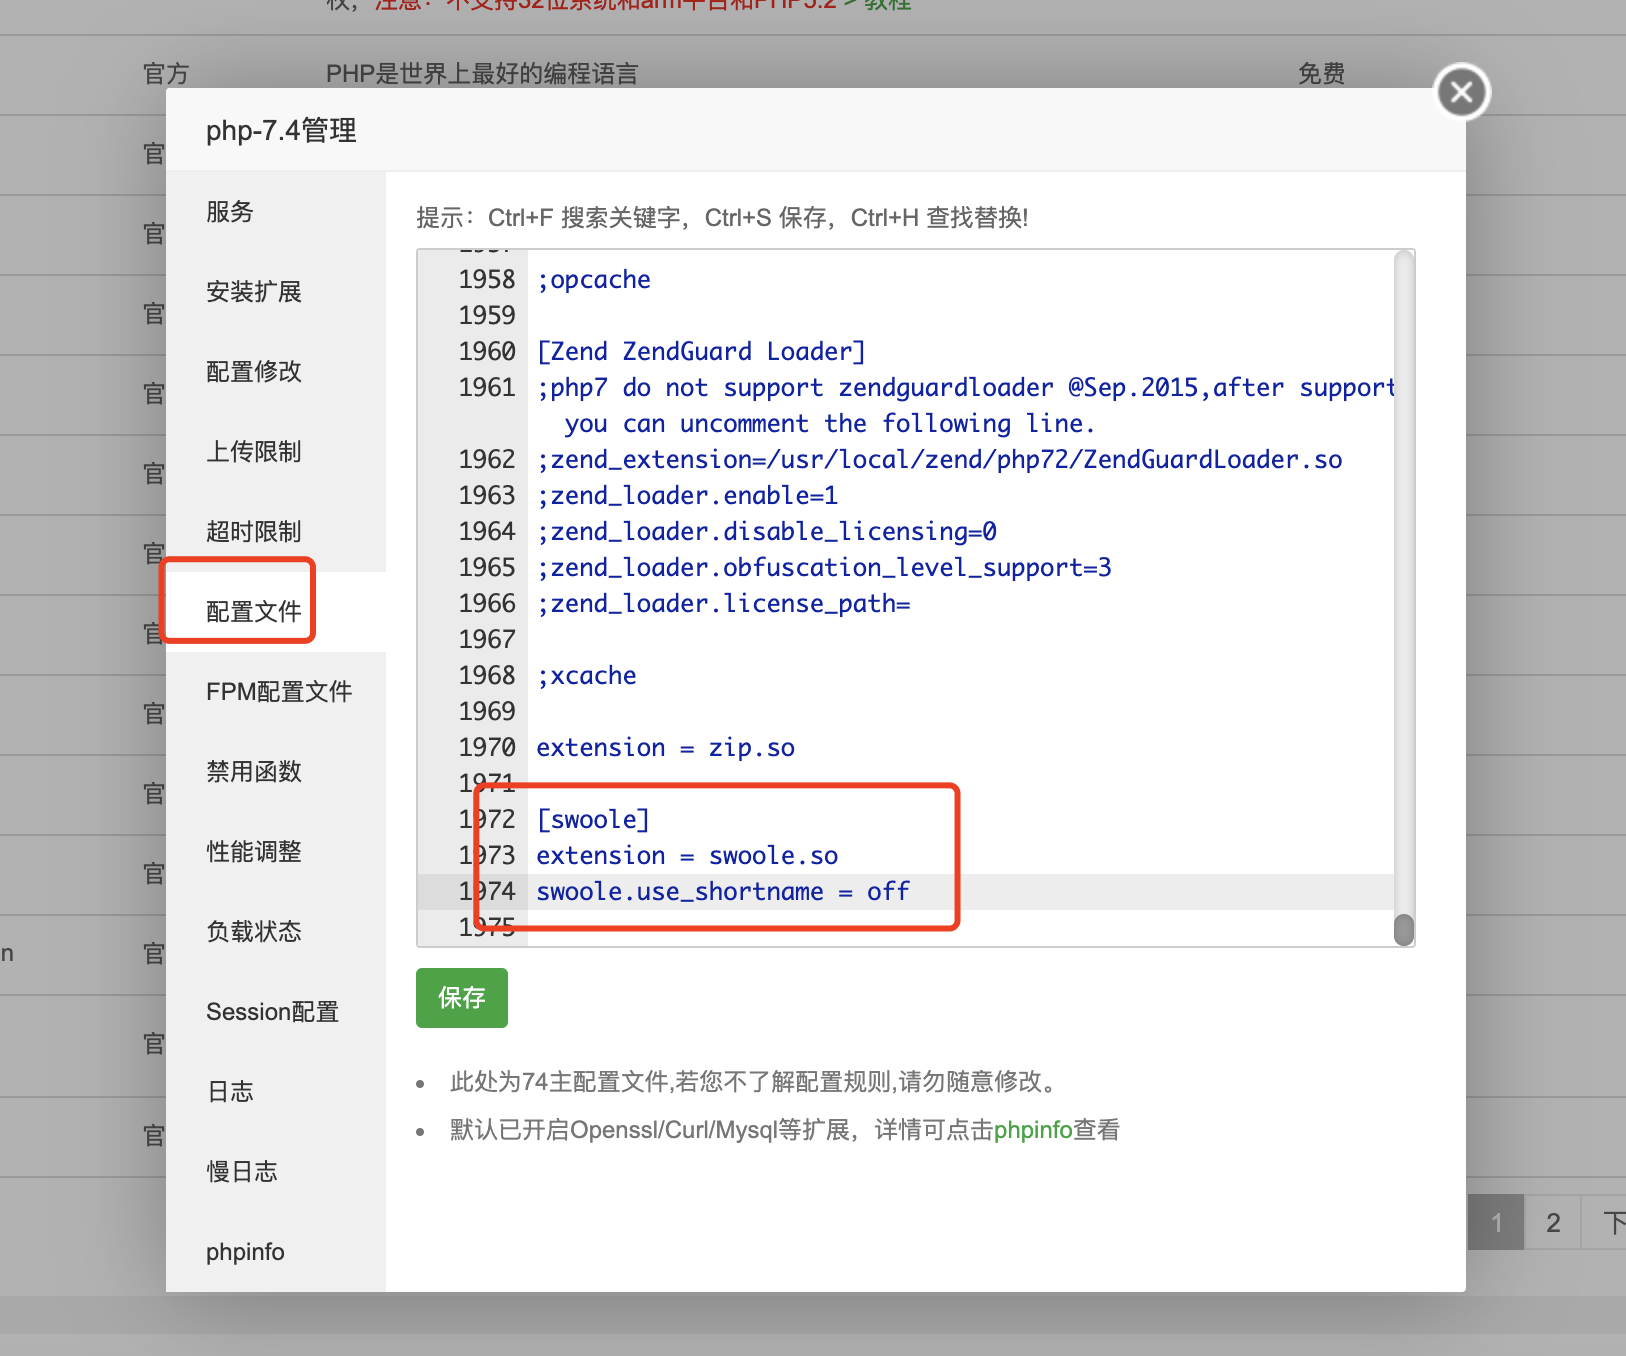
- 宝塔面板->软件商店->PHP-7.4->安装扩展->Swoole4
安装Redis
- 宝塔面板->软件商店->PHP-7.4->安装扩展->redis
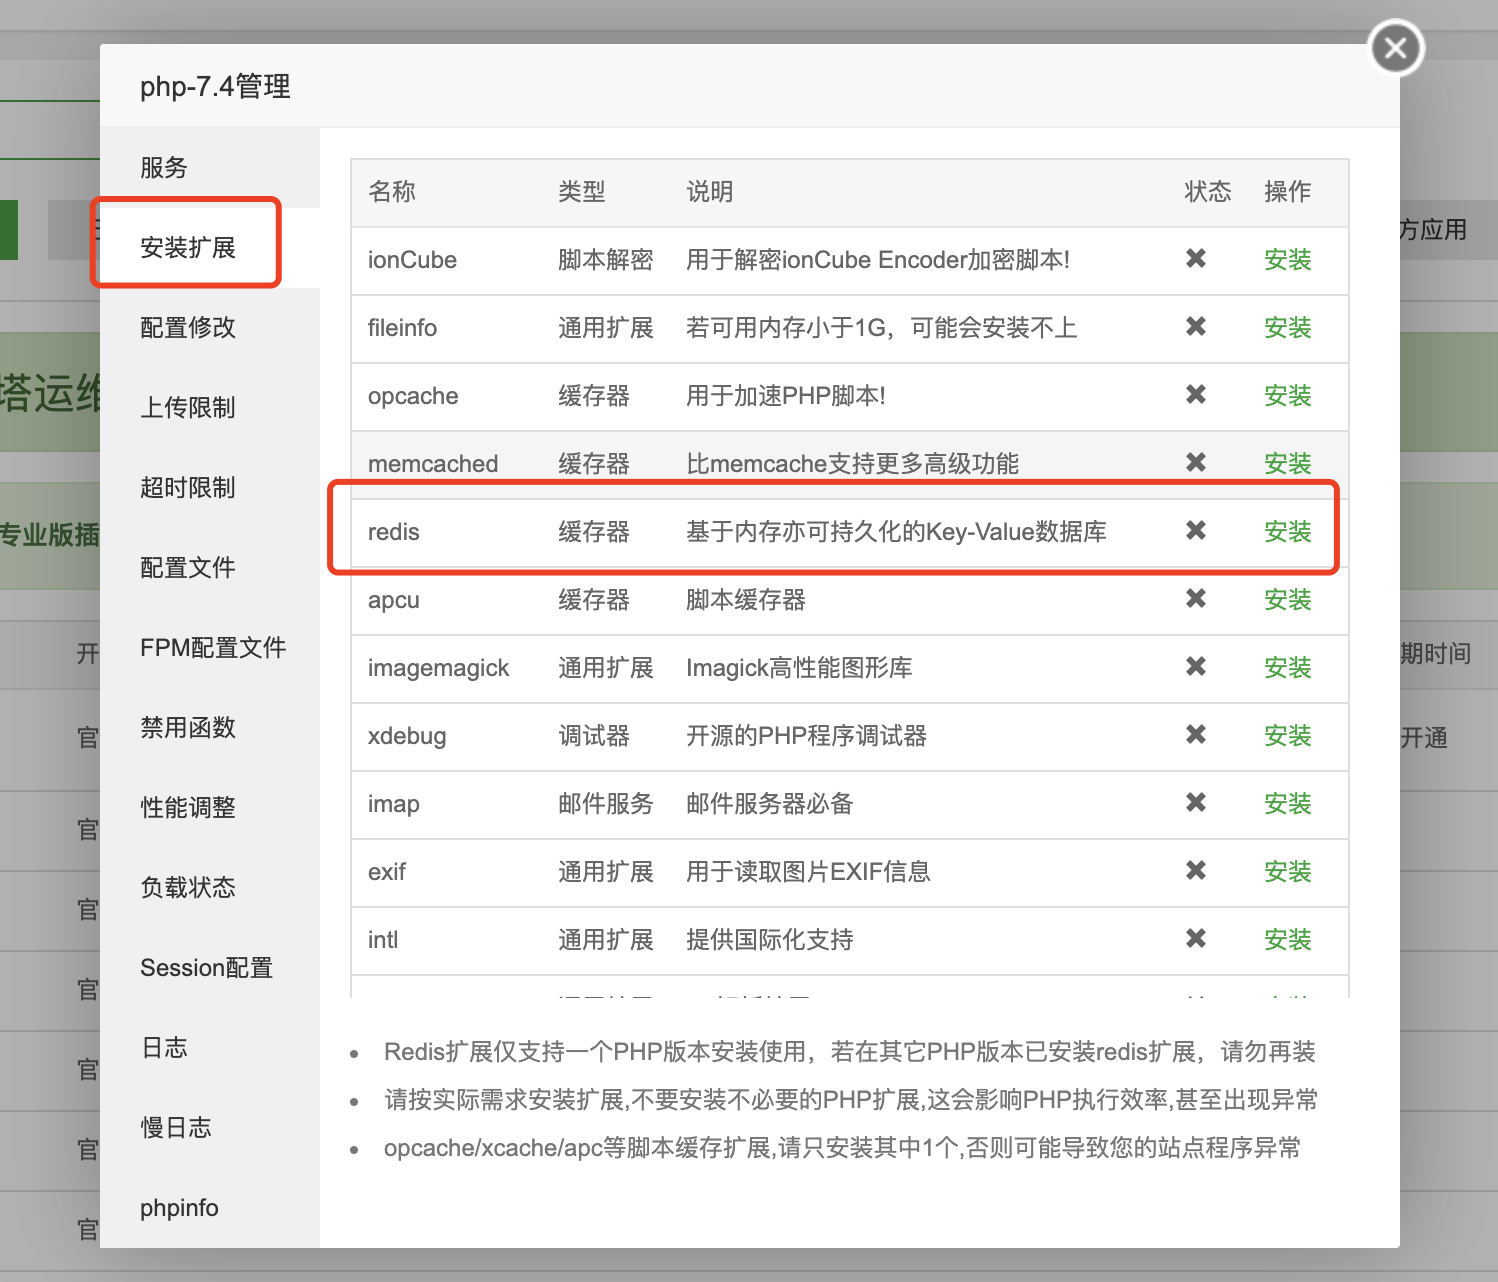
- 宝塔面板->软件商店->PHP-7.4->安装扩展->redis
安装php7-wxwork-finance-sdk
- 执行以下命令进行安装
~# cd /www
/www# git clone https://github.com/pangdahua/php7-wxwork-finance-sdk.git
/www# wget https://wwcdn.weixin.qq.com/node/wework/images/sdk_20200401.zip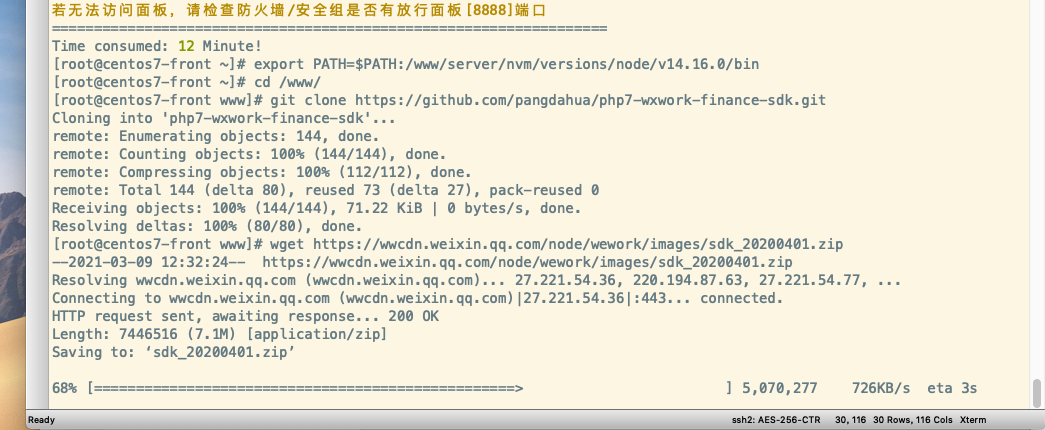
/www# unzip sdk_20200401.zip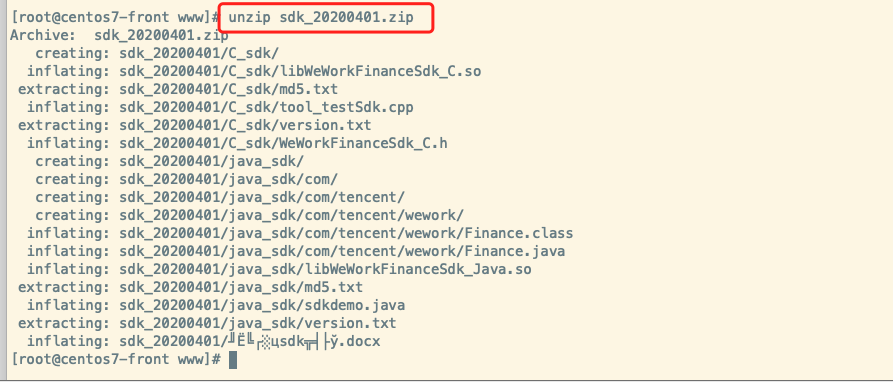
/www# cd php7-wxwork-finance-sdk
/www/php7-wxwork-finance-sdk# /www/server/php/74/bin/phpize
/www/php7-wxwork-finance-sdk# ./configure --with-php-config=/www/server/php/74/bin/php-config --with-wxwork-finance-sdk=/www/sdk_20200401/C_sdk
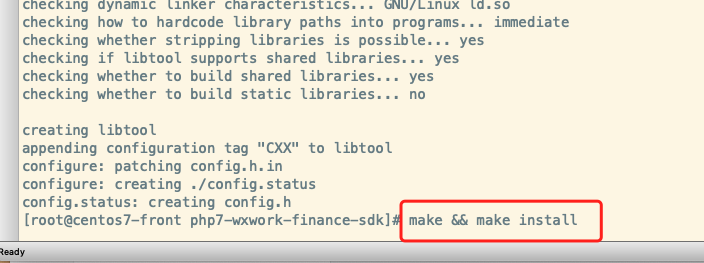
/www/php7-wxwork-finance-sdk# make && make install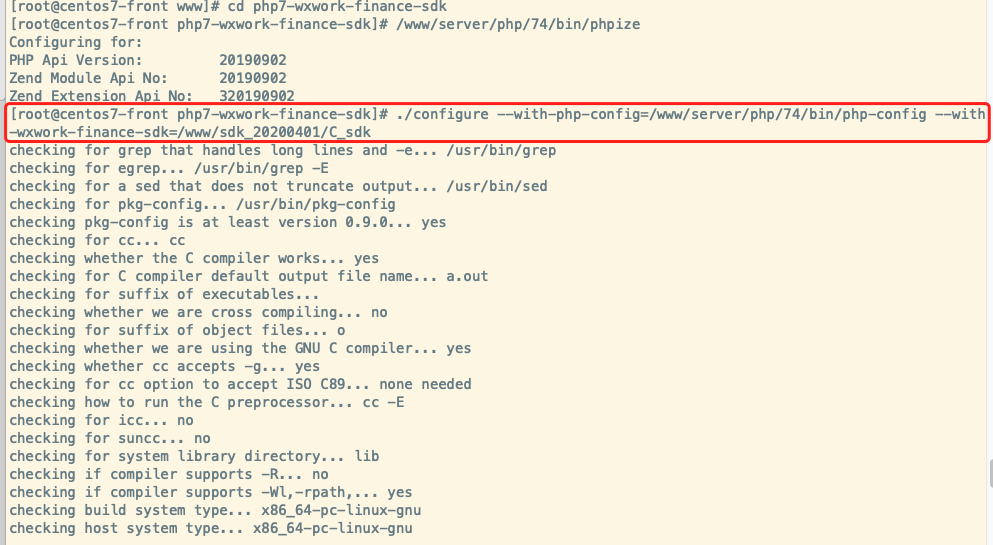
- 宝塔面板->软件商店->PHP-7.4->配置文件->最后面添加以下配置并保存
[wxwork_finance_sdk]
		extension=wxwork_finance_sdk.so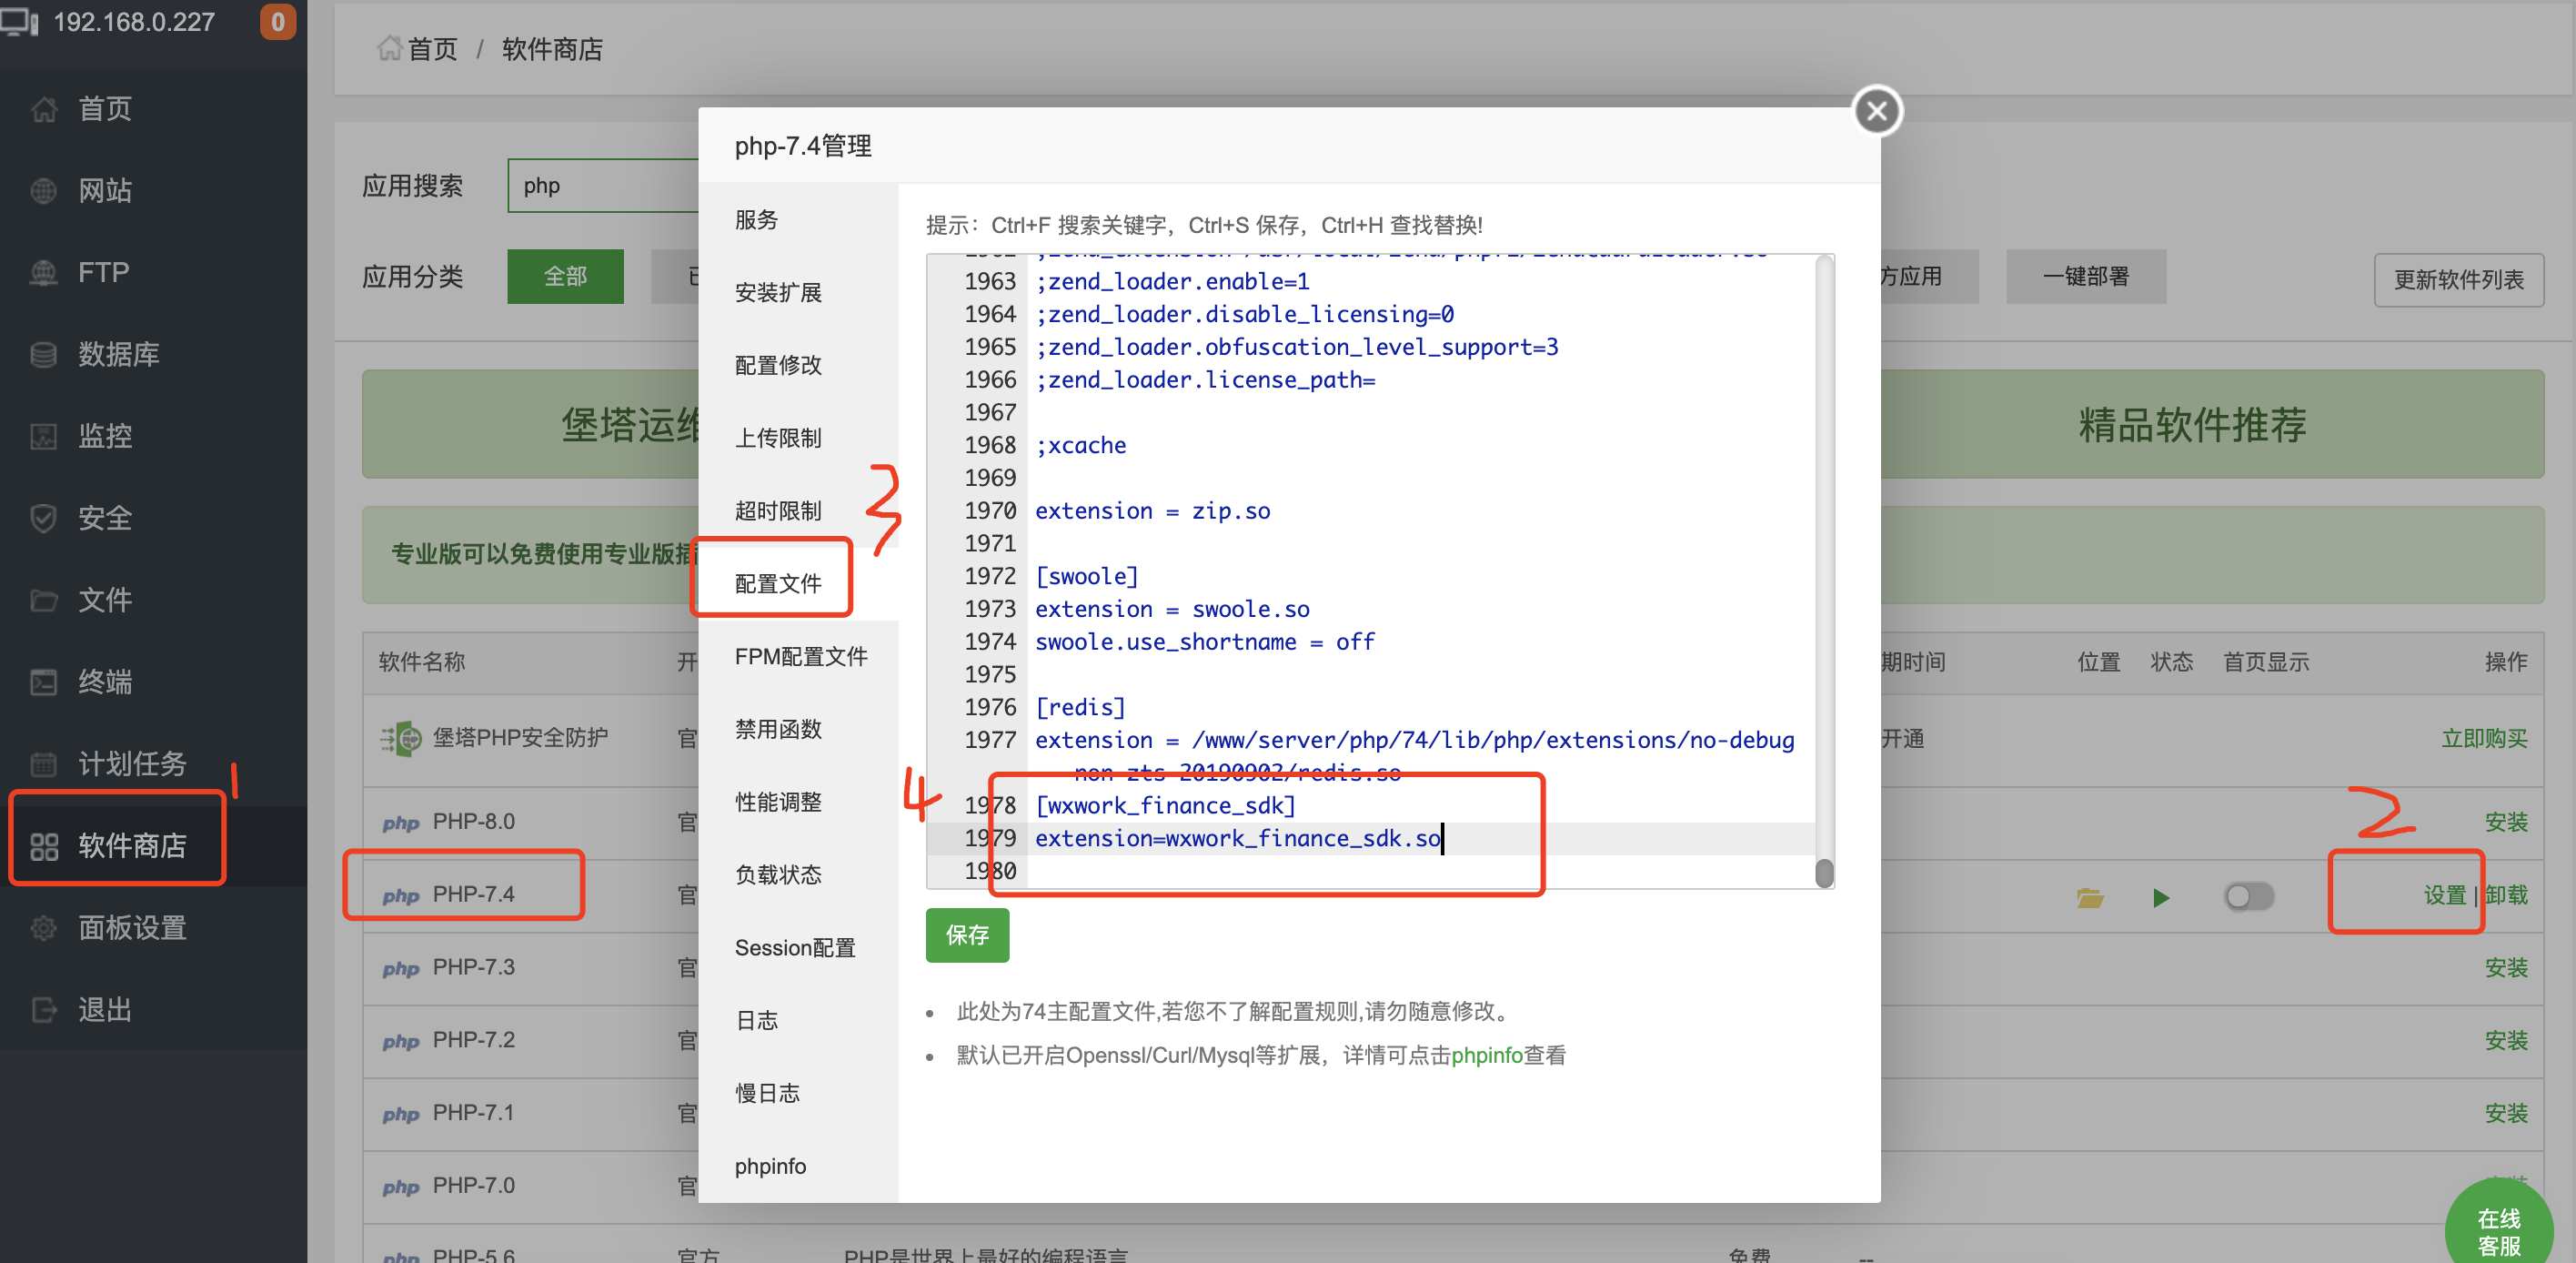
安装php7-wxwork-finance-sdk 旗舰版和开源版可以不安装该扩展
- 执行以下命令进行安装
wget https://oss.mo.chat/rpm/swoole_loader74.so 找到 php 放扩展的目录,cp当前swoole_loader74.so 进去- 宝塔面板->软件商店->PHP-7.4->配置文件->最后面添加以下配置并保存
extension=swoole_loader74.so安装fileinfo
- 宝塔面板->软件商店->PHP-7.4->安装扩展->fileinfo
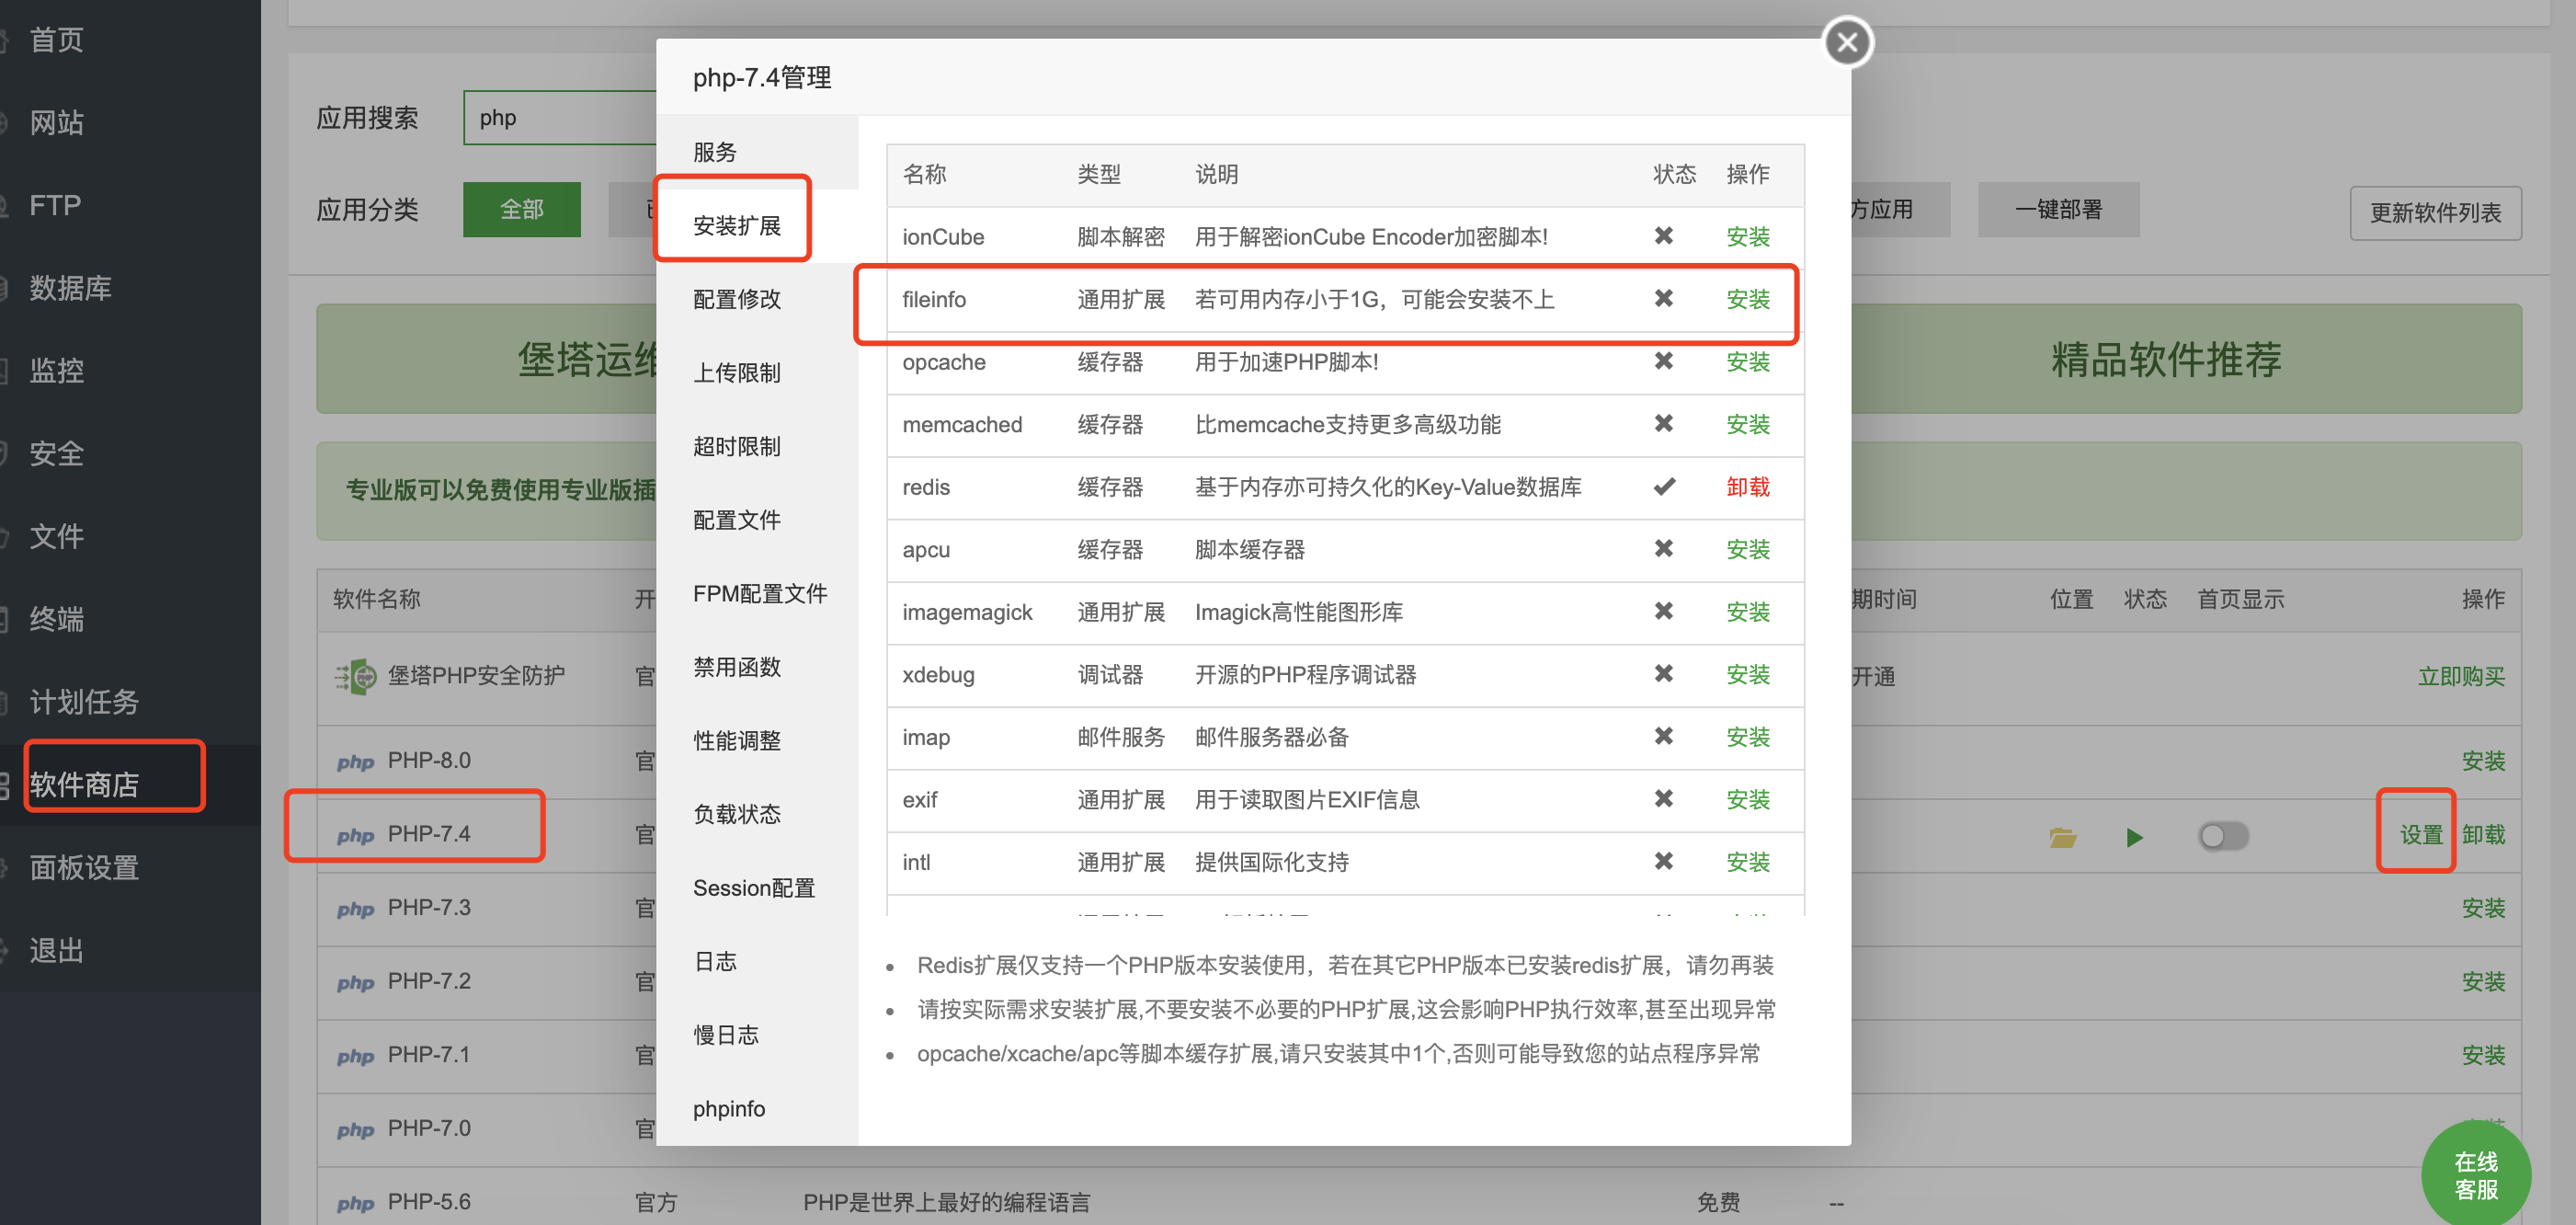
- 宝塔面板->软件商店->PHP-7.4->安装扩展->fileinfo
安装ffmpeg
- 执行以下命令进行安装
/www# cd /www
/www# wget https://ffmpeg.org/releases/ffmpeg-snapshot.tar.bz2
/www# tar -jxvf ffmpeg-snapshot.tar.bz2
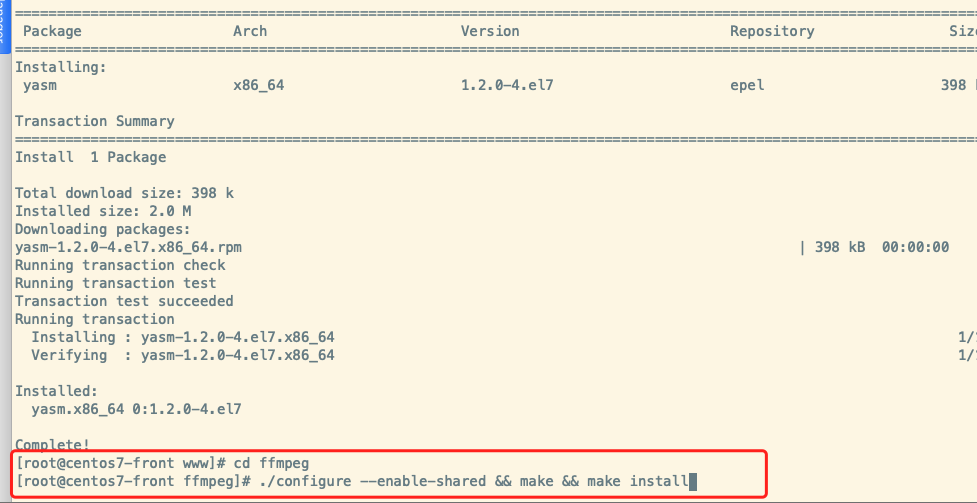
/www# yum install yasm -y
/www# cd ffmpeg
/www/ffmpeg# ./configure --enable-shared && make && make install
## 验证
/www/ffmpeg# ffmpeg -version

## 提示错误
ffmpeg: error while loading shared libraries: libavdevice.so.58: cannot open shared object file: No such file or directory

## 查找错误原因
/www/ffmpeg# ldd ffmpeg

## 查找缺失文件
/www/ffmpeg# find /usr -name 'libavdevice.so.58'

## 得到文件路径
/usr/local/lib/libavdevice.so.58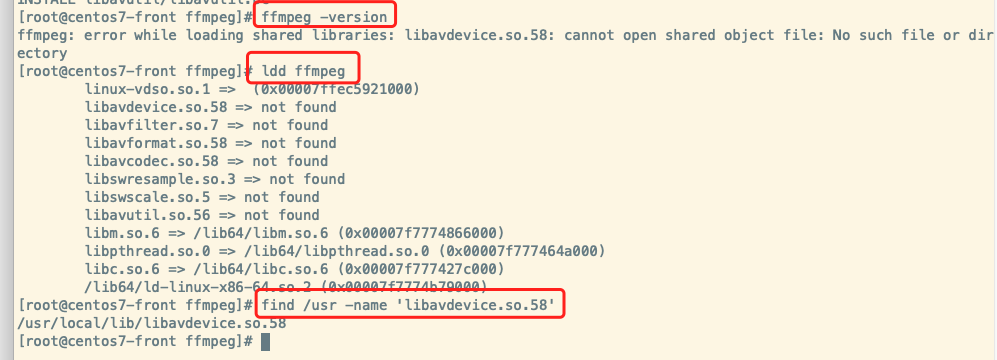
## 添加
export LD_LIBRARY_PATH=/usr/local/lib/
## 完成
/www/ffmpeg# ffmpeg -version
确认相关环境正确安装(https://mochat.wiki (opens new window))
- 查看 PHP 版本是否正确,需 >= 7.2,建议 7.4
php -v
- 查看 Swoole 版本安装是否正确,并确定
swoole.use_shortname参数值为Off
php --ri swoole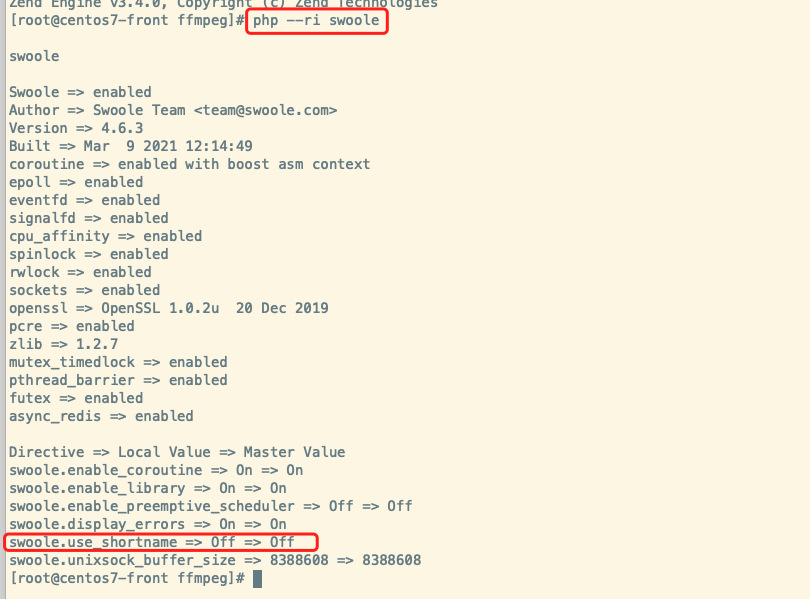
- 查看 Reids wxwork_finance_sdk 扩展是否正确安装
php --ri redis
php --ri wxwork_finance_sdk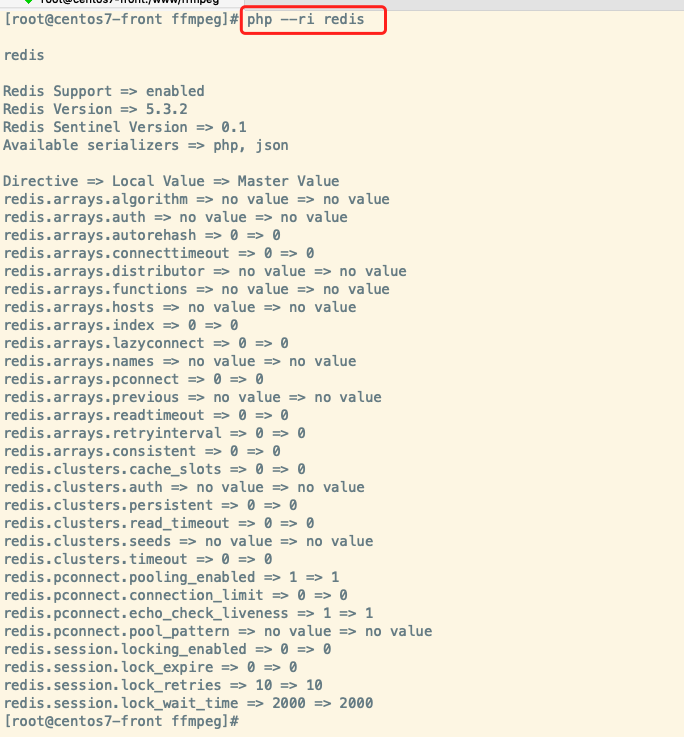

- 查看FFMpeg
ffmpeg -version
- 确保内存大于 1024M
php -i | grep memory_limit
# 安装项目
安装MoChat后端
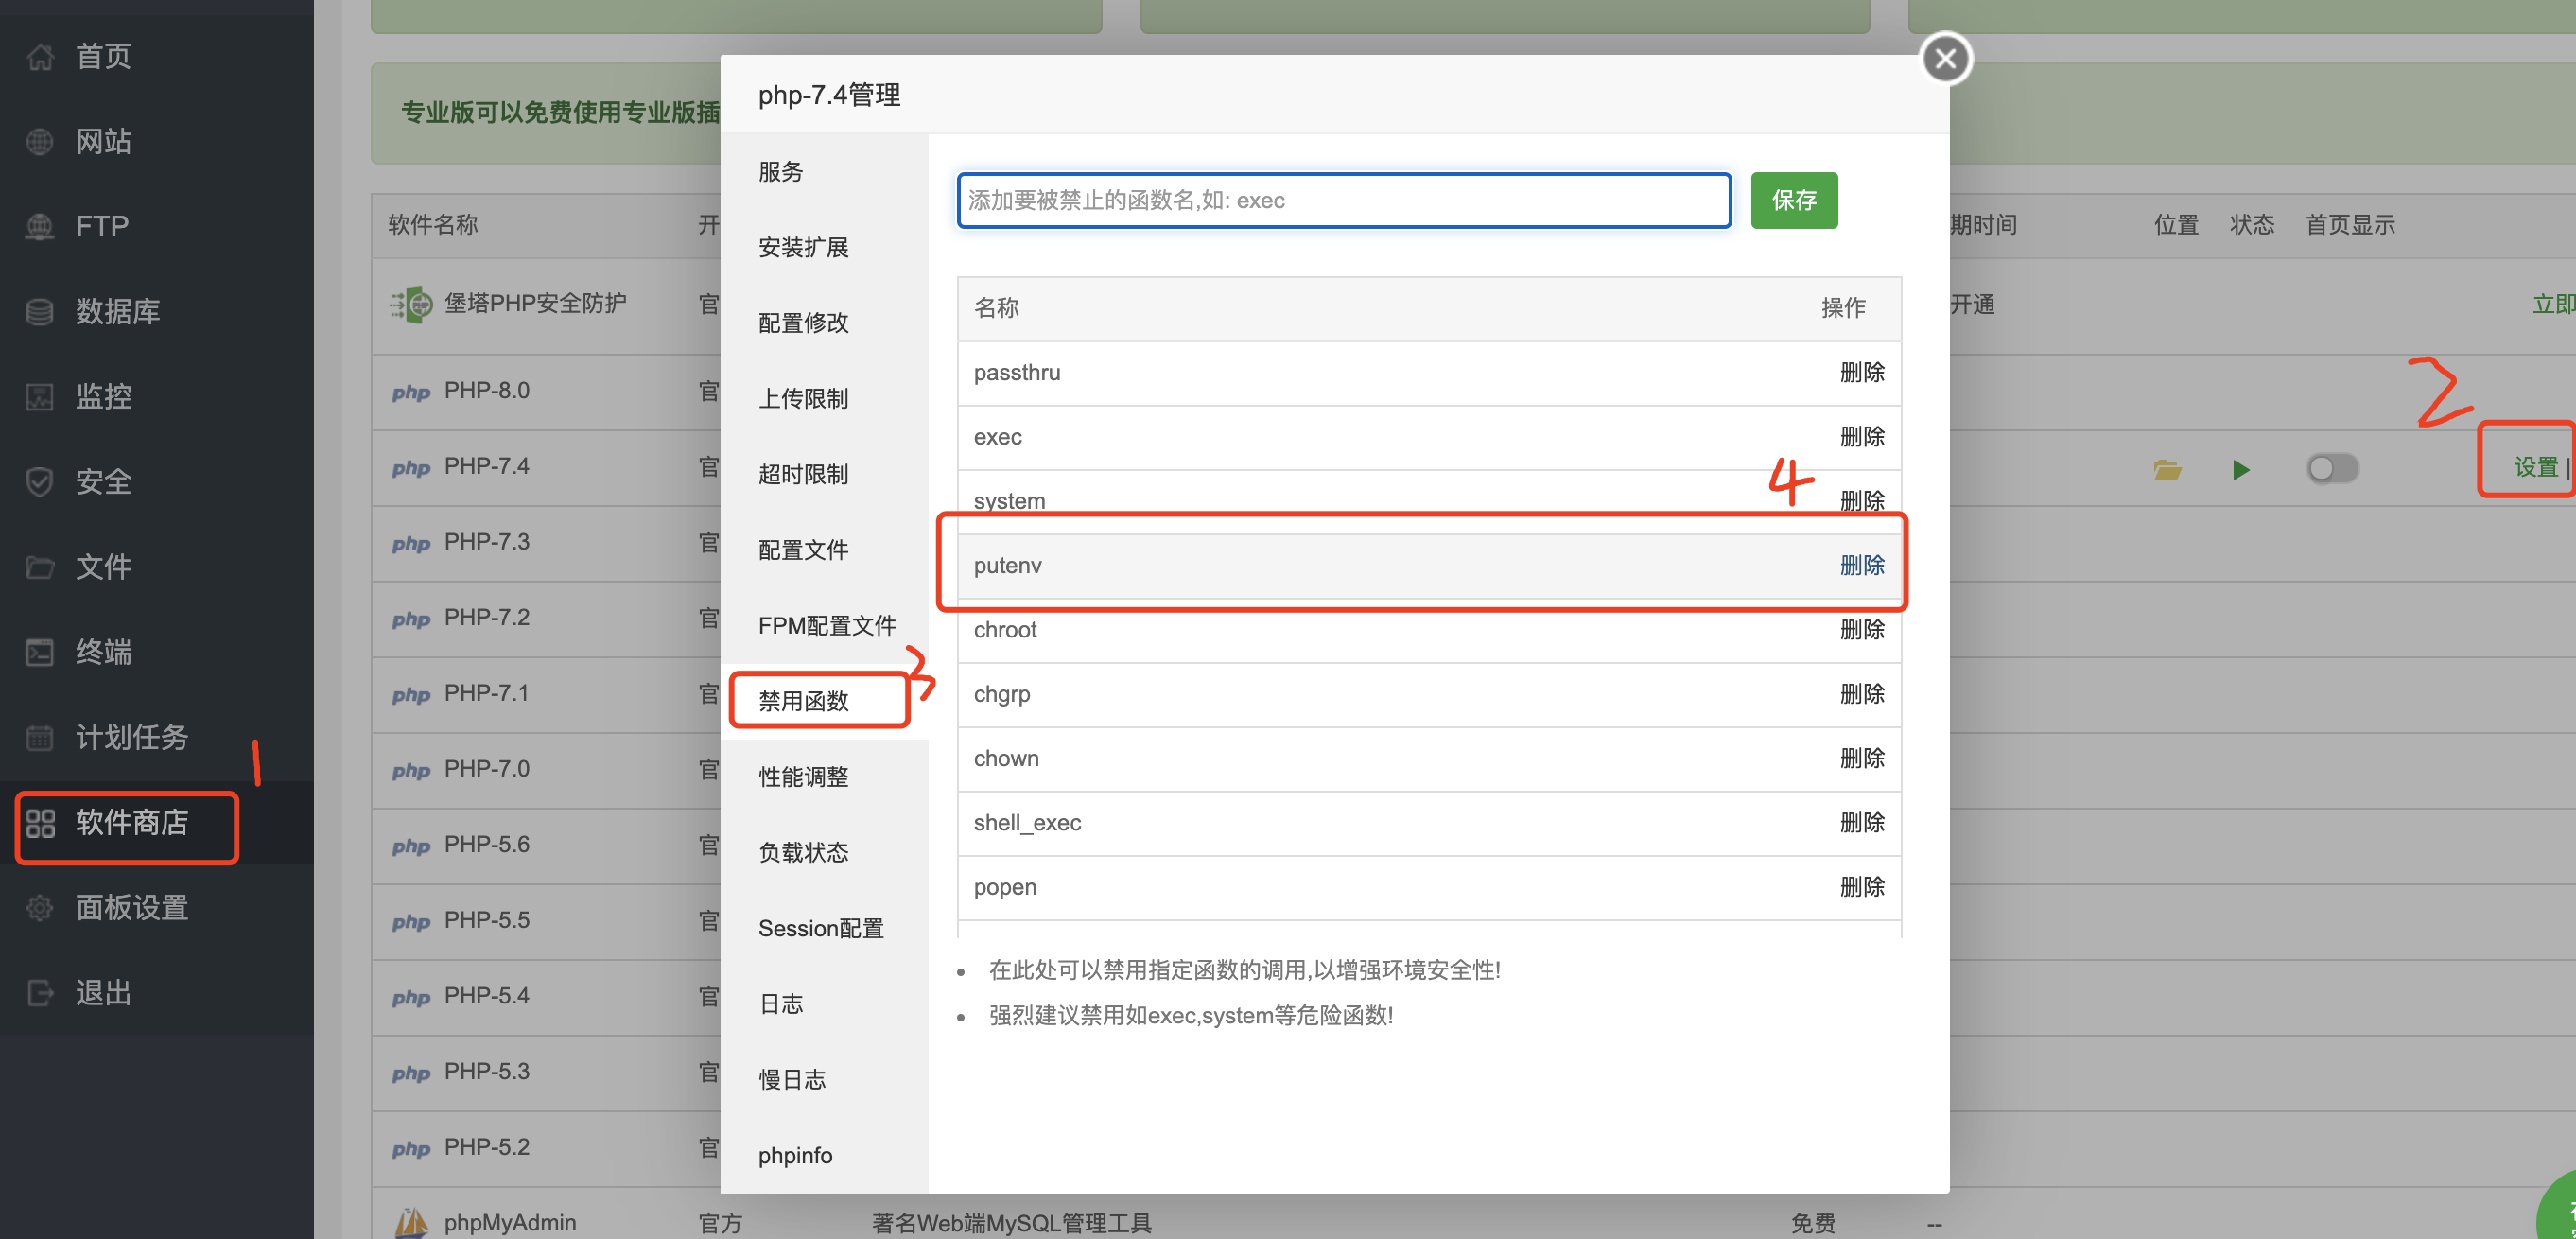
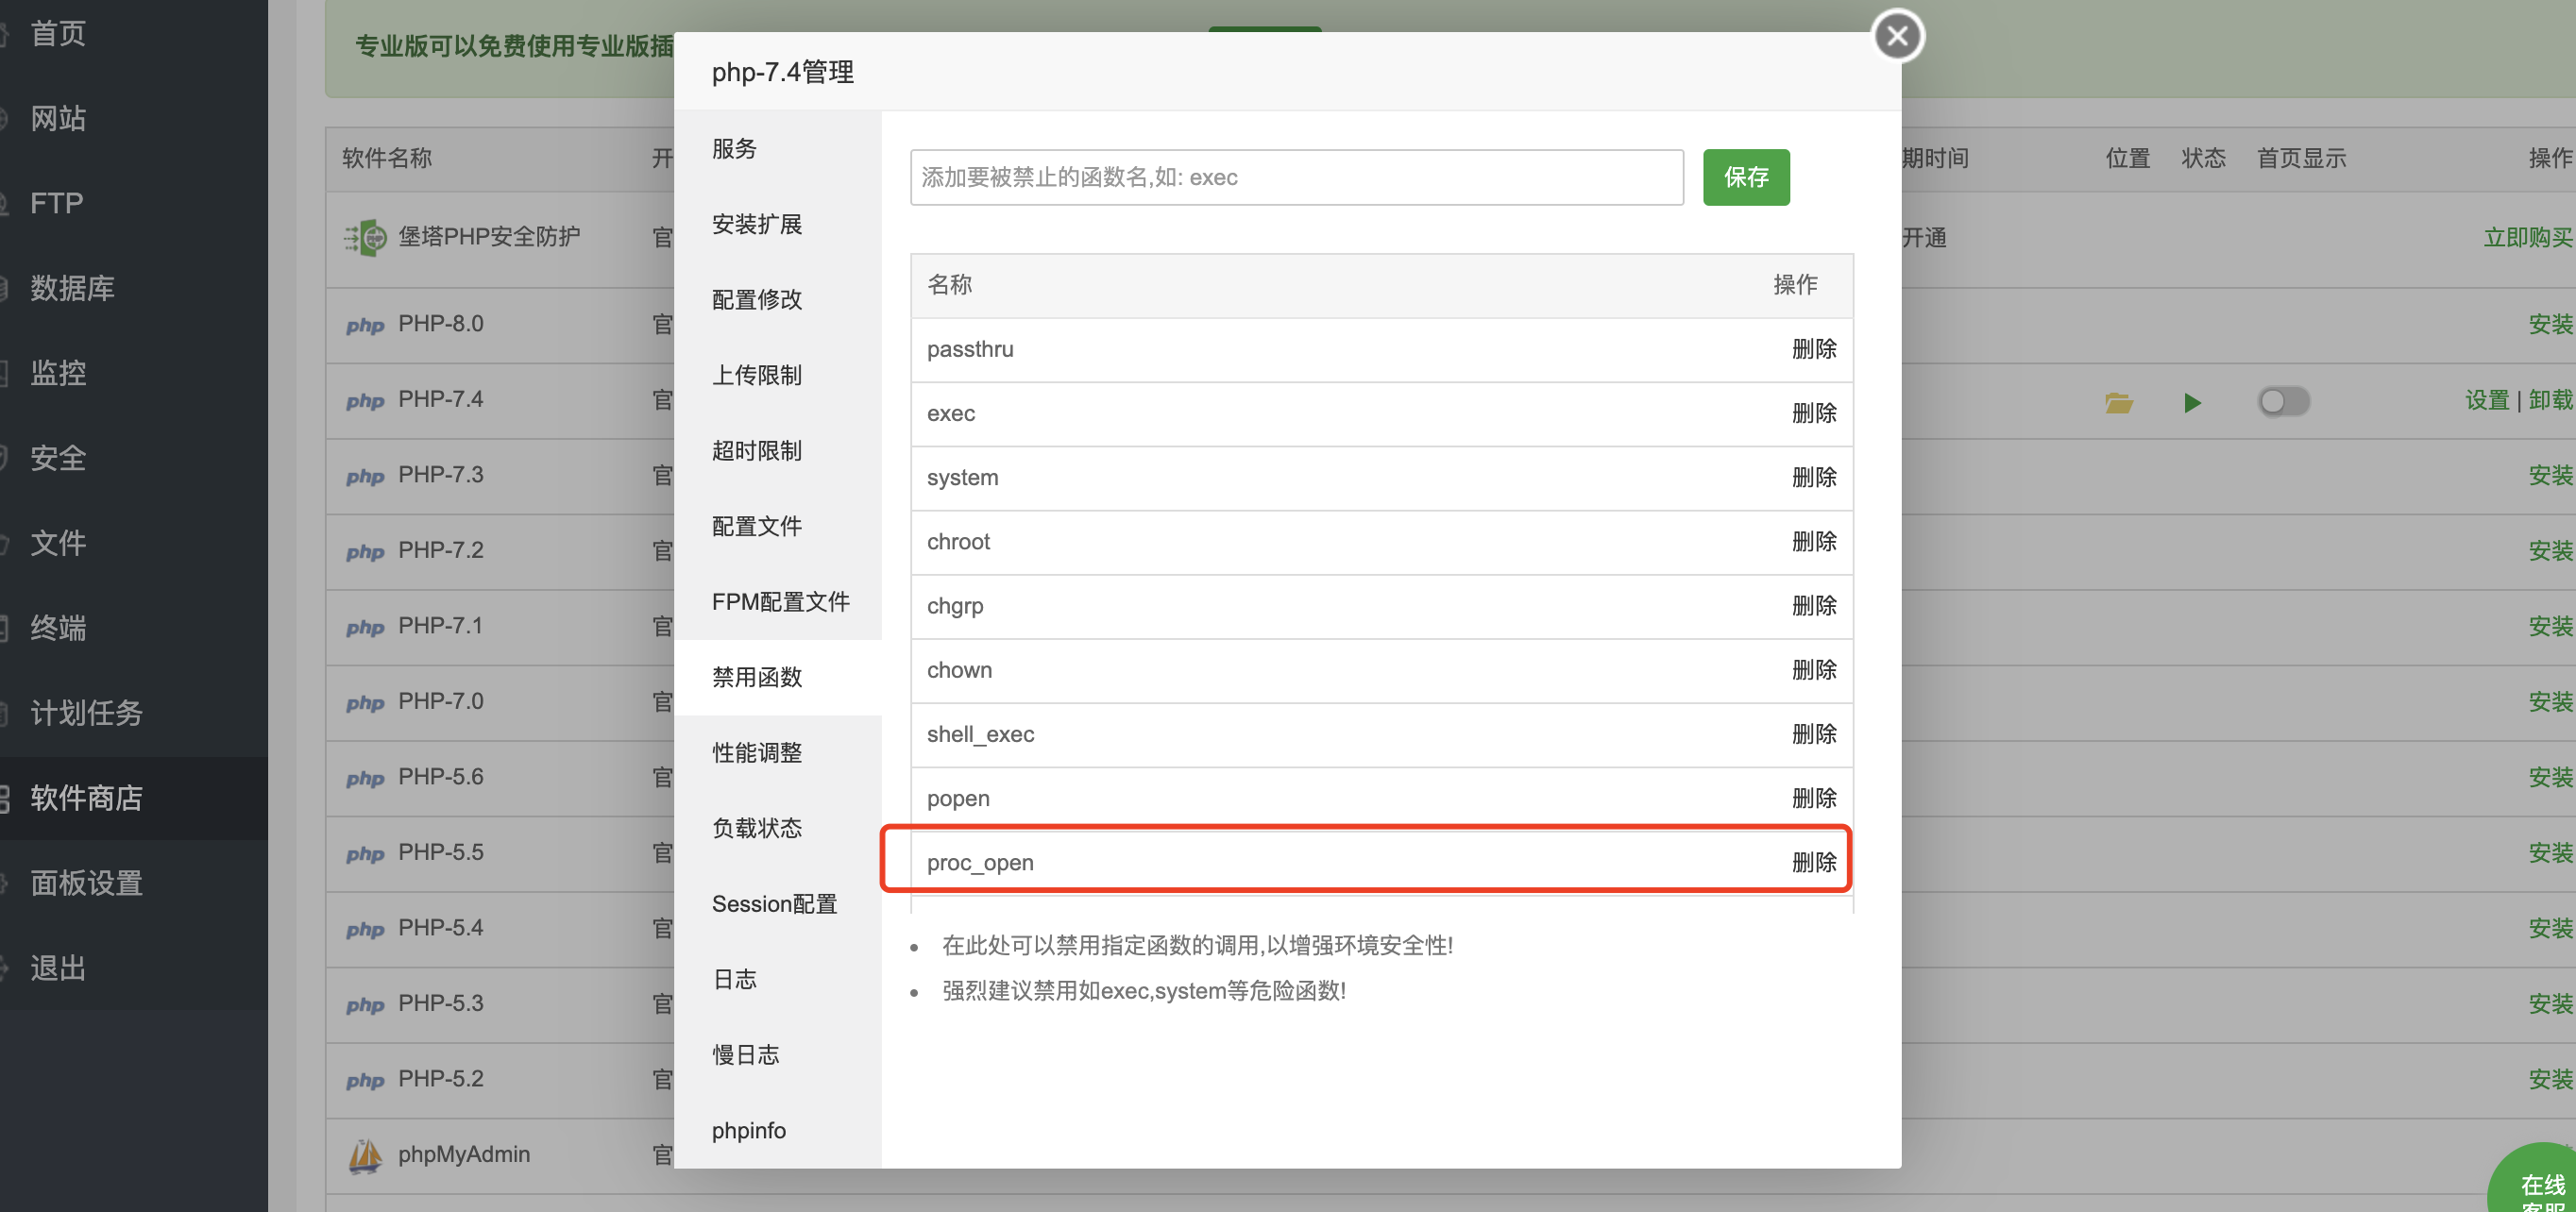
- 宝塔面板->软件商店->PHP-7.4->禁用函数->删除symlink,putenv,proc_open,pcntl系列函数
- 执行以下命令安装项目
# composer config -g repo.packagist composer https://mirrors.aliyun.com/composer
# /usr/bin/composer self-update
# cd /www/wwwroot
# git clone https://github.com/mochat-cloud/mochat.git
# cd /www/wwwroot/mochat/api-server
# composer install
# cp .env.example .env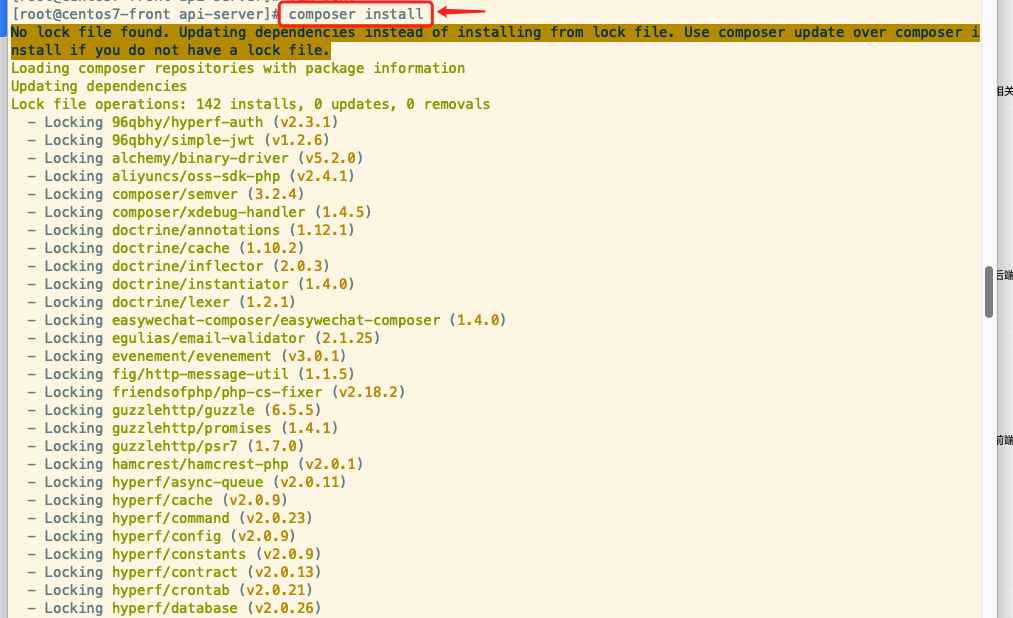
- 初始化项目,mysql数据库需要5.7版本及以上(5.7引入了json类型)执行以下命令:
# php bin/hyperf.php mc:init
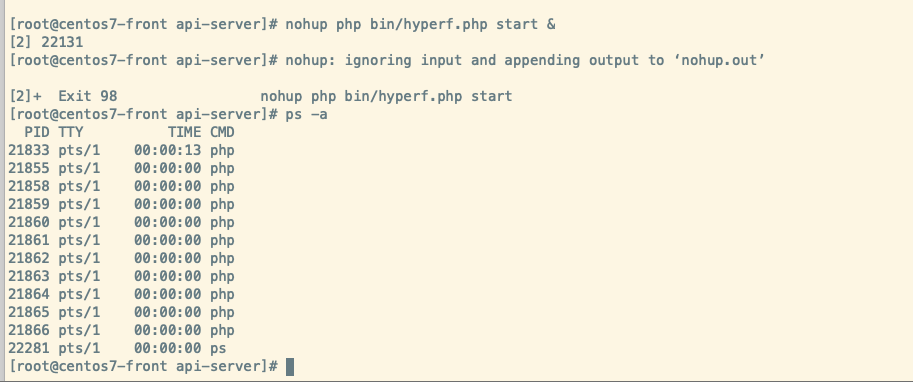
# php bin/hyperf.php server:start -d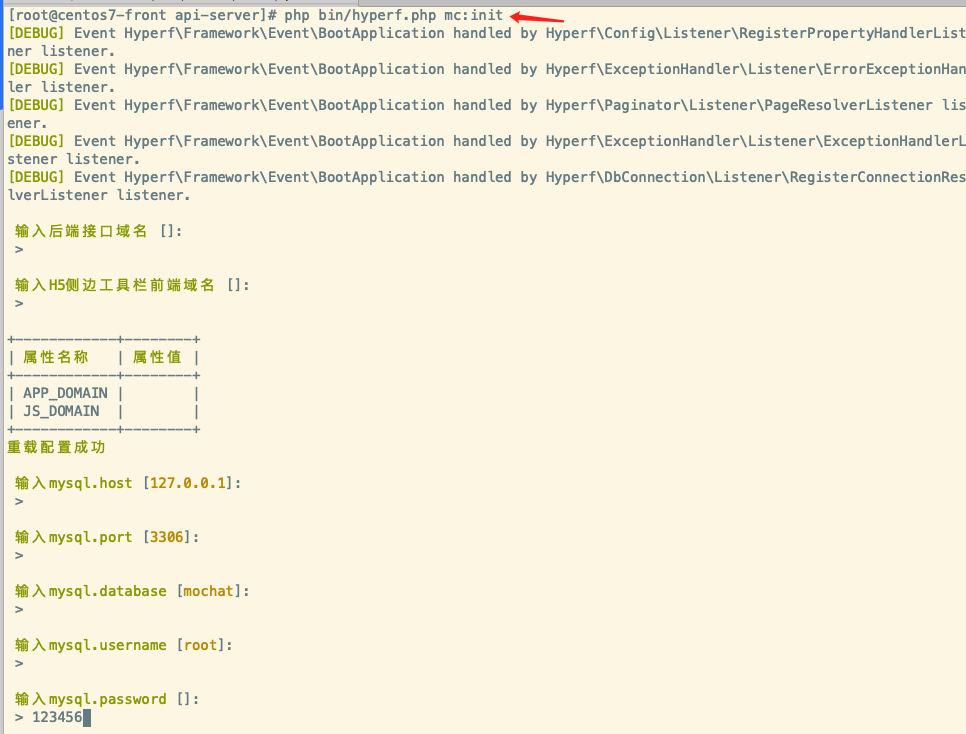
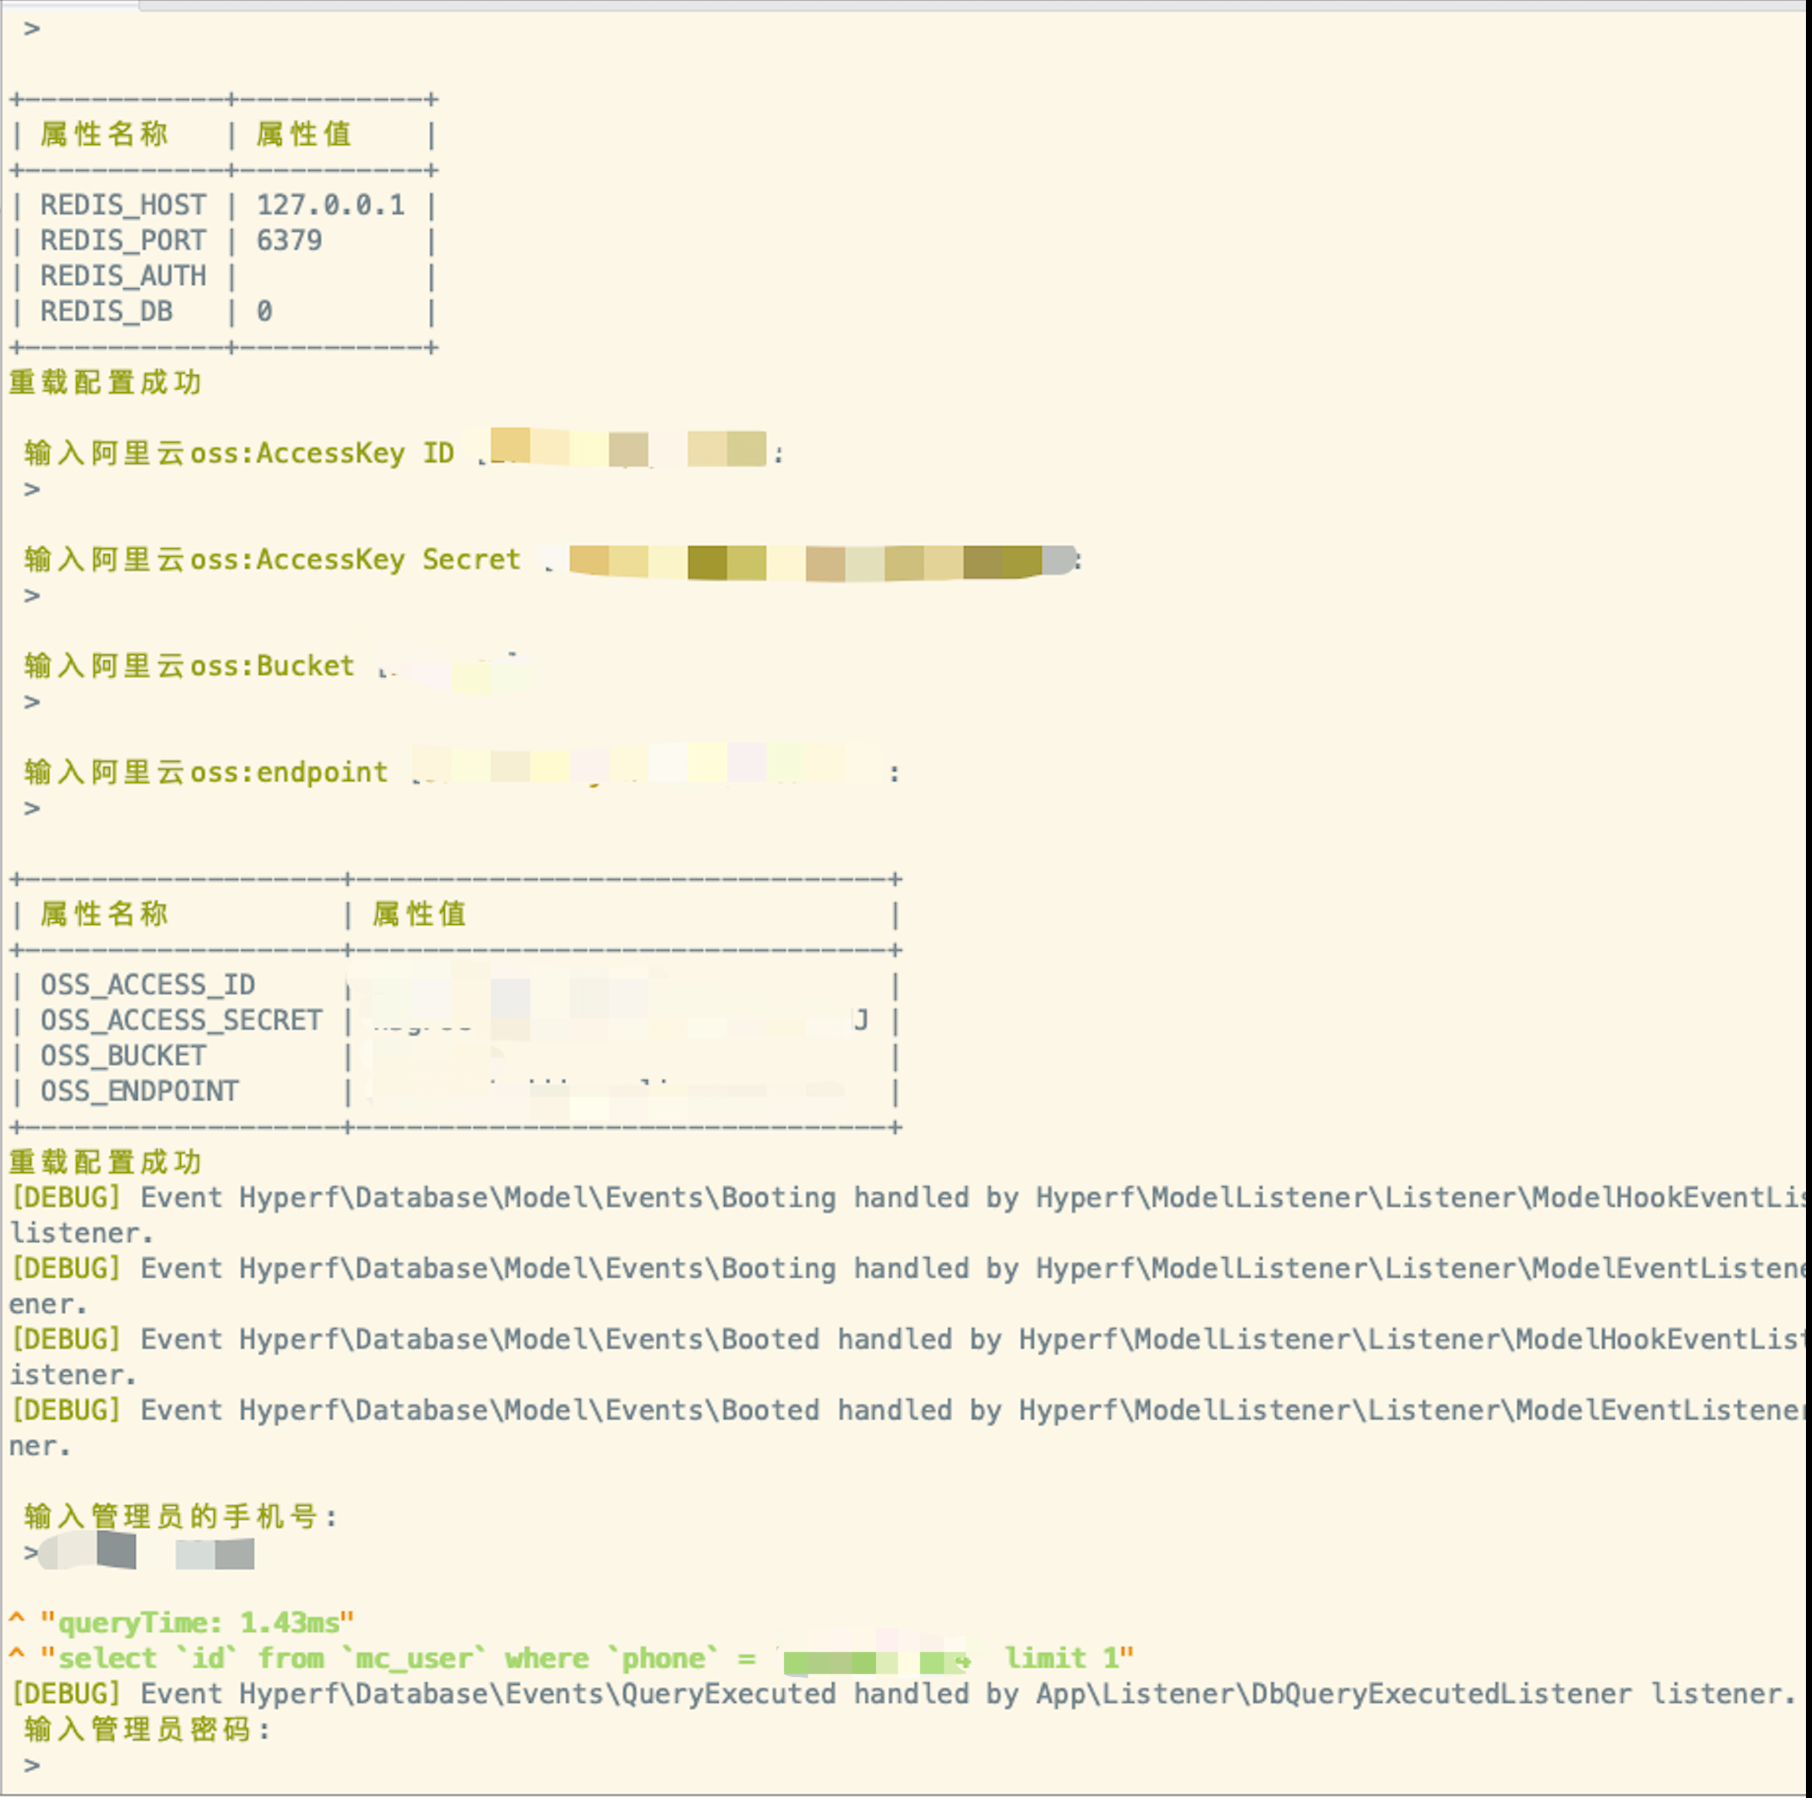

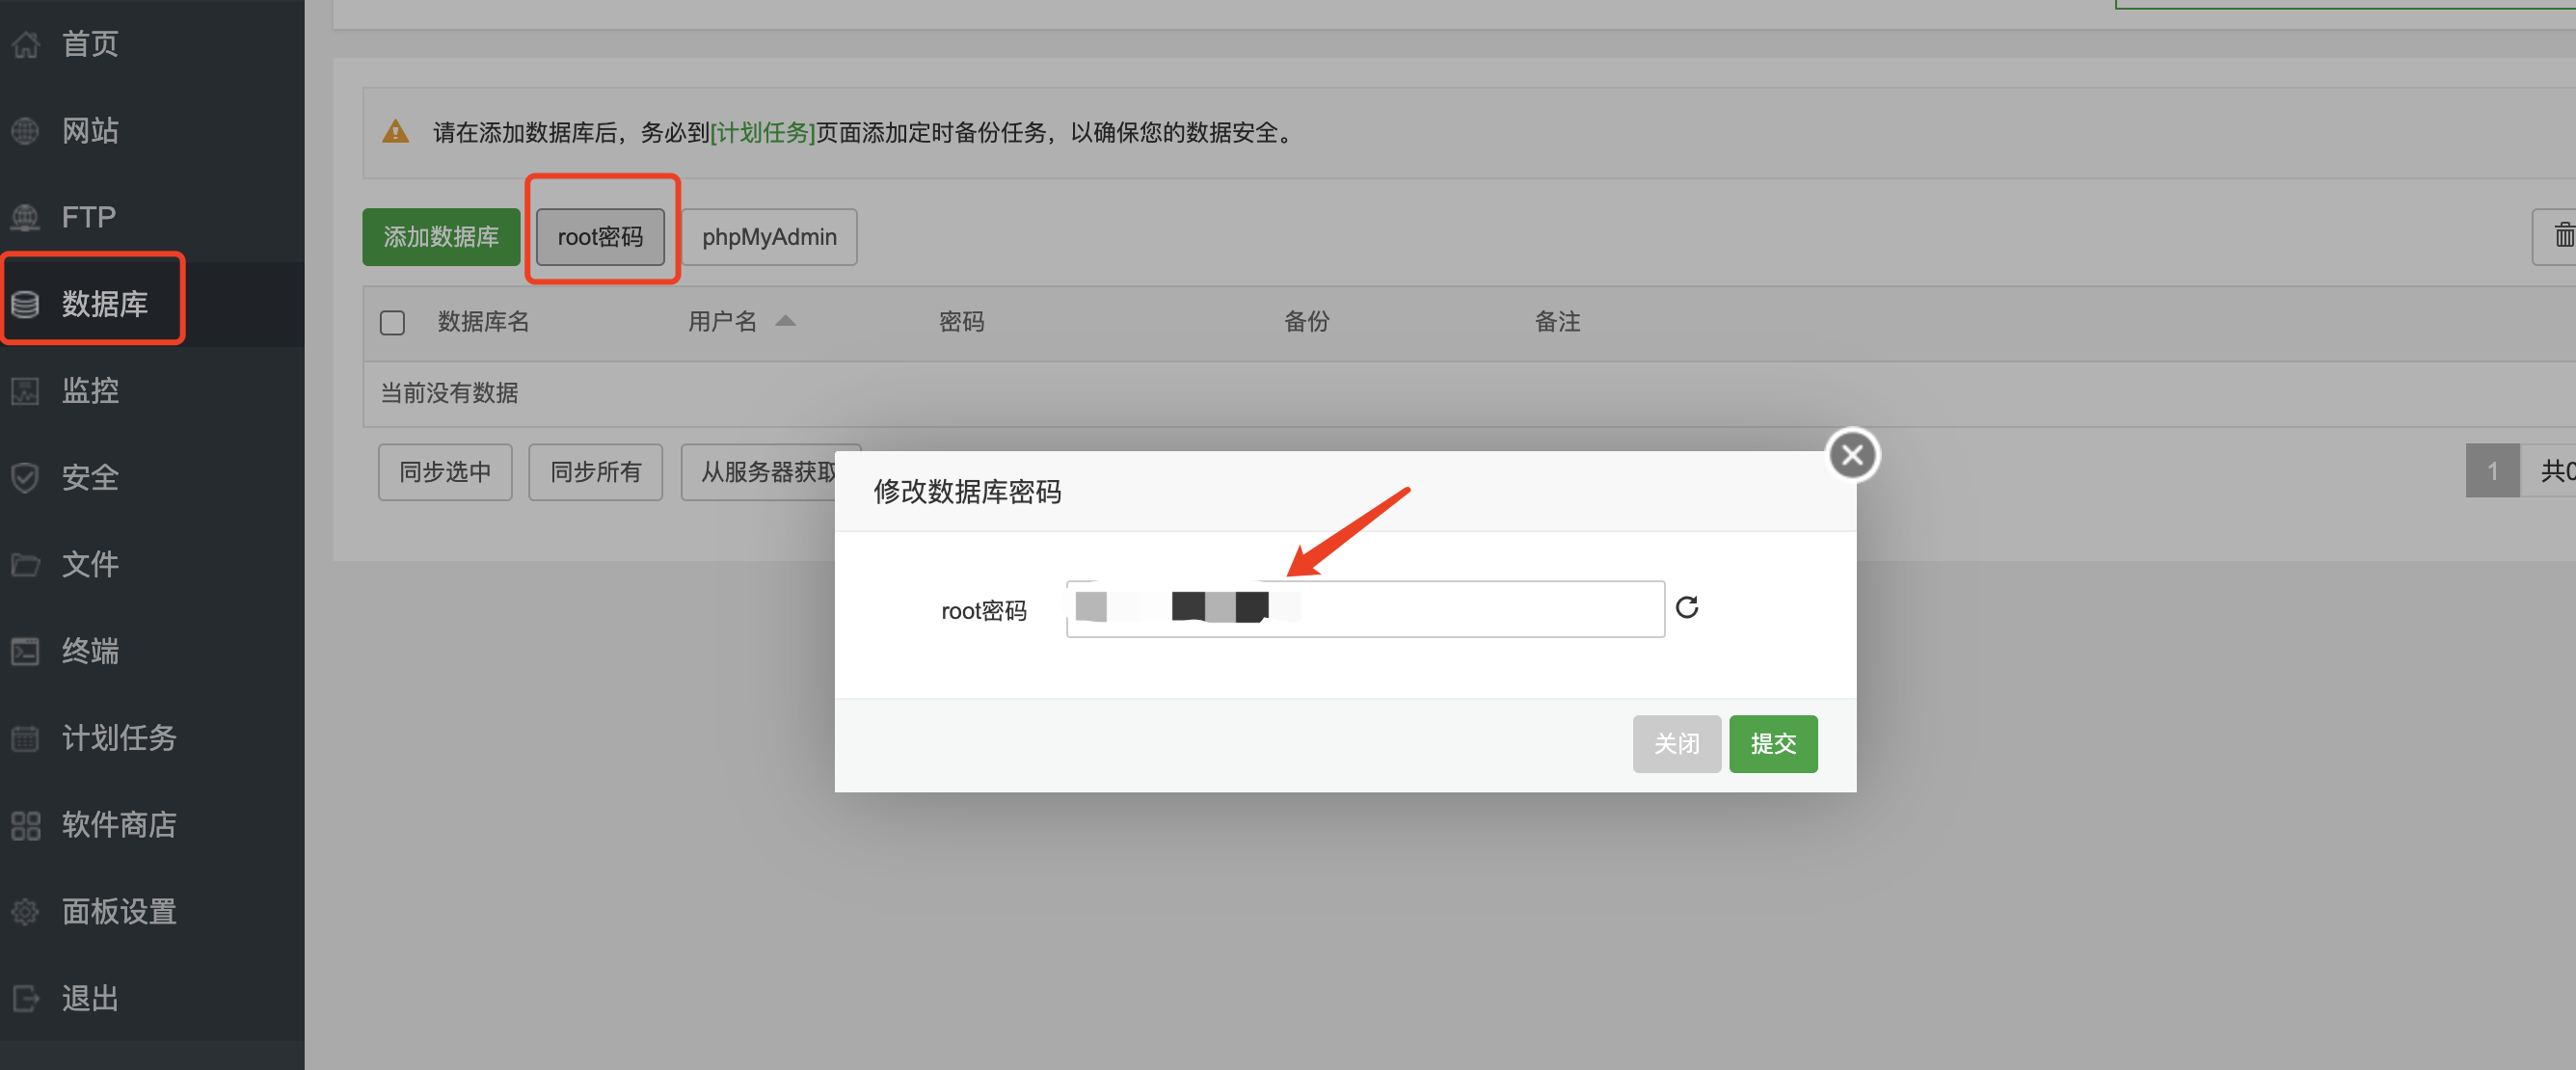
注:如果不知道宝塔面板mysql默认安装的密码,请查看
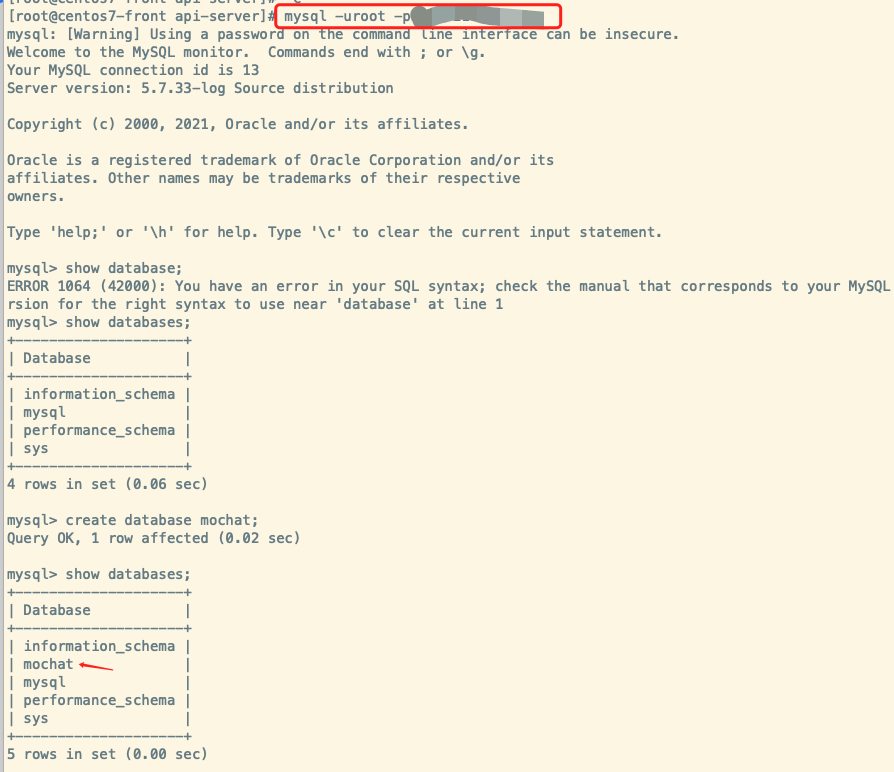
注:如果没有mochat数据库,请链接数据库创建mochat数据库
- 宝塔面板->软件商店->PHP-7.4->禁用函数->删除symlink,putenv,proc_open,pcntl系列函数
配置前端
- PC管理后台
这里修改的域名一定要写成后端api接口的域名,不要写错了。
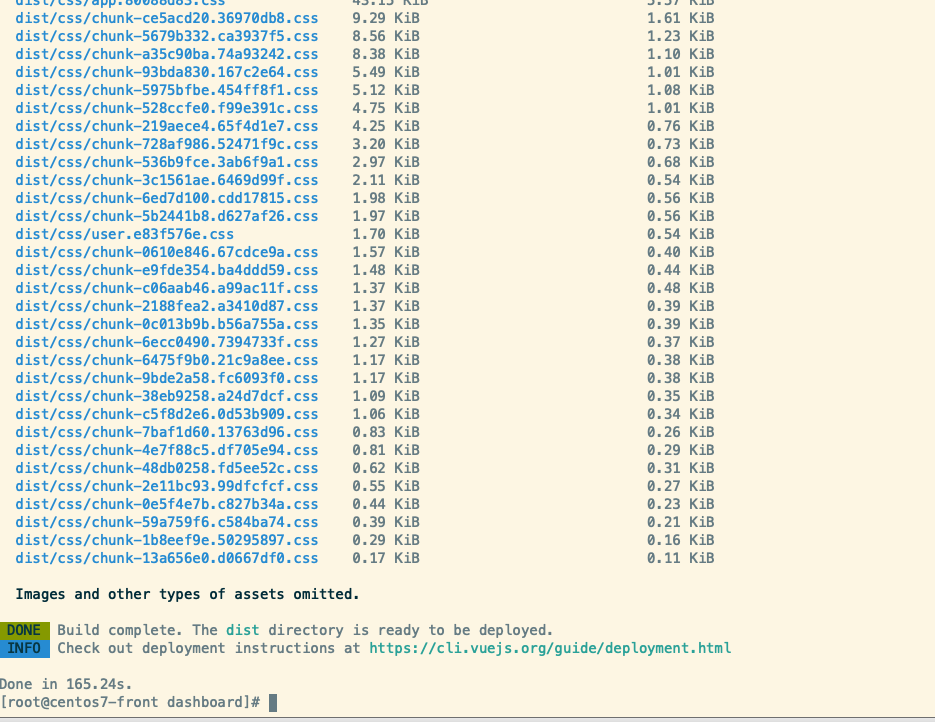
比如,http://api.mochat.com 或 http://backend.test# cd /www/wwwroot/mochat/dashboard # cp .env.example .env # 这里修改的域名一定要写成后端api接口的域名,不要写错了,比如,http://api.mochat.com 或 http://backend.test # vi .env #修改配置文件,不会vi可以用其他编辑器打开该文件 # yarn install # yarn run dll # yarn run build (2小时15分 # Screen -S dashboard)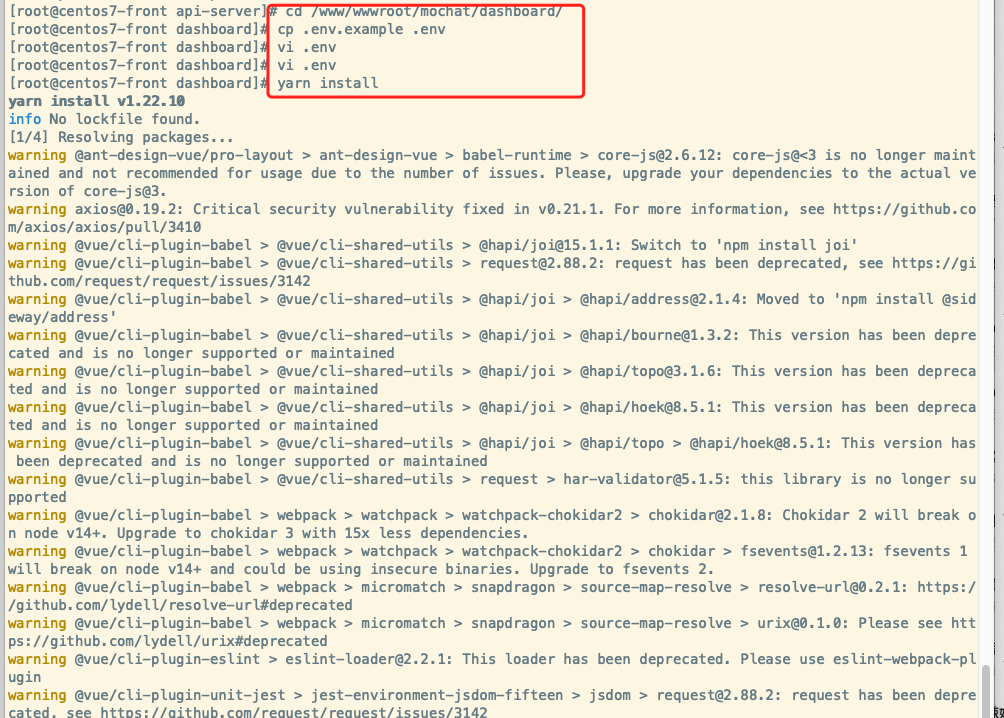
- 侧边栏
这里修改的域名一定要写成后端api接口的域名,不要写错了。
比如,http://api.mochat.com 或 http://backend.test# cd /www/wwwroot/mochat/sidebar # cp .env.example .env # 这里修改的域名一定要写成你自己的后端api接口的域名,不要写错了,比如,http://api.mochat.com 或 http://backend.test # vi .env #修改配置文件,不会vi可以用其他编辑器打开该文件 # yarn install # yarn run build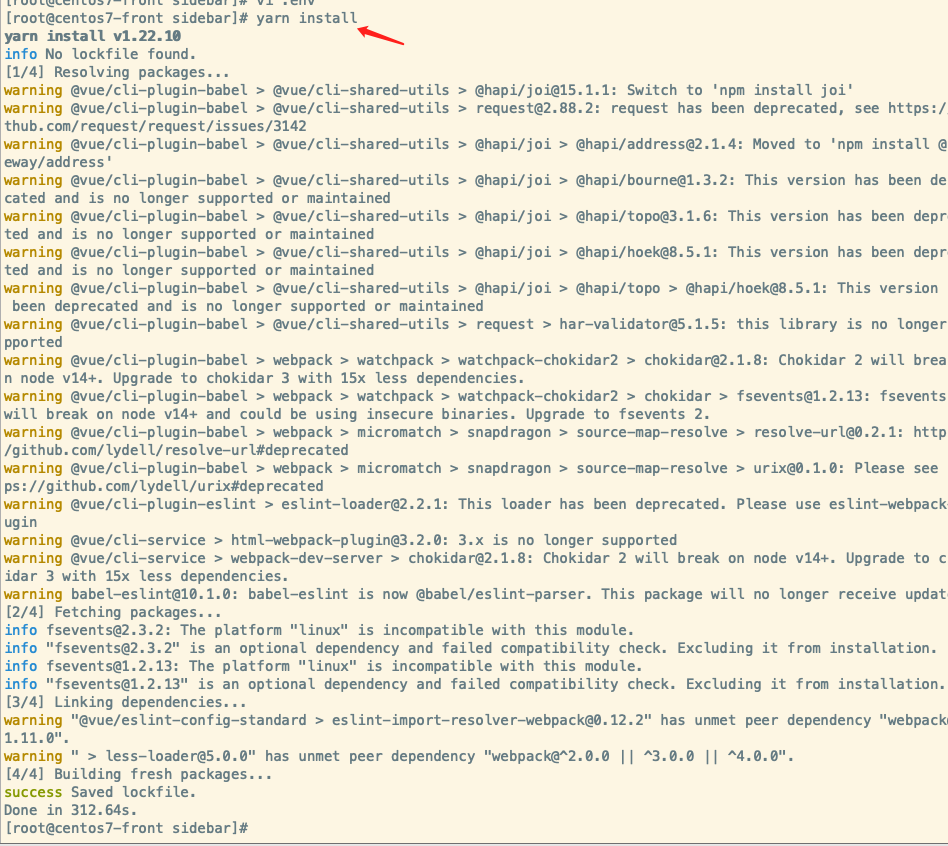
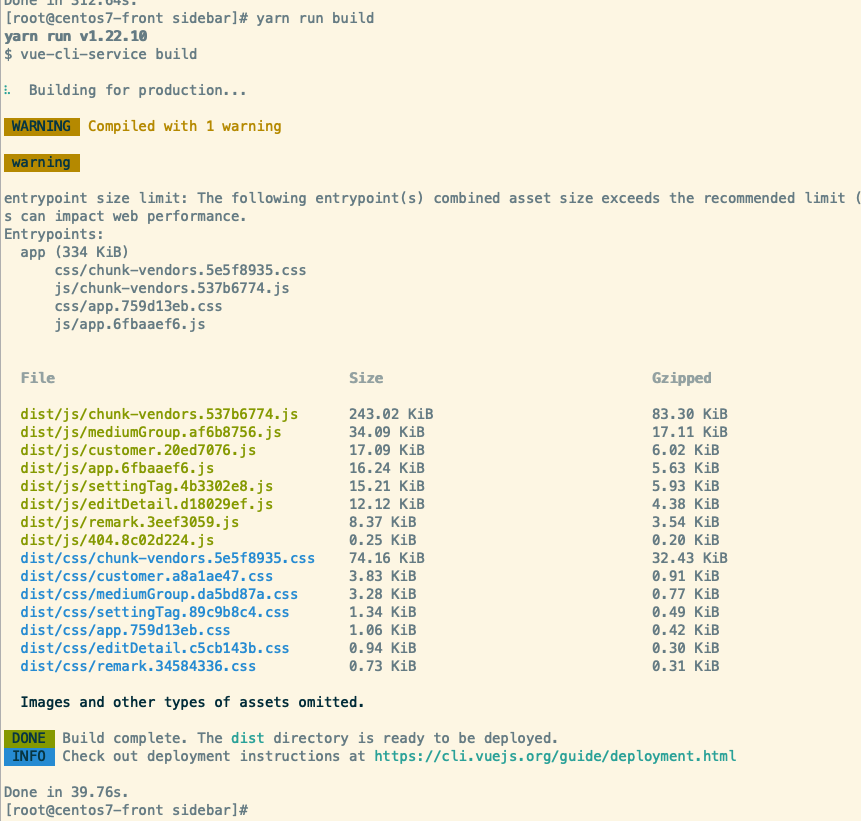
注:如果再次修改.env配置文件重新构建项目时报如下错误,执行以下代码

执行以下命令 # chattr -i /www/wwwroot/mochat/sidebar/dist/.user.ini 再进行删除 # rm -f /www/wwwroot/mochat/sidebar/dist/.user.ini 再次进入目录编译 # yarn run build- 运营工具
这里修改的域名一定要写成后端api接口的域名,不要写错了。
比如,http://api.mochat.com 或 http://backend.test# cd /www/wwwroot/mochat/operation # cp .env.example .env # 这里修改的域名一定要写成你自己的后端api接口的域名,不要写错了,比如,http://api.mochat.com 或 http://backend.test # vi .env #修改配置文件,不会vi可以用其他编辑器打开该文件 # yarn install # yarn run build注:如果再次修改.env配置文件重新构建项目时报如下错误,执行以下代码

执行以下命令
# chattr -i /www/wwwroot/mochat/operation/dist/.user.ini
再进行删除
# rm -f /www/wwwroot/mochat/operation/dist/.user.ini
再次进入目录编译
# yarn run build
宝塔面板配置站点
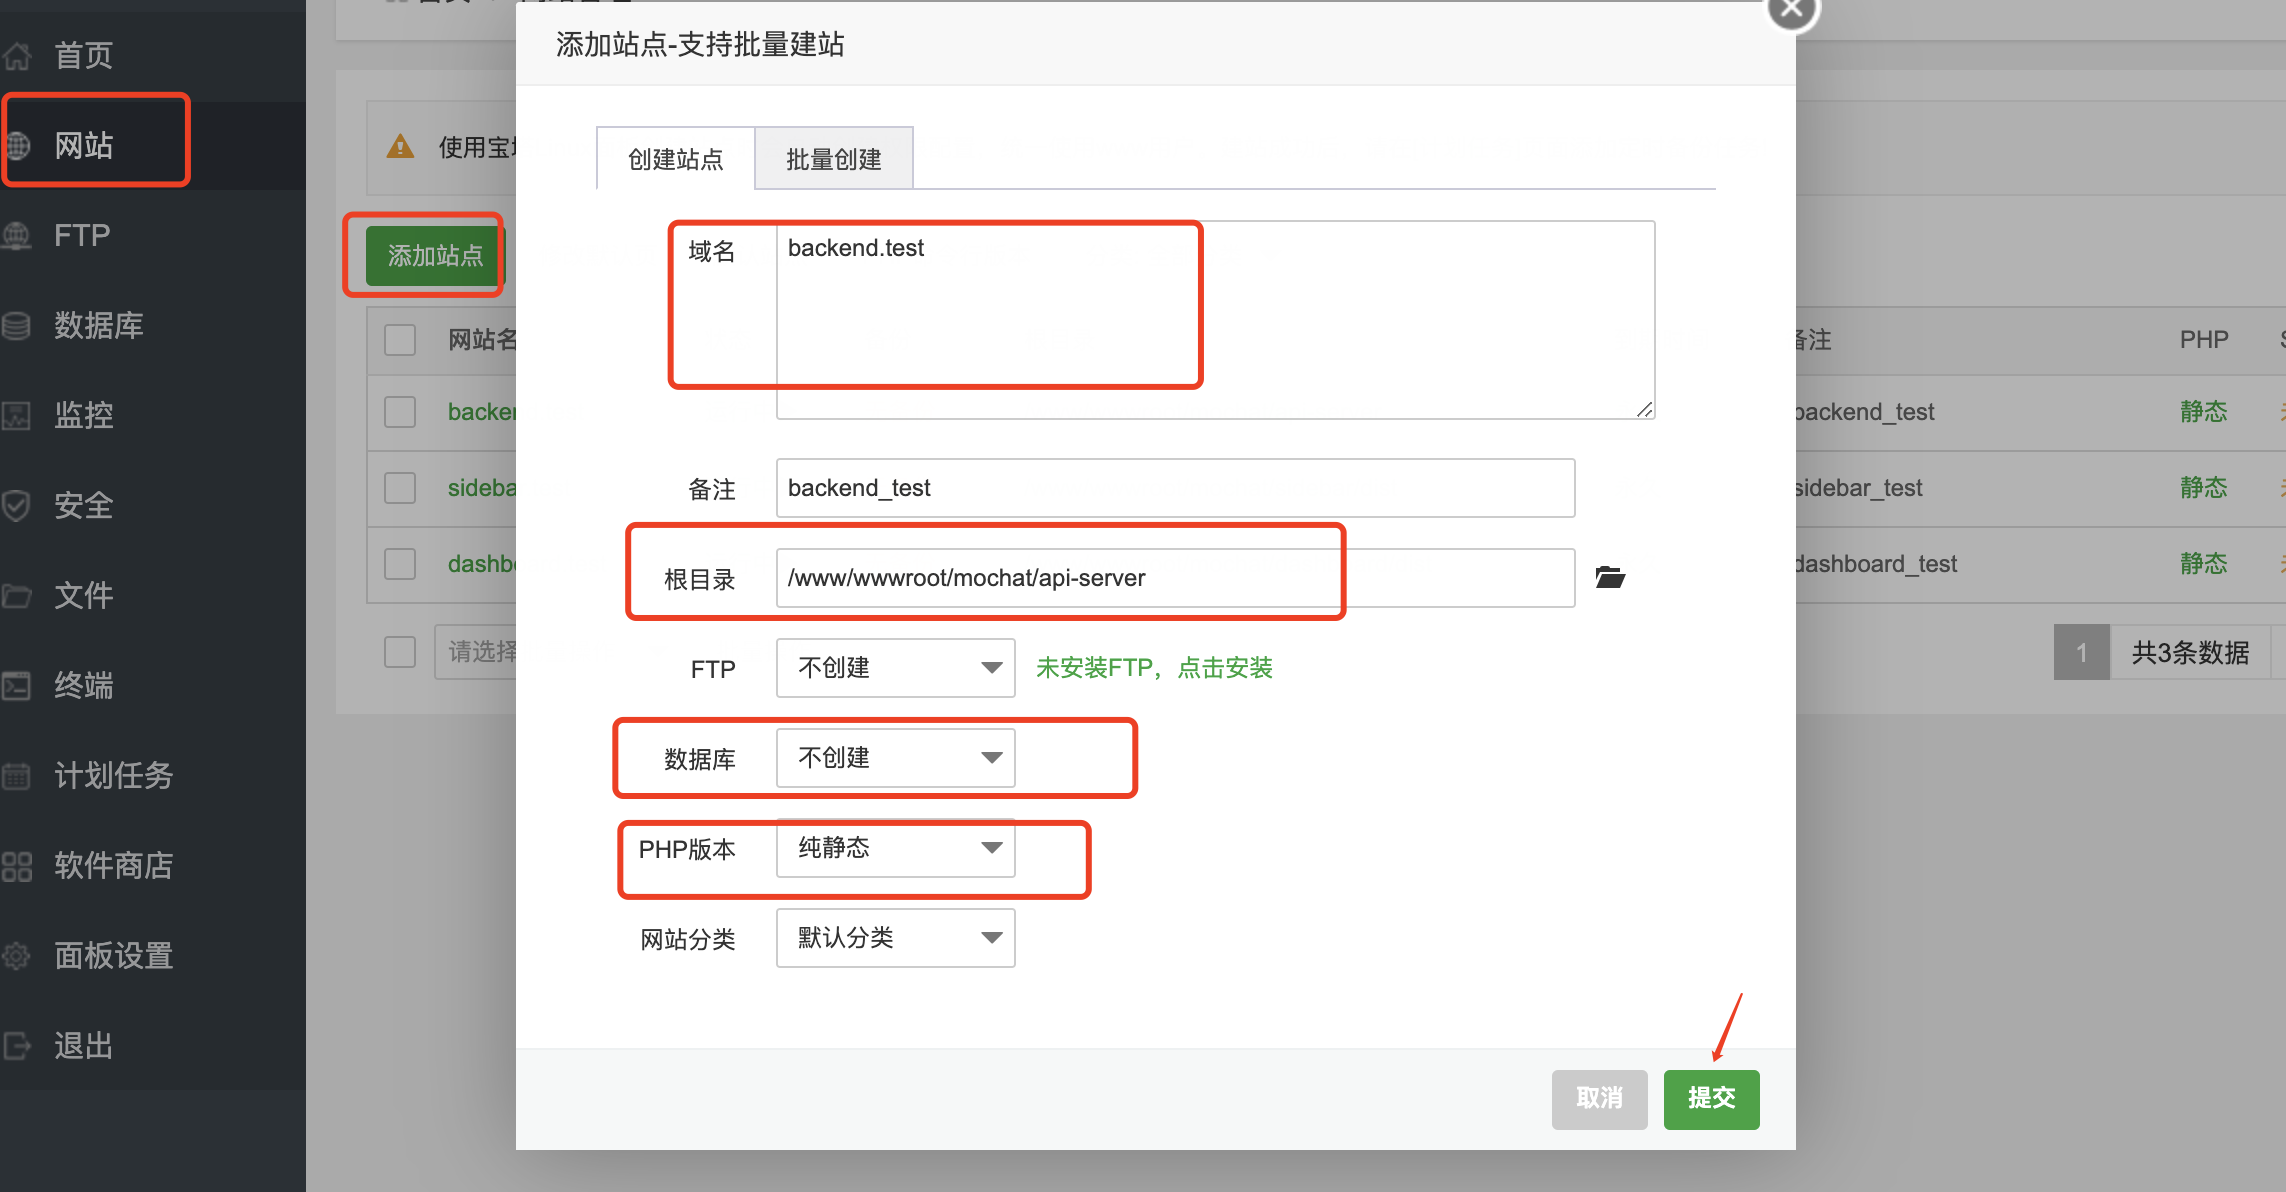
- 网站 ---添加站点 backend.test php版本 纯静态,数据库 不创建
反向代理 目标URL:http://127.0.0.1:9501 发送域名 $host 开启代理 如图:

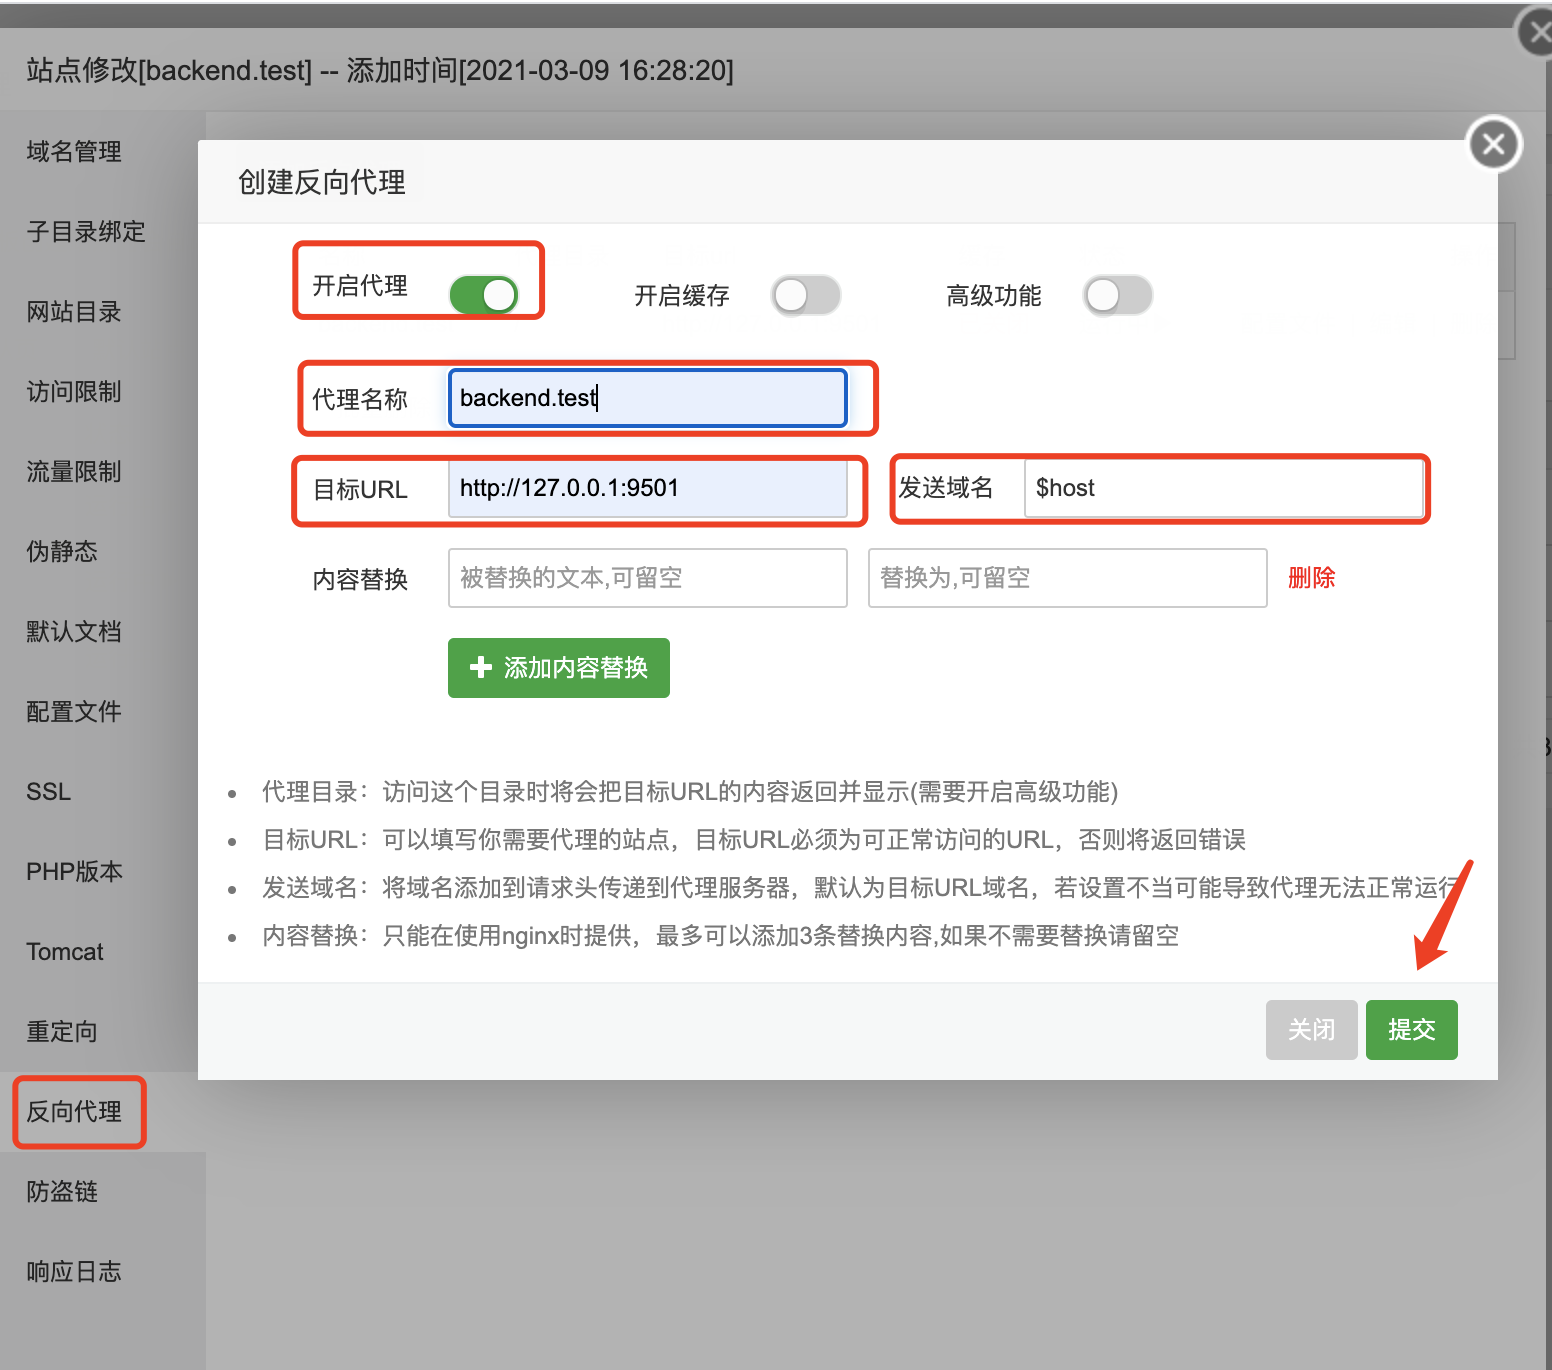
配置完代理,点配置文件,增加跨域设置如下:
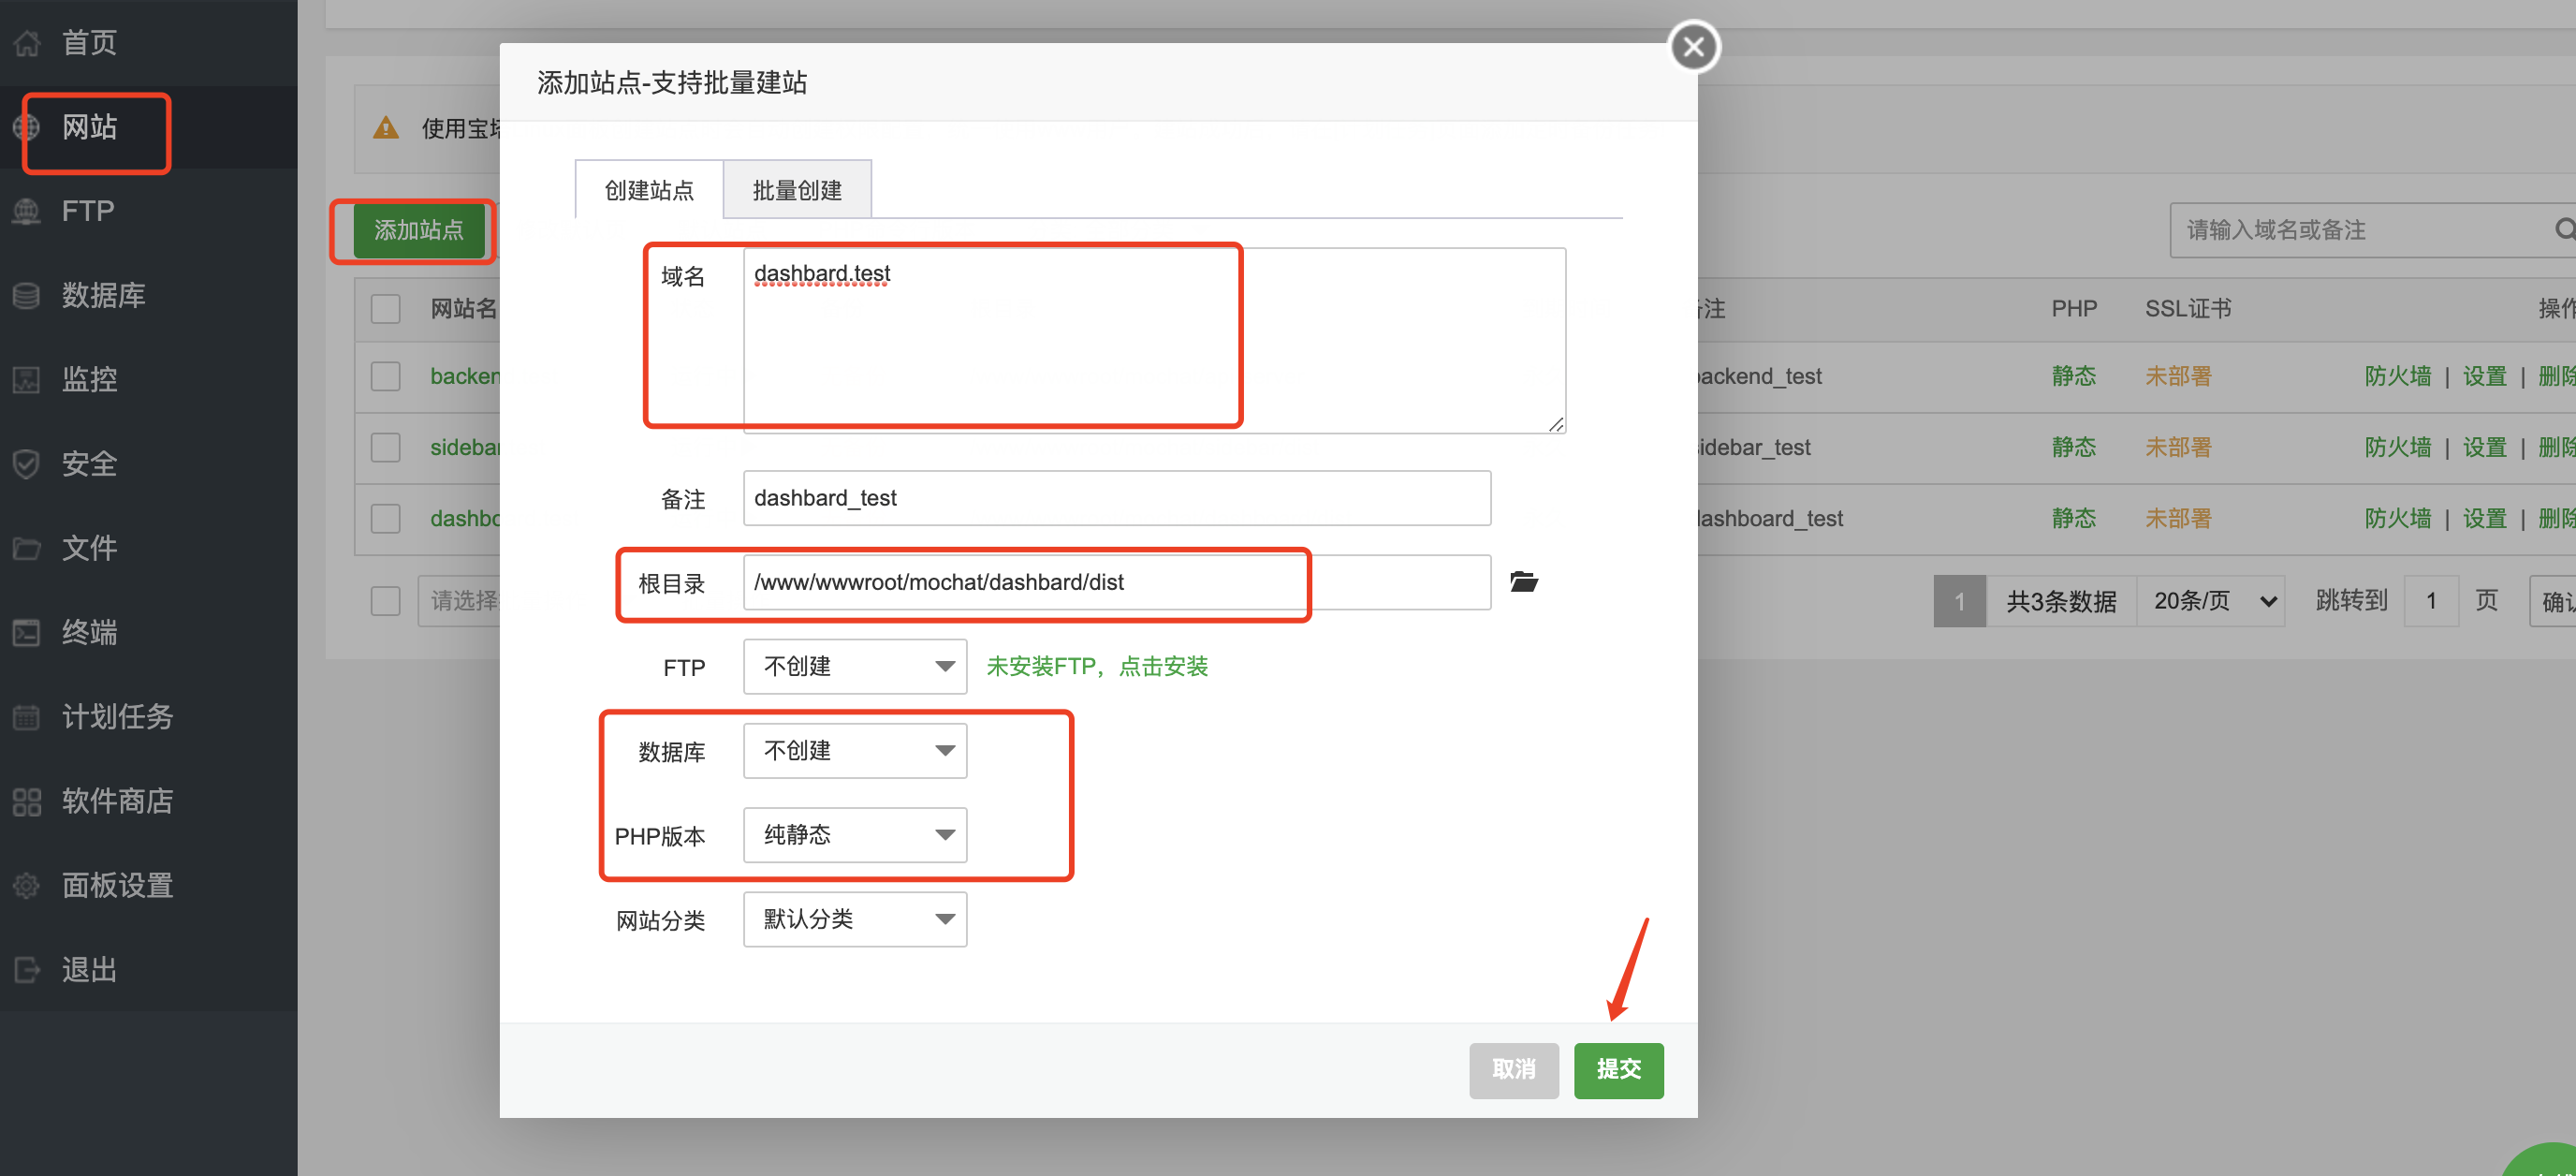
location ~* \.(gif|png|jpg|css|js|woff|woff2)$ { proxy_pass http://127.0.0.1:9501; proxy_set_header Host $host; proxy_set_header X-Real-IP $remote_addr; proxy_set_header X-Forwarded-For $proxy_add_x_forwarded_for; proxy_set_header REMOTE-HOST $remote_addr; # 设置跨域 add_header Access-Control-Allow-Origin *; add_header Access-Control-Allow-Methods 'GET, POST, PUT, DELETE, PATCH, OPTIONS'; add_header Access-Control-Allow-Headers 'Accept,Origin,Keep-Alive,User-Agent,X-Requested-With,If-Modified-Since,Cache-Control,Content-Type,Authorization'; expires 12h; }- 网站 ---添加站点 dashboard.test php版本 纯静态,数据库 不创建
网站目录 /www/wwwroot/mochat/dashboard/dist 如图:
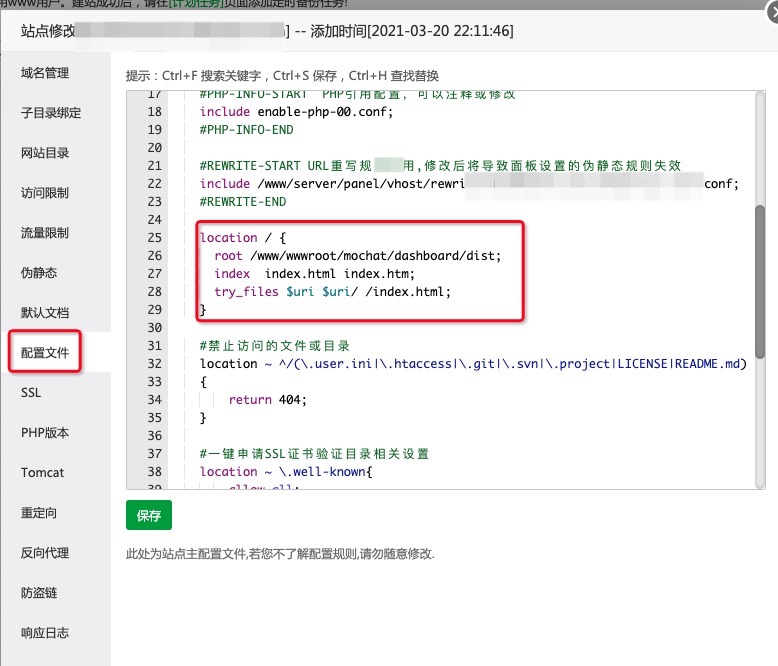
- 找到刚添加的网站,点右侧的设置,进入之后点配置文件,以如图所示的位置加上
location / {
      root /www/wwwroot/mochat/dashboard/dist;
      index  index.html index.htm;
      try_files $uri $uri/ /index.html;
    }

location /authRedirect {
        proxy_set_header Host $http_host;
        proxy_set_header X-Real-IP $remote_addr;
        proxy_set_header X-Forwarded-For $proxy_add_x_forwarded_for;
        # http时使用下面的配置
        proxy_cookie_path / "/; HttpOnly; SameSite=strict";
        # https时使用下面的配置
        # proxy_cookie_path / "/; secure; HttpOnly; SameSite=strict";

        proxy_pass http://127.0.0.1:9501/dashboard/officialAccount/authRedirect/;
    }
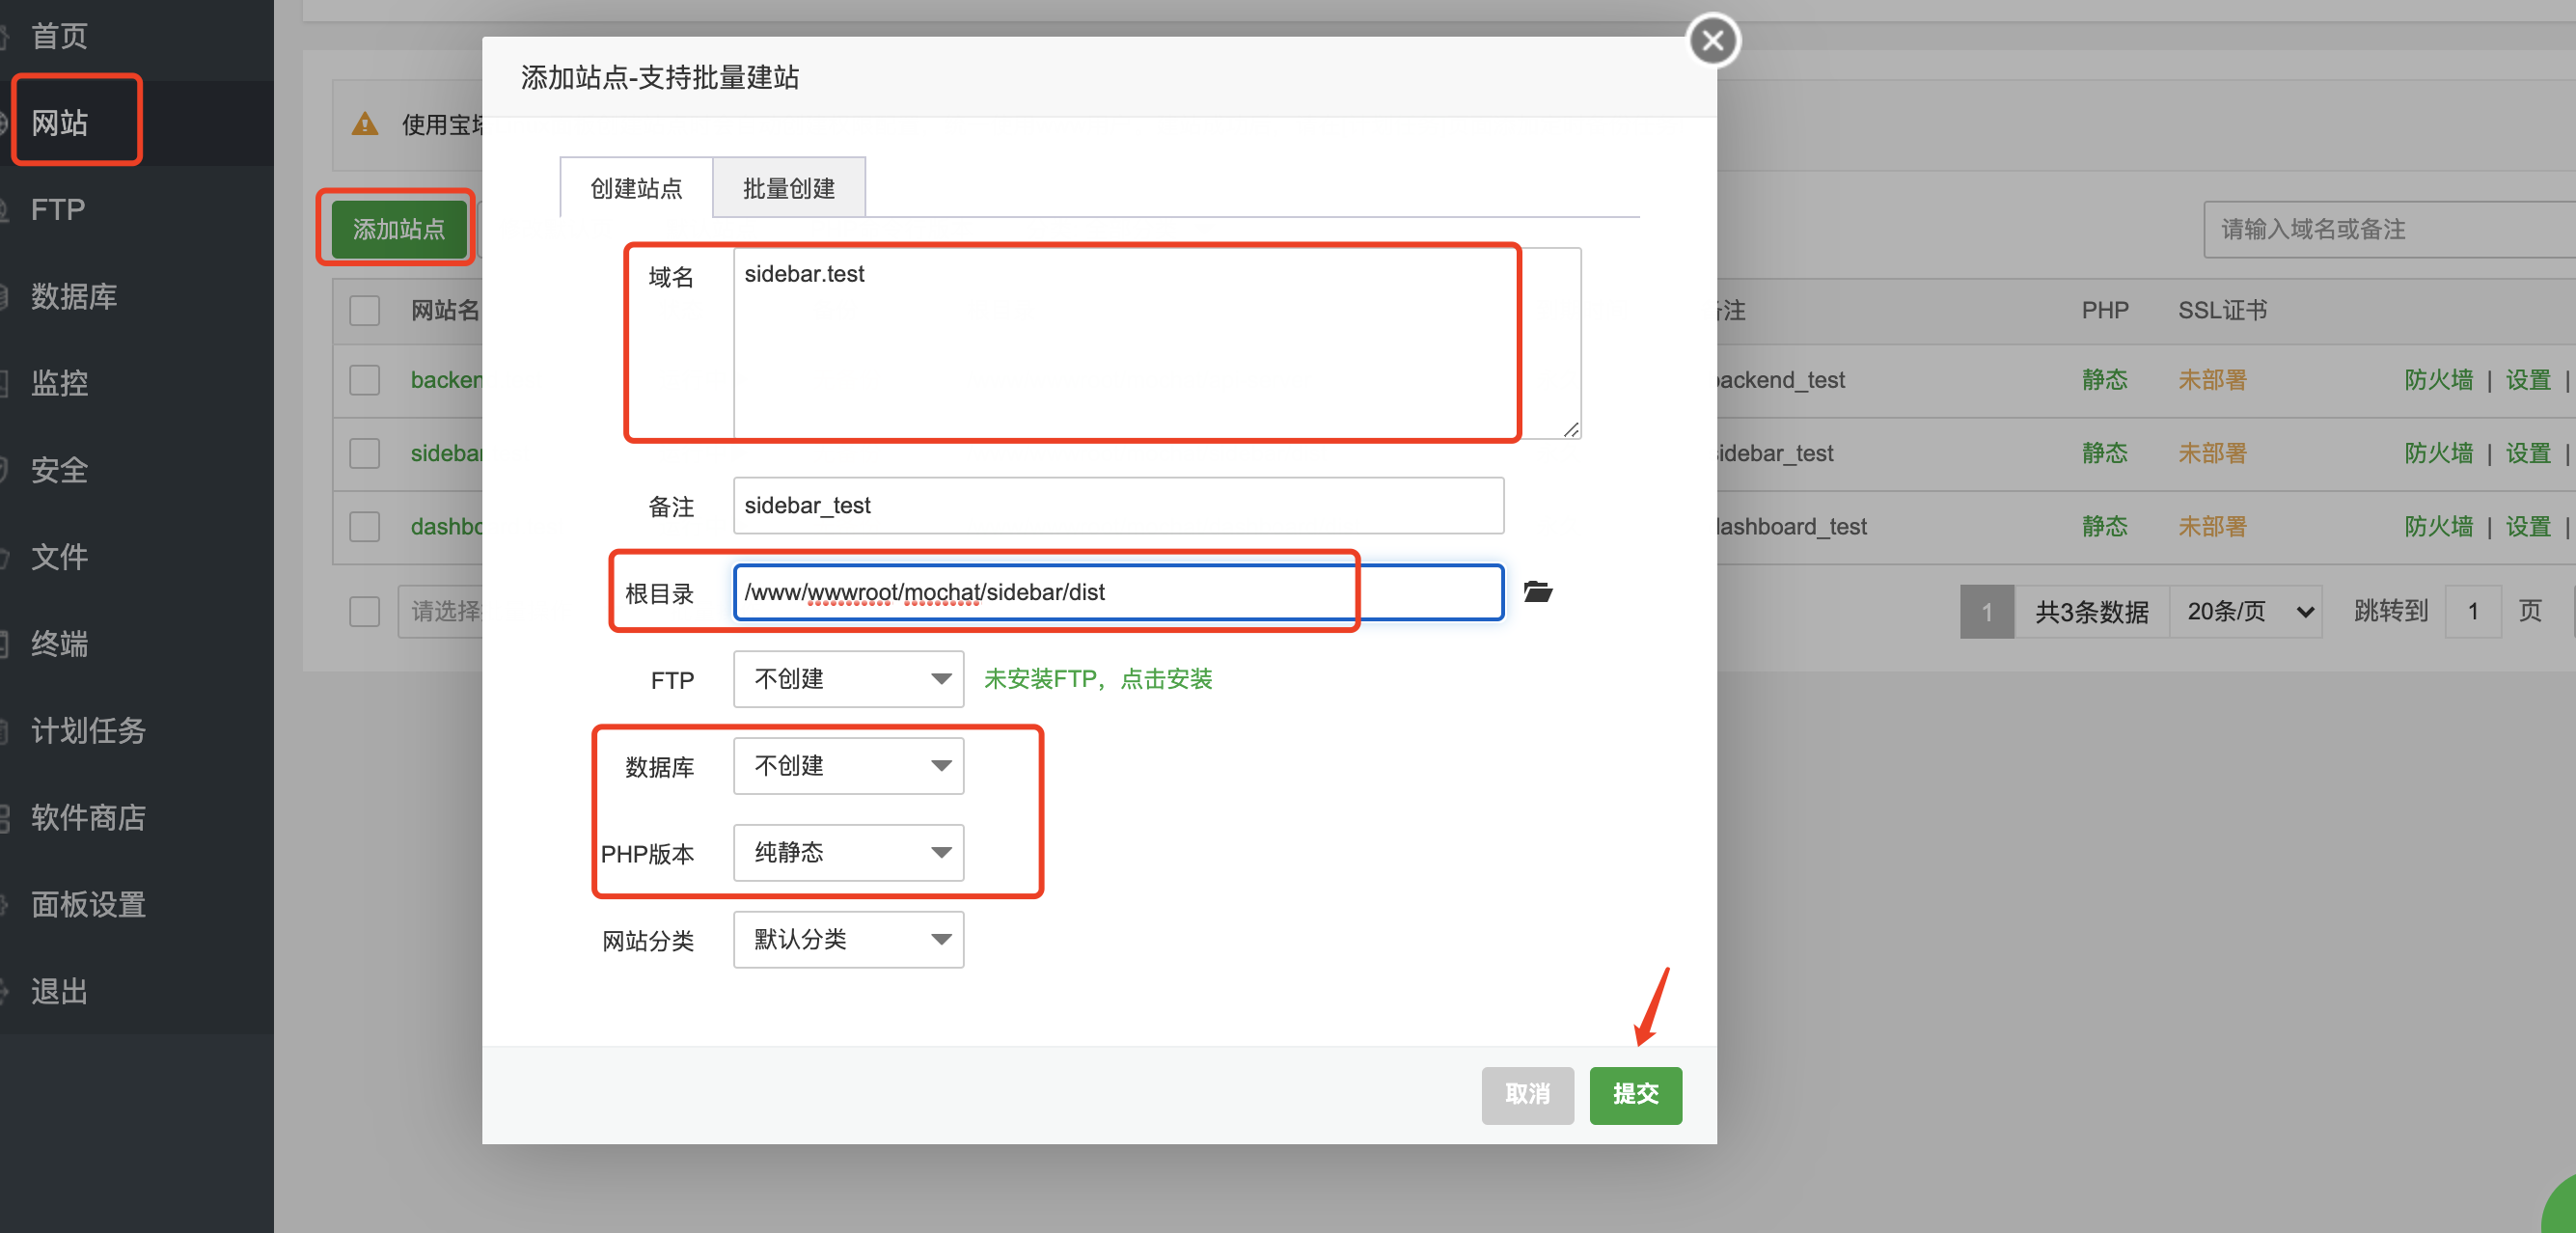
网站 ---添加站点 sidebar.test php版本 纯静态,数据库 不创建 网站目录/www/wwwroot/mochat/sidebar/dist 如图:
找到刚添加的网站,点右侧的设置,进入之后点配置文件,以如图所示的位置加上
location / {
      root /www/wwwroot/mochat/sidebar/dist;
      index  index.html index.htm;
      try_files $uri $uri/ /index.html;
    }

# 企业微信txt自动验证
location ^~ /WW_verify_ {
    proxy_pass http://127.0.0.1:9501;
}
网站 ---添加站点 operation.test php版本 纯静态,数据库 不创建 网站目录/www/wwwroot/mochat/operation/dist 如图:

找到刚添加的网站,点右侧的设置,进入之后点配置文件,以如图所示的位置加上
location / {
      root /www/wwwroot/mochat/operation/dist;
      index  index.html index.htm;
      try_files $uri $uri/ /index.html;
    }

location ^~ /auth/ {
            proxy_set_header Host $http_host;
            proxy_set_header X-Real-IP $remote_addr;
            proxy_set_header X-Forwarded-For $proxy_add_x_forwarded_for;
            # http时使用下面的配置
            proxy_cookie_path / "/; HttpOnly; SameSite=strict";
            # https时使用下面的配置
            # proxy_cookie_path / "/; secure; HttpOnly; SameSite=strict";

            proxy_pass http://127.0.0.1:9501/operation/auth/;
       }

   location ^~ /openUserInfo/ {
        proxy_set_header Host $http_host;
        proxy_set_header X-Real-IP $remote_addr;
        proxy_set_header X-Forwarded-For $proxy_add_x_forwarded_for;
        # http时使用下面的配置
        proxy_cookie_path / "/; HttpOnly; SameSite=strict";
        # https时使用下面的配置
        # proxy_cookie_path / "/; secure; HttpOnly; SameSite=strict";

        proxy_pass http://127.0.0.1:9501/operation/openUserInfo/;
   }
同理添加工作台和超管后台的前端代码
工作台配置:
    location / {
          root /www/wwwroot/mochat/workbench/dist;
          index  index.html index.htm;
          try_files $uri $uri/ /index.html;
        }

    # 企业微信txt自动验证
    location ^~ /WW_verify_ {
        proxy_pass http://127.0.0.1:9501;
    }
server { listen 80; server_name admin.mochat.com; access_log /var/log/nginx/admin.mochat.com.log main; error_log /var/log/nginx/admin.mochat.com.log.err error; fastcgi_intercept_errors off; rewrite_log off; location / { root /data/www/mochat/admin/dist; index index.html; try_files $uri $uri/ /index.html; } location /api/ { client_max_body_size 20m; proxy_set_header Host $http_host; proxy_set_header X-Real-IP $remote_addr; proxy_set_header X-Forwarded-For $proxy_add_x_forwarded_for; proxy_cookie_path / "/; secure; HttpOnly; SameSite=strict"; # 执行代理访问真实服务器 proxy_pass http://127.0.0.1:9501/; } location = /favicon.ico { log_not_found off; access_log off; } }超管后台配置
- 网站 ---添加站点 backend.test php版本 纯静态,数据库 不创建
反向代理 目标URL:http://127.0.0.1:9501 发送域名 $host 开启代理 如图:
访问
- 后端接口访问 backend.test

- 管理后台 dashboard.test 如图:
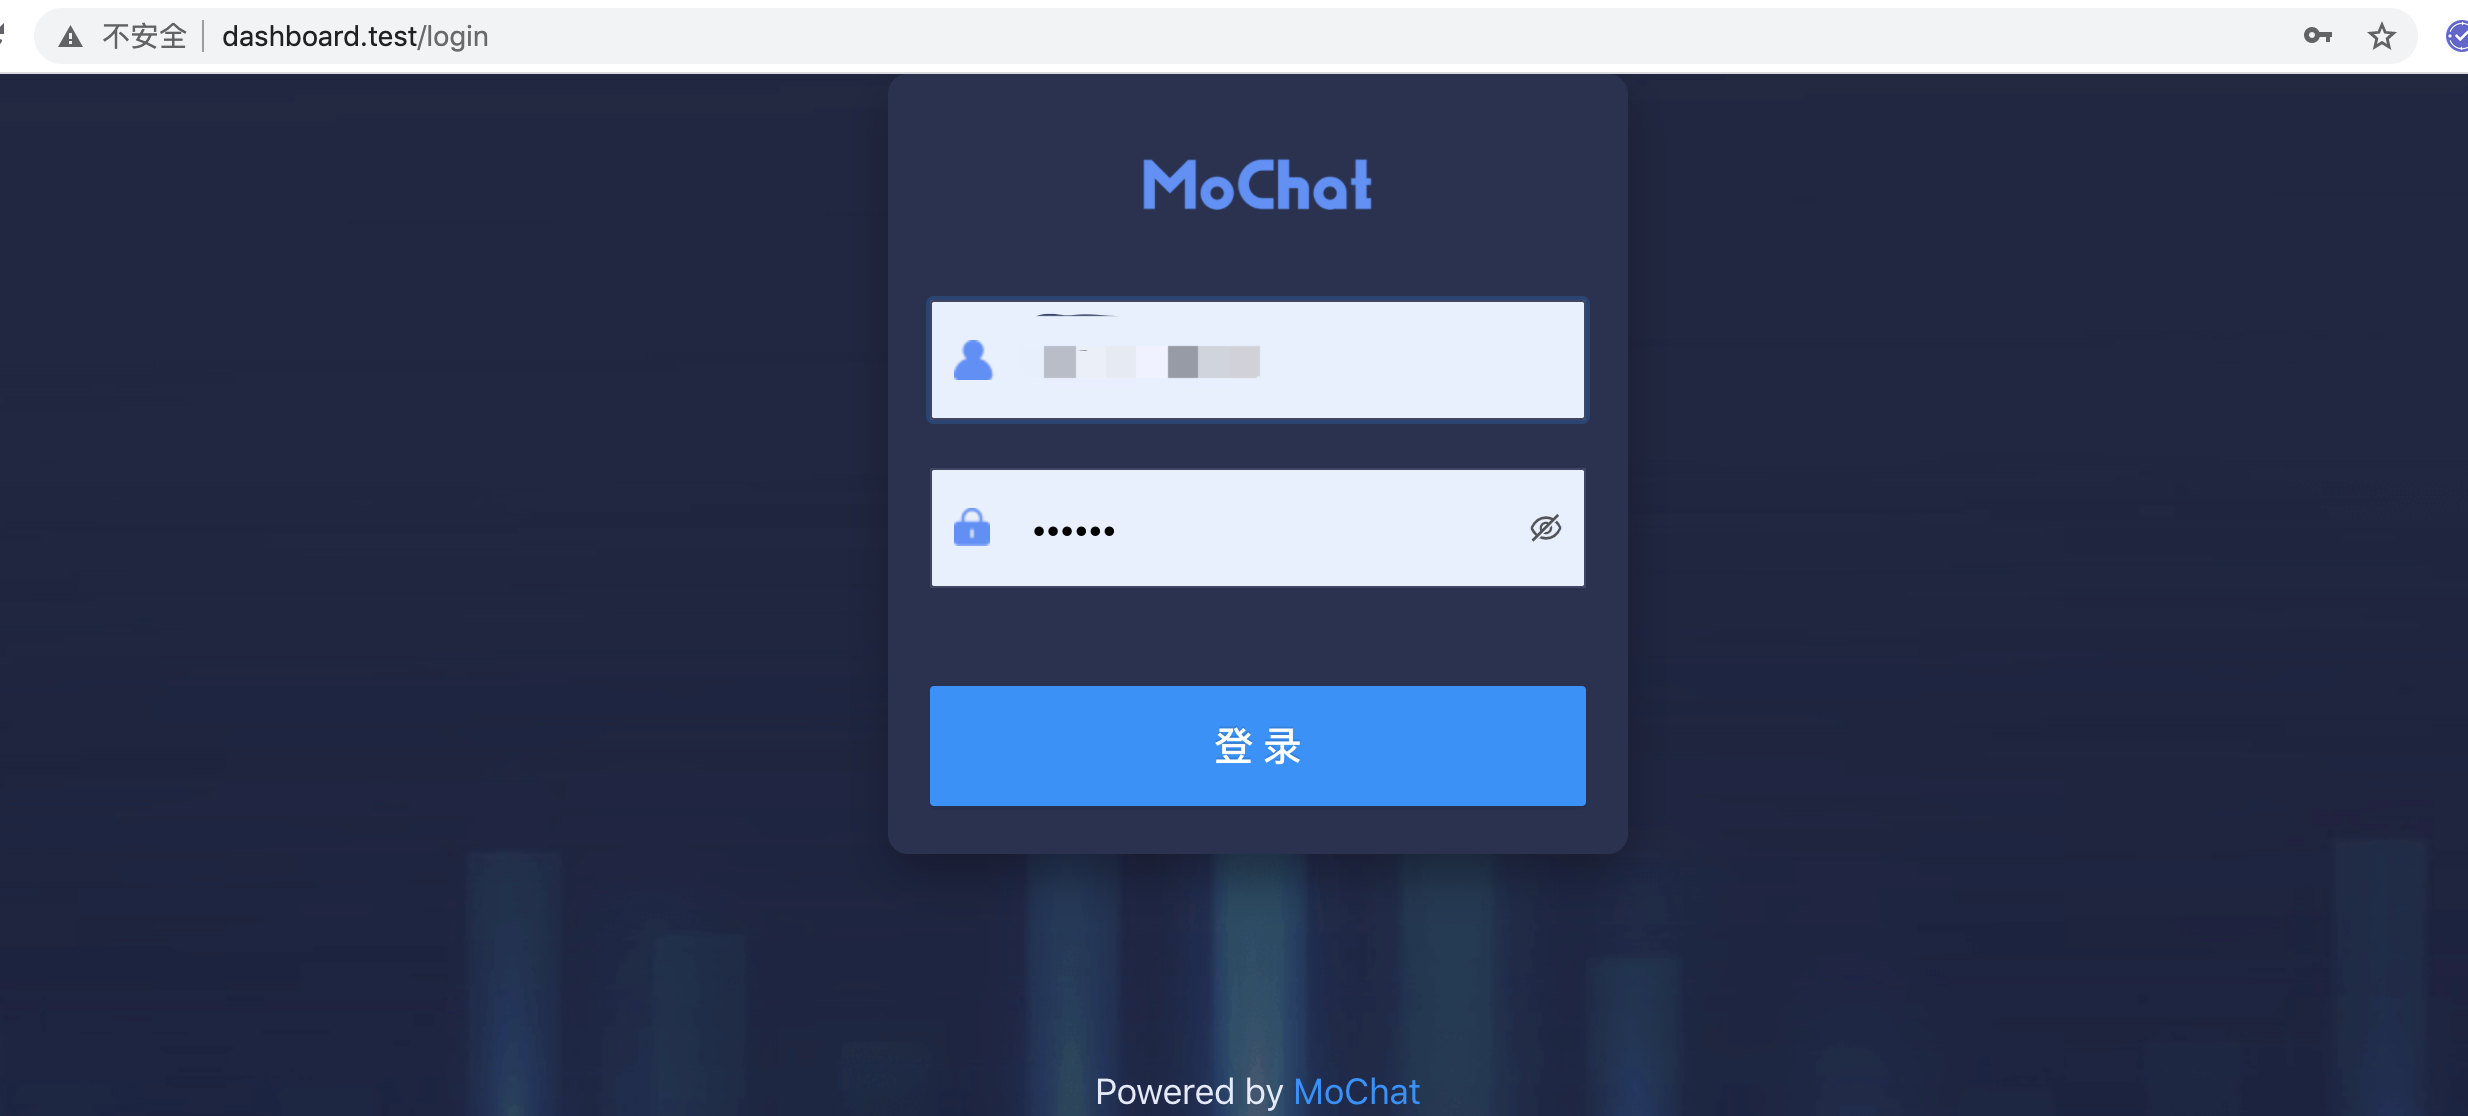
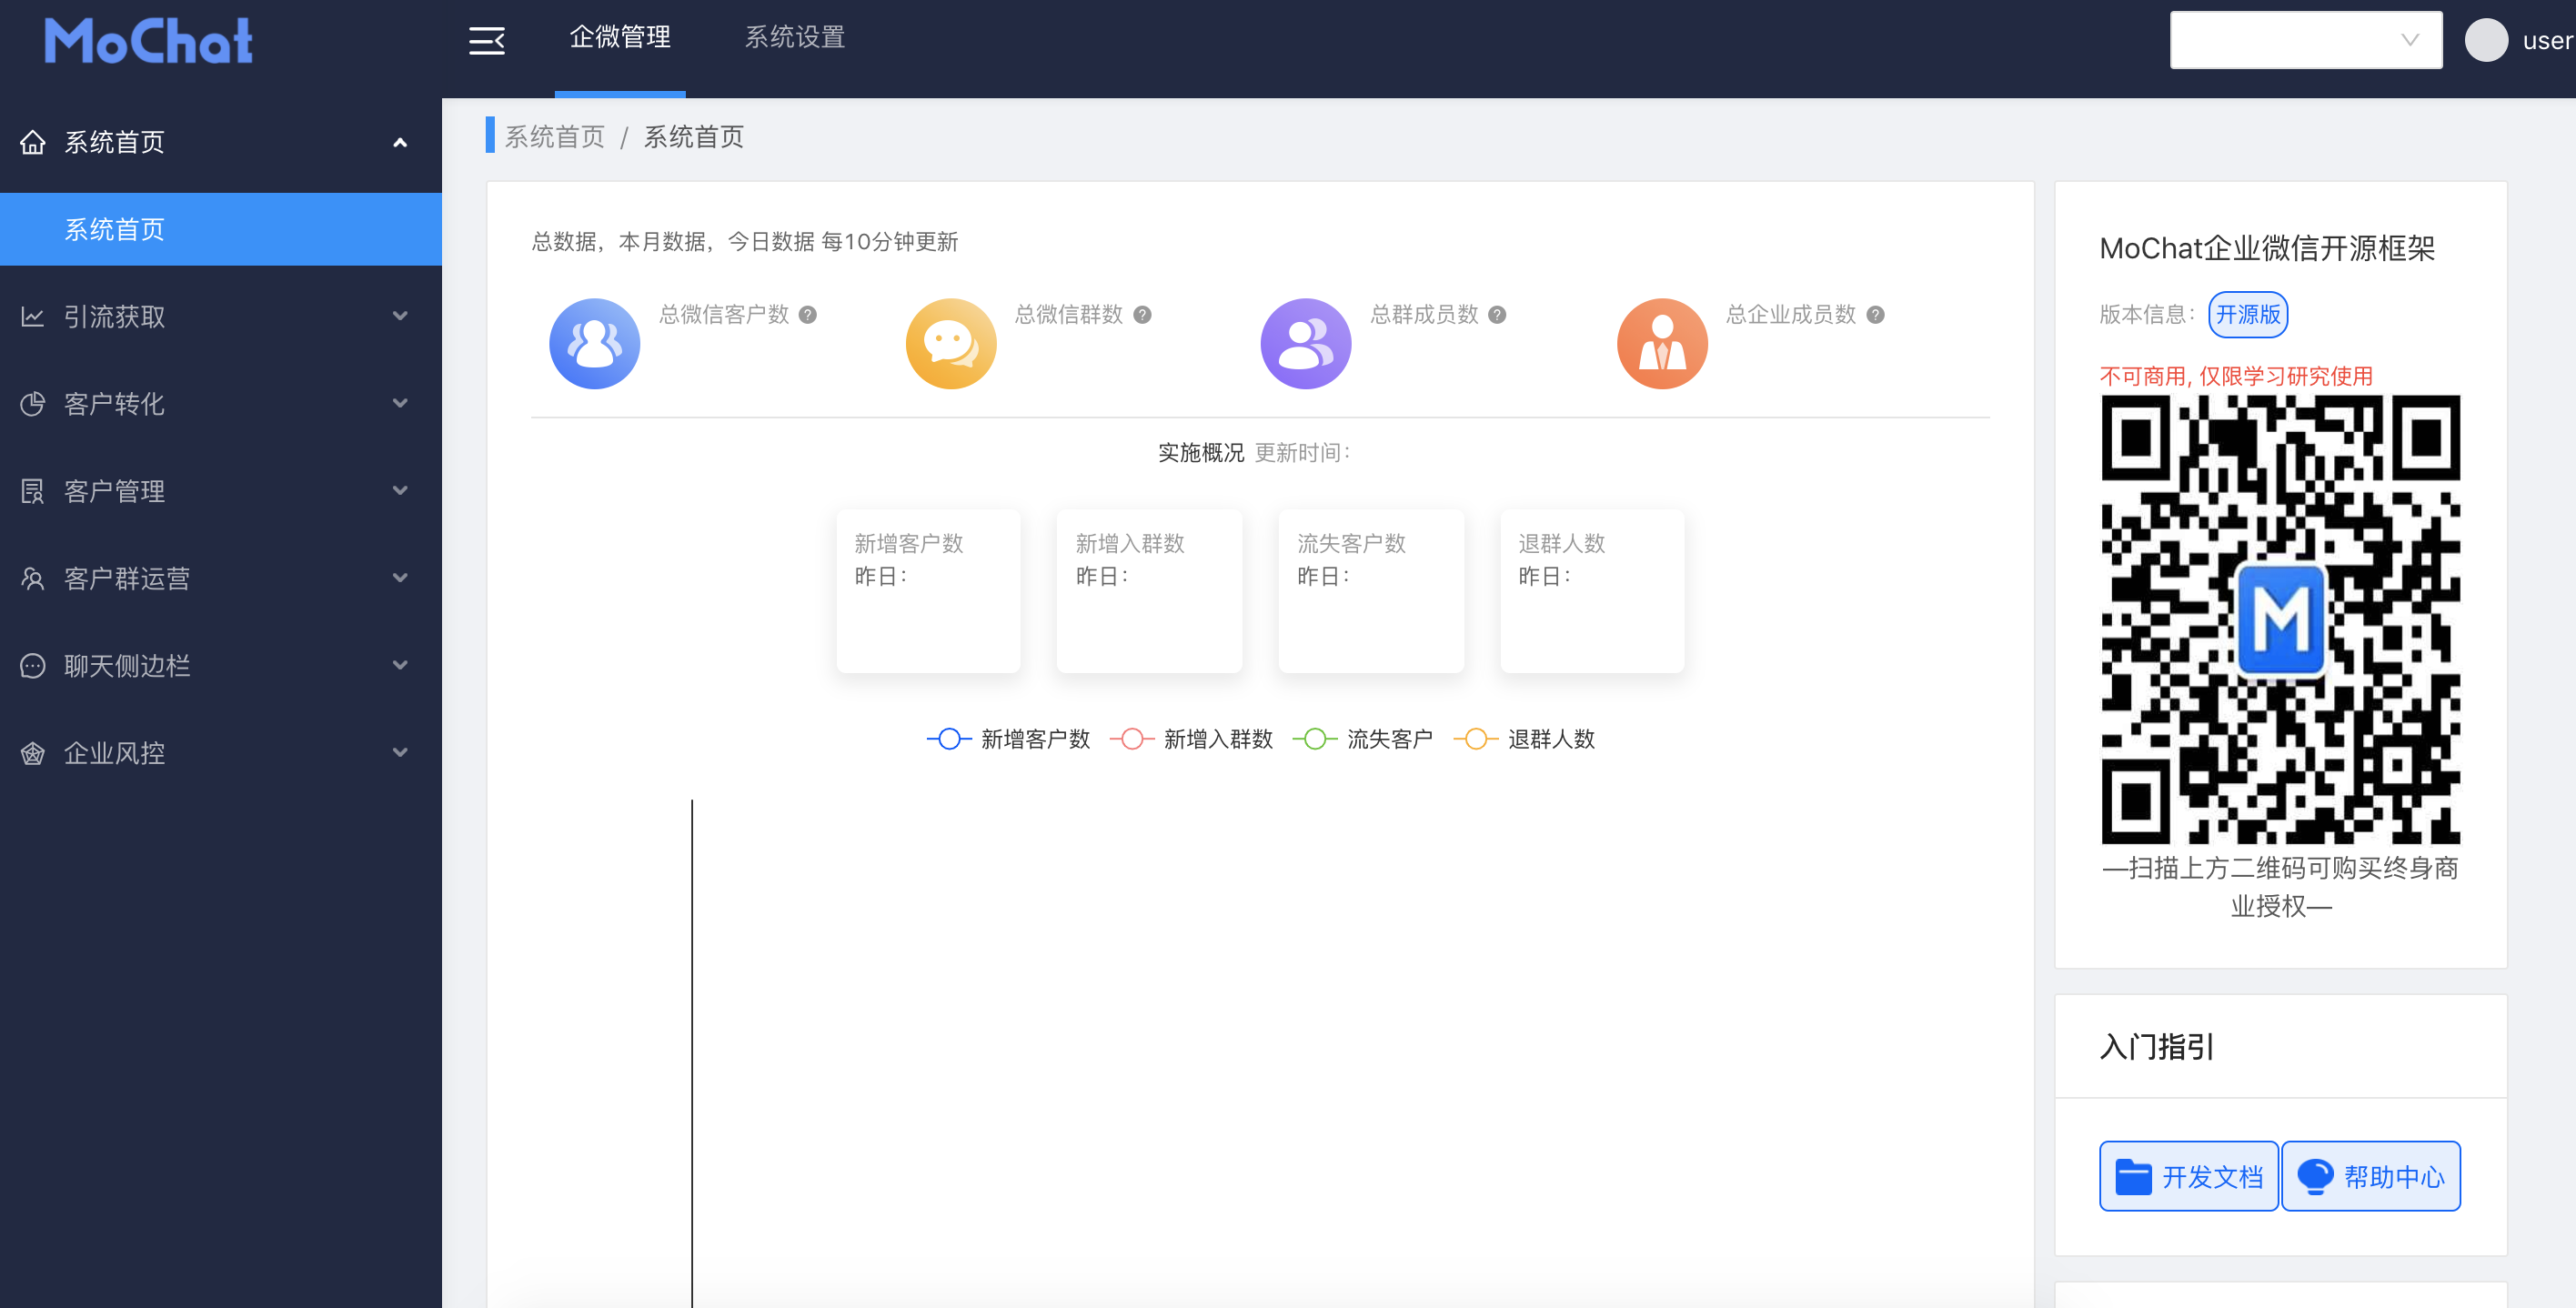
注意:如果后端接口访问成功,后端界面登录不成功报401的话,可能的原因是初始化管理员密码没成功,请登录mysql重置一下管理员密码
- 首先查看.env中的默认密钥后缀配置,生成一下密码:

php -r "var_dump(password_hash(md5('123456' . '3S6ybWbSy&23fFeq8'), PASSWORD_BCRYPT));"
- 登录mysql重新设置一下管理员登录密码:
# mysql -u用户名 -p密码
# mysql> use mochat
# mysql> update mc_user set password="密码";
# mysql> select * from mc_user \G;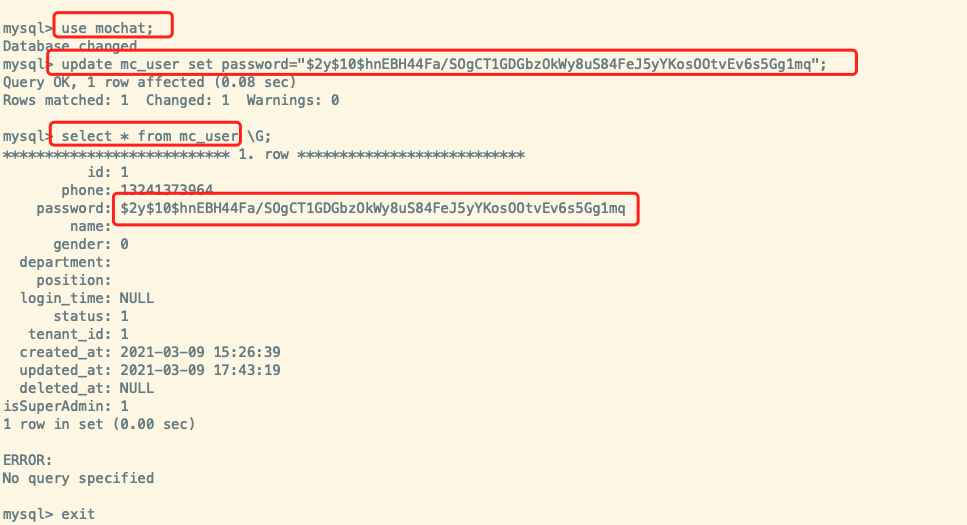
浏览器再次打开dashboard.test,输入用户名密码登录
- 如何授权绑定企业微信至MoChat系统 请查看:https://mochat.wiki/wework/how-to-authorize.html (opens new window)
侧边栏 sidebar.test
- 后端接口访问 backend.test
# 常见问题
- nginx设置反向代理后,返回 502 bad gateway?
请检查后端 api-server 启动成功没有,命令如下:
ps aux | grep mochat
看看有没有对应的进程,如果没有,刚需执行如下命令启动
cd /www/wwwroot/mochat/api-server
php bin/hyperf.php server:start -d
为了服务稳定,建议使用更专业的进程管理工具来启动,详见:Supervisor 部署 (opens new window)